
After purchasing velocidrone you will be directed to the ‘my licenses’ page of our website.
This area of the website is accessible to you for the lifetime of the product and you can come here to download the program as many times as you wish. There are no limits on download from this section of the site.
VelociDrone requires a usb joystick type controller in order to be able to fly the quads in the simulator. This could be a gamepad controller or a full radio control transmitter that you use to fly real quads. The key is that whatever device you connect must present itself as a USB joystick to the operating system as this is what velocidrone looks for and connects to for quad control. Some radio control transmitters can do this natively and others like Spektrum / Futaba will require a third party piece of hardware or ‘dongle’ to do the work for them.
If you connect your controller and VelociDrone cannot see it it is important to understand that this is not a simulator problem - this is an operating system / controller problem and needs to be resolved at that level. If you connect a usb joystick device correctly VelociDrone will ALWAYS see it. If you don’t see your controller in the program then something has gone wrong with how you connected it with the operating system. Refer to your controllers instructions to understand why.
Also check the controllers section later in this document as there are some pitfalls with certain controllers and operating systems which require remedial action to get a functional controller.
Velocidrone is not a Windows installed program - it does not have a Windows installer like a lot of commercial software. Similarly on Mac/Linux it is not installed with the App store or into Applications folders.
Instead you download a zip file, unzip it to a location of your choice and run the launcher to download the main files. Always start Velocidrone using the launcher in order to remain up to date with the latest content and bug fixes.
It is up to you where you install it but there are places we don’t suggest you put it. On Windows do not drag it to the program files directory as this is write restricted and will cause problems. On OSX do not run it directly from the downloads folder as this will usually cause a quarantine. VelociDrone always installs (on windows and linux) to the folder that you put the launcher in, it will not ask you for an install location it will just install the files to whatever folder you unpacked the launcher files to from the downloaded zip archive.
If you move either .exe or the .app file to another folder on it’s own without the associated files it will break the functionality of the program, all the files need to be kept together.
When unzipping please use standard tools to do so, we are aware of issues with third party zip packages not unzipping the archive correctly and causing problems.
We have an install video on our youtube which covers install for all operating systems.
For OSX there are a couple of other things to be aware of in the installation process.
Once you have unarchived the launcher (preferably to your desktop) you will need to open it.
Due to OSX security you will probably not be able to double click it as it will display a security message such as unknown developer for example.
Instead right click the launcher and select “open” from the context menu. This will open a dialog within which the only option you can take is to cancel. Now right click the launcher again and select “open” from the context menu. This time you will get different options, select that you wish to open the launcher and it will do so.
The launcher will now install the sim, after install you can click “play” on the launcher to run it.
When you do this OSX verification will run on VelociDrone. Due to the main simulator being exceptionally large (over 30gb), verification on slower machines, particularly those with mechanical drives, may take a long time. You will see the icon bouncing in the task bar, it will then go solid in the task bar and then eventually the simulator will launch. Even if OSX says VelociDrone is not responding - ignore it - this is not the case and it will open eventually.
Sadly we cannot circumvent OSX verification, it will only do it once but it takes a while and is necessary before OSX will let you run it normally. Lastly, always ensure you run from the launcher to make sure you stay up-to-date. Do not make shortcuts to the velocidrone app and run it that way as you will for sure miss crucial updates to keep your sim functional with our multiplayer system.
For Linux some linux systems may remove the execution flag on the launcher - you can edit the launcher and tick the execution flag permission to turn this back on.
Lastly if you have problems with Linux there are several known issues that can be circumvented by checking our knowledge baseon our website.
Once velocidrone is installed and run you will be presented with the main menu …
Before you can use VelociDrone you must create an account and purchase a license from our website at velocidrone.com.
To create your account visit the website and click the Login button at the top right of the website. This will prompt you to enter your details as follows:
Name - your full name
Email - a valid email address, you will be sent a confirmation email to validate your account
Password - a memorable password for logging into your account, must be greater than 6 characters.
Confirm Password - must match what you typed in password
Player Name - used to identify you in multiplayer sessions and on our leaderboard
Birth Year - Not currently used
After registering you will receive a confirmation email containinga link that you must click to activate your account before going any further.
Once your account is activated you may purchase VelociDrone. To purchase the license, click the add to cart button. At purchase you may notice there are other premium content packages and if you would like any of these items they can be purchased at the same time as the license or you can come back later and add them. Do not buy premium content packs on their own - they all need a full velocidrone license in order to function.
Please be patient as there can occasionally be a delay of up to a couple of hours in the license getting activated. The majority of the time this is immediate, however, PayPal may take a little while getting back to us after purchase.
Once you have a license you can start VelociDrone and enter in your registration details when prompted.
If you purchase premium content while running Velocidrone then you must restart the program in order to access it. Additional models that are part of a premium content pack can be found in the “Add quad” section of the model selection screen which is discussed later in the manual.
Main Menu
The main menu presents you with the main areas of the simulator.
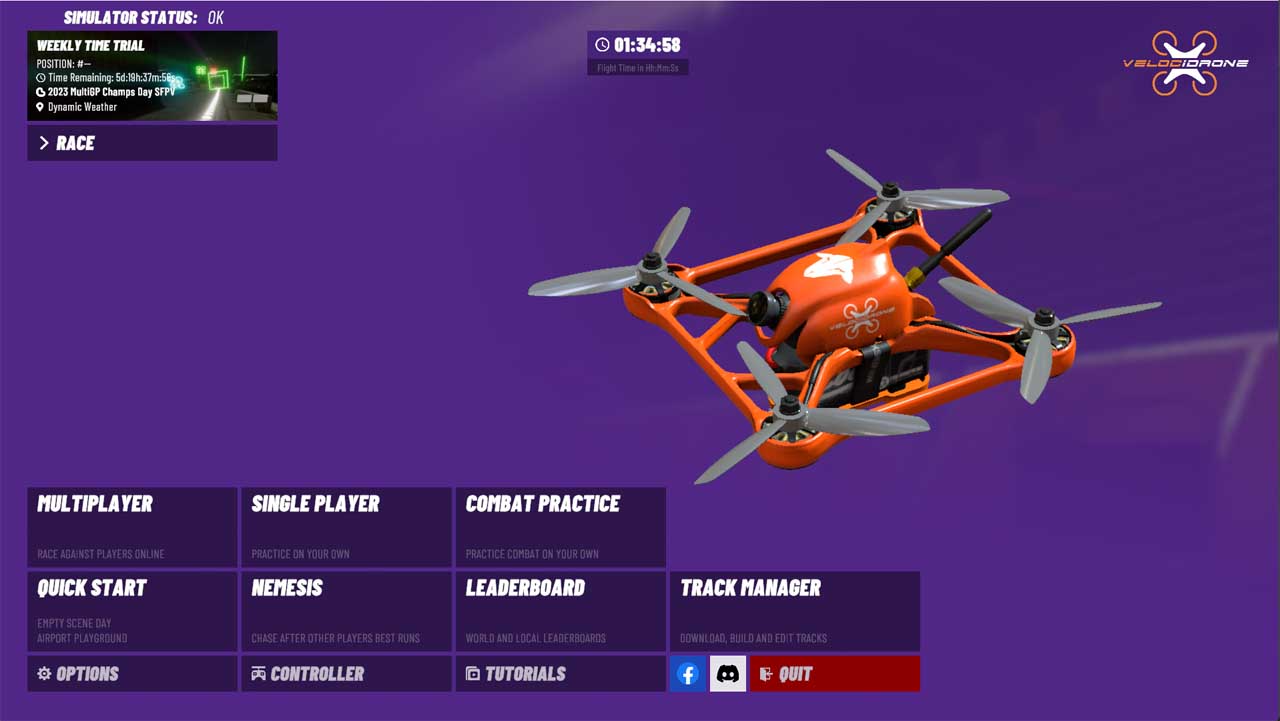
At the top you will find the weekly time trial. Here you can compete on a weekly basis on a single track with other players using nemesis mde (see later in the manual).
The weekly time trial may be active or finished:
If it is active there will be a countdown to its ending and a button top right to enter and compete in the time trial.
At the bottom will be the main buttons for accessing the simulator content, these should be mostly self explanatory - you will find further details in this document.
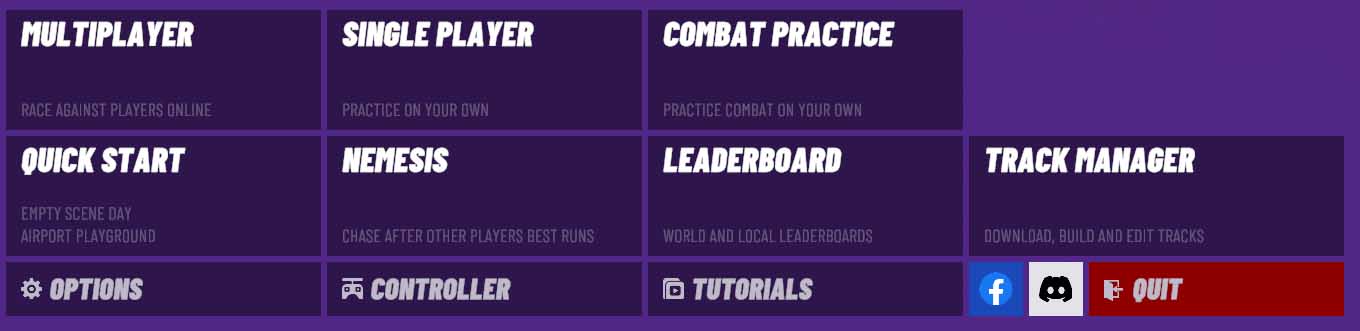
At the top middle of the screen is this:
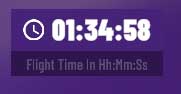
It is the time spent in the simulator (inside a flight scene).
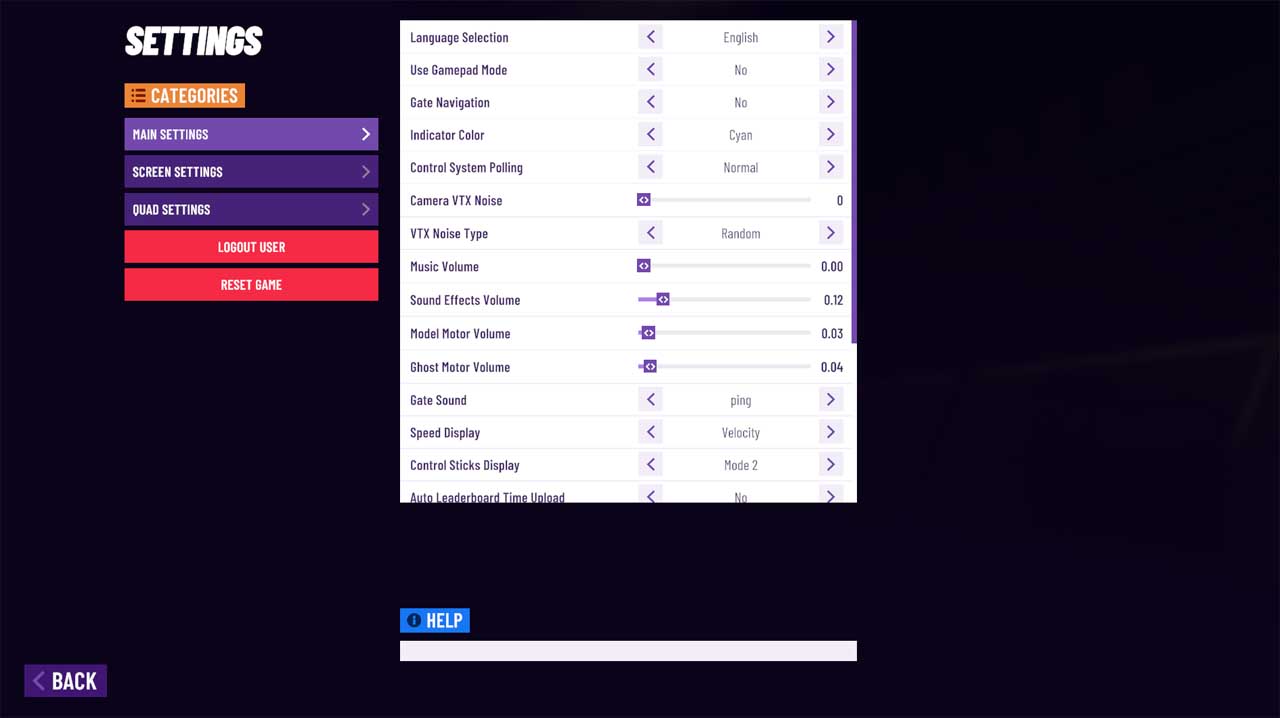
Main Settings Panel
Language: Specifies what language the sim will display text in.
Use Gamepad mode: Alters the throttle curves to make the gamepad not be at half throttle when at mid stick (the default sprung position for a gamepad)
Gate Navigation: Puts an overlay on the screen in race mode identifying where the next gate is as well as guidance arrows to navigate you to the next gate around the edges of the screen.
Dark User Interface: Switches between a light user interface where text is mainly on white backgrounds to a dark interface where light coloured text is on a dark backrgound.
Indicator Colour: What colour the gate navigation indicators will be displayed with.
Control System Polling:Windows only option - setting this to fast polls your usb controller at a faster rate (reducing latency).
Camera VTX Noise: Simulates video interference that you would see when flying a real quad with a video feed. For low specification machines, we recommend turning this off by dragging the slider full left as it is a full screen effect and can cause a drop in frame rate. For mid to high performance machines you can set this at a level you prefer. The further you go to the right on the slider, the more the interference will appear when you are flying.
VTX Noise Type:Changes how the VTX noise appears. “Random” will make VTX interference appear on screen at random times and is not influenced by any other factor. “Distance” will make the interference stronger the further you fly from the start grid. Additionally flying behind terrain breaking line of sight from the start grid will also increase the strength. Furthermore, the strength of interference is stronger lower to the ground than it is higher up.
Music Volume: Adjusts music volume in menusand in game.
SFX Volume: Adjust extra effects like button sounds volume.
Model Motor Volume: Adjust the volume of the quad motors both in menu and in game.
Ghost Motor Volume: Adjust the volume of the ghost quad motors in game.
Gate Sound: The sound that will be played when you pass through a checkpoint gate successfully. This also has an option for no sound at all.
Speed Display: Displays the speed of your quad as either maximum velocity or ground speed. This is to allow emulation of OSD type displays that use GPS for speed display which of course is ground speed only.
Display Control Sticks: Toggles whether control sticks (your remote / transmitter inputs) are displayed as an overlay in flight mode.
Control Sticks Display: The transmitter mode that will be used to display your sticks on the screen if you press M in flight mode. Options are mode 1 through mode 4.
Auto Leaderboard Upload: When set to no you will have to upload your lap times to the leaderboards manually by pressing the upload button at the end of a race. When set to “auto” times will always be uploaded automatically. Bear in mind time upload only happens in single class modes.
Lap Time Announcement: How your lap times will be announced by the built in voice announcement system.
Single Player Race Countdown: Whether you will get 3-2-1, immediate start or crash restart. Bear in mind crash restartdoes not allow much time for the flight controller to settle after a crash, so you can get somewhat rocky starts if you use crash restart mode.
Voice Announcements: Whether the inbuilt voice announcements will be used for your lap times and lap positions.
Hide My ID from Friends: Whether you will be hidden from people when playing multiplayer. If people have added you as a friend then with this set on they will not be able to see you online in sessions.
End of race statistics: How the end of race dialogue will be displayed.
Session Join Method:Determines how players will join multiplayer sessions that you host. “Unrestricted” will create the player quad and join them as soon as they enter the lobby. In a “Restricted” lobby, joined players are able spectate and chat but a player quad will only be created when the host presses F4 to join them or a race is started. Creating a player quad can cause game stutter particularly in busy lobbies. Setting the session join method to “Restricted” prevents this game stutter from affecting races in progress.
Full Reset Button: This button will completely reset your sim database to defaults. This removes all downloaded tracks and resets everything to as if you have installed the sim for the first time.
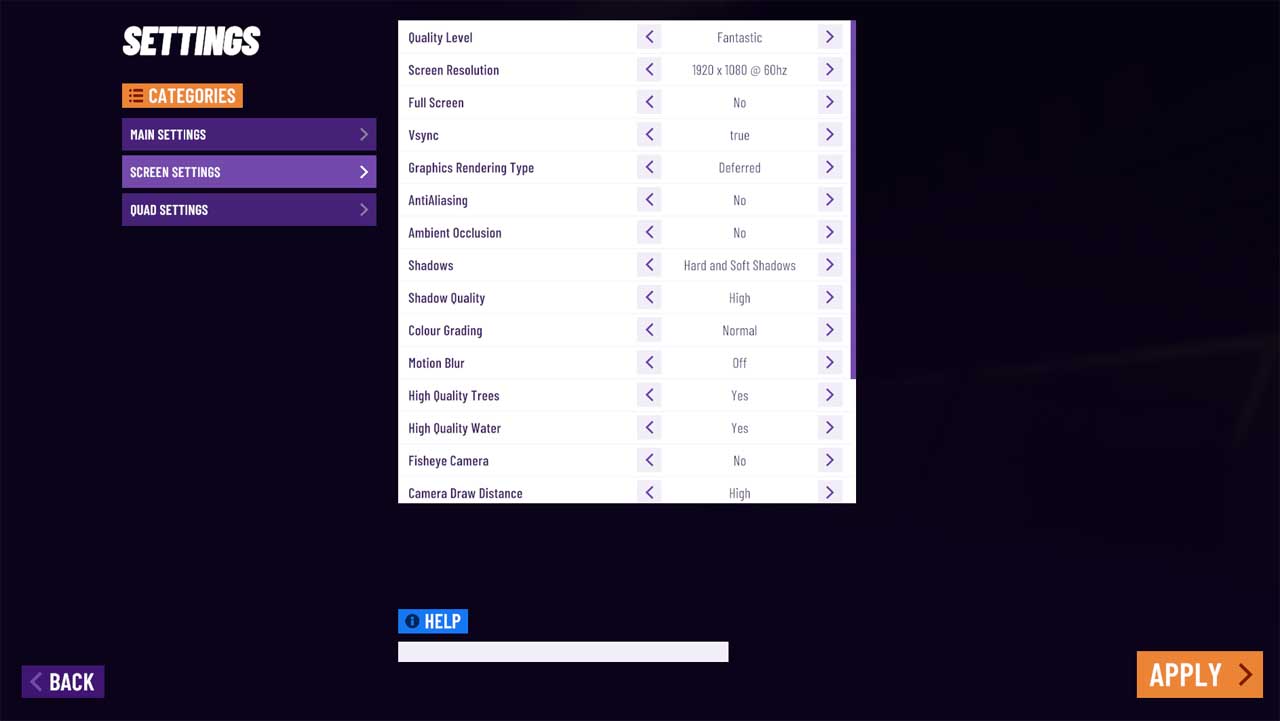
Screen Settings Panel
Auto Adjust Quality: With this turned on VelociDrone will look at the minimum FPS you have configured and automatically raise or lower quality settings to achieve that FPS. When this is turned on VelociDrone will use any quality setting between fast and fantastic, it will not use fastest setting and if you have a low specification computer you should turn off auto quality and set fastest manually.
Minimum FPS: This setting is used by the Auto Quality function, if you are not using auto quality you should set it to 9999. Whatever you set here VelociDrone will try to achieve as a frame rate. This will only work with vsync off. Setting 9999 for this value will cause your video card to run as fast as it can. You should never set this value to 9999 and then turn on Auto Adjust Quality as this will cause the sim to try to achieve 9999 fps and will issue frame rate warnings continuously.
Quality Level: Adjust the draw distances, shadow drawing, texture quality and so forth for the entire game. Fantastic has everything turned on and will require a more powerful graphics card (and looks the best), whereas fastest will run on older and mobile type cards. There are a range of options here with quality improving as you work your way up to fantastic level (fastest, fast, simple, good, beautiful, fantastic).
Screen Resolution: Sets your screen resolution. Remember that higher resolution means more pixels to draw and will need a more powerful card. If your qualitylevel is set to fastest and you need more performance then dropping screen resolution is a good option. Only resolutions for supported aspect ratios willbe shown (16:9, 16:10, 4:3, 5:4). If you select a resolution that is 144hz velocidrone will not change your screen to run at this hz rate, you need to set your screen to this rate in windows / linux / osx. This is because VelociDrone does not run as a dedicated fullscreen application, it runs as windowed fullscreen and therefore is limited to the hz rate you set in the operating system.
Fullscreen: Fullscreen uses less power than windowed. Choose your preference.
Vsync: When set to on VelociDrone will sync the FPS to the monitor refresh rate. Turn it off if you want to run faster than your monitor refresh rate. Bear in mind vsync doubles your controls latency - so for most people it is preferential to have this off unless you are on a low powered machine - in which case vsync may be the preferred option for smooth playback.
Graphics Rendering Type: For low specification machines this should be set to “Forward”. For high power gaming machines this should be set to Deferred. Forward will only display a maximum of four point lights at a time, whereasdeferred will render and display all point lights in a scene at once. For night time scenes with point lighting - deferred may be preferential providing you have a graphics card suitable to run it.
Shader Quality: On gaming machines you can set this to Gaming, on anything else it should be set to Normal. This setting makes your graphics card use instanced indirect GPU instancing for things like trees and grass - which is faster and more efficient on a very modern gaming card.
Anti Aliasing:This gets rid of jagged lines in your rendering of on screen objects at the cost of some performance.
Ambient Occlusion:This adds an extra level of shadowing to objects to make them seem more realistic at the cost of some performance.
Shadows:Disabling shadows will provide the most performance. Hard shadows are the best for performance if you want to enable shadows. “Hard and Soft Shadows” has the heaviest impact on performance. This should be set to user preference; lower specification machines should prioritise performance.
Shadow Quality:Determines the resolution of shadows. “Low” will provide the best performance and moving up through to “Ultra High” having the heaviest impact on performance. Users should set this to their preference but we recommend prioritising performance and picking the option that best suits your machine's specification. The lower you go the less distance away from the camera shadows will no longer be rendered. The higher you go, shadows will be rendered at greater distances.
Colour Grading: Choose the LUT you wish to use to modify the colour output of VelociDrone. There are options in here that can change the vibrancy and colour of the output as well as provide options for colour blind customers.
Motion Blur: This setting sets the computational complexity used to give motion blur (or turns it off entirely). Motion blur can enhance the perceptionof speed but it usually doesthis at the expense of being able to judge distances accurately. Faster races trying to get the best times may preferthis off.
Motion Blur Amount: This setting configures how strong the motion blur effect should be.
High Quality trees: High quality trees require a good modern graphics card, mobile graphics cards or older cards should opt for not using high quality trees (the low quality ones still look very nice).
High Quality Water: High quality water requiresa good modern graphics card, mobile graphics cards or older cards should opt for not using high quality water (the low quality water still looks very nice).
Fish Eye Camera: Applies a fish eye effect to the camera to better simulate the lens effect of a wide angle FPV camera.
Camera Draw Distance:Controls how far into the distance the camera can see. Setting this low will make objects in the distance not be drawn and reduce the loading on your system.
Dynamic Skies: Select animated or static sky rendering. Static setting reduces CPU load.
Birds Butterflies Whether to display birds and butterflies in the various available sceneries.
Hide Mouse Pointer Automatically hides the mouse and side menus in flight mode after five seconds of inactivity of the mouse if set to yes. Menus and mouse will unhide if the mouse is moved. If set to no the mouse and menus will always be visible.
Player Indicators:This puts a highlighting box around other quads in multiplayer with the players name underneath. The box in single class will change from green towards red as that player gets prop damage. It is useful for spectating so you know who the other players are or for multiplayer if you want to know who you are racing against. You can have this set to “Third Person” so it is only seen in spectator views or “Always On” to see it in all views including FPV.
Player Indicator Boxes:Allows the player highlight box to be shown or hidden, when hidden you just see a player name but no box around the player.
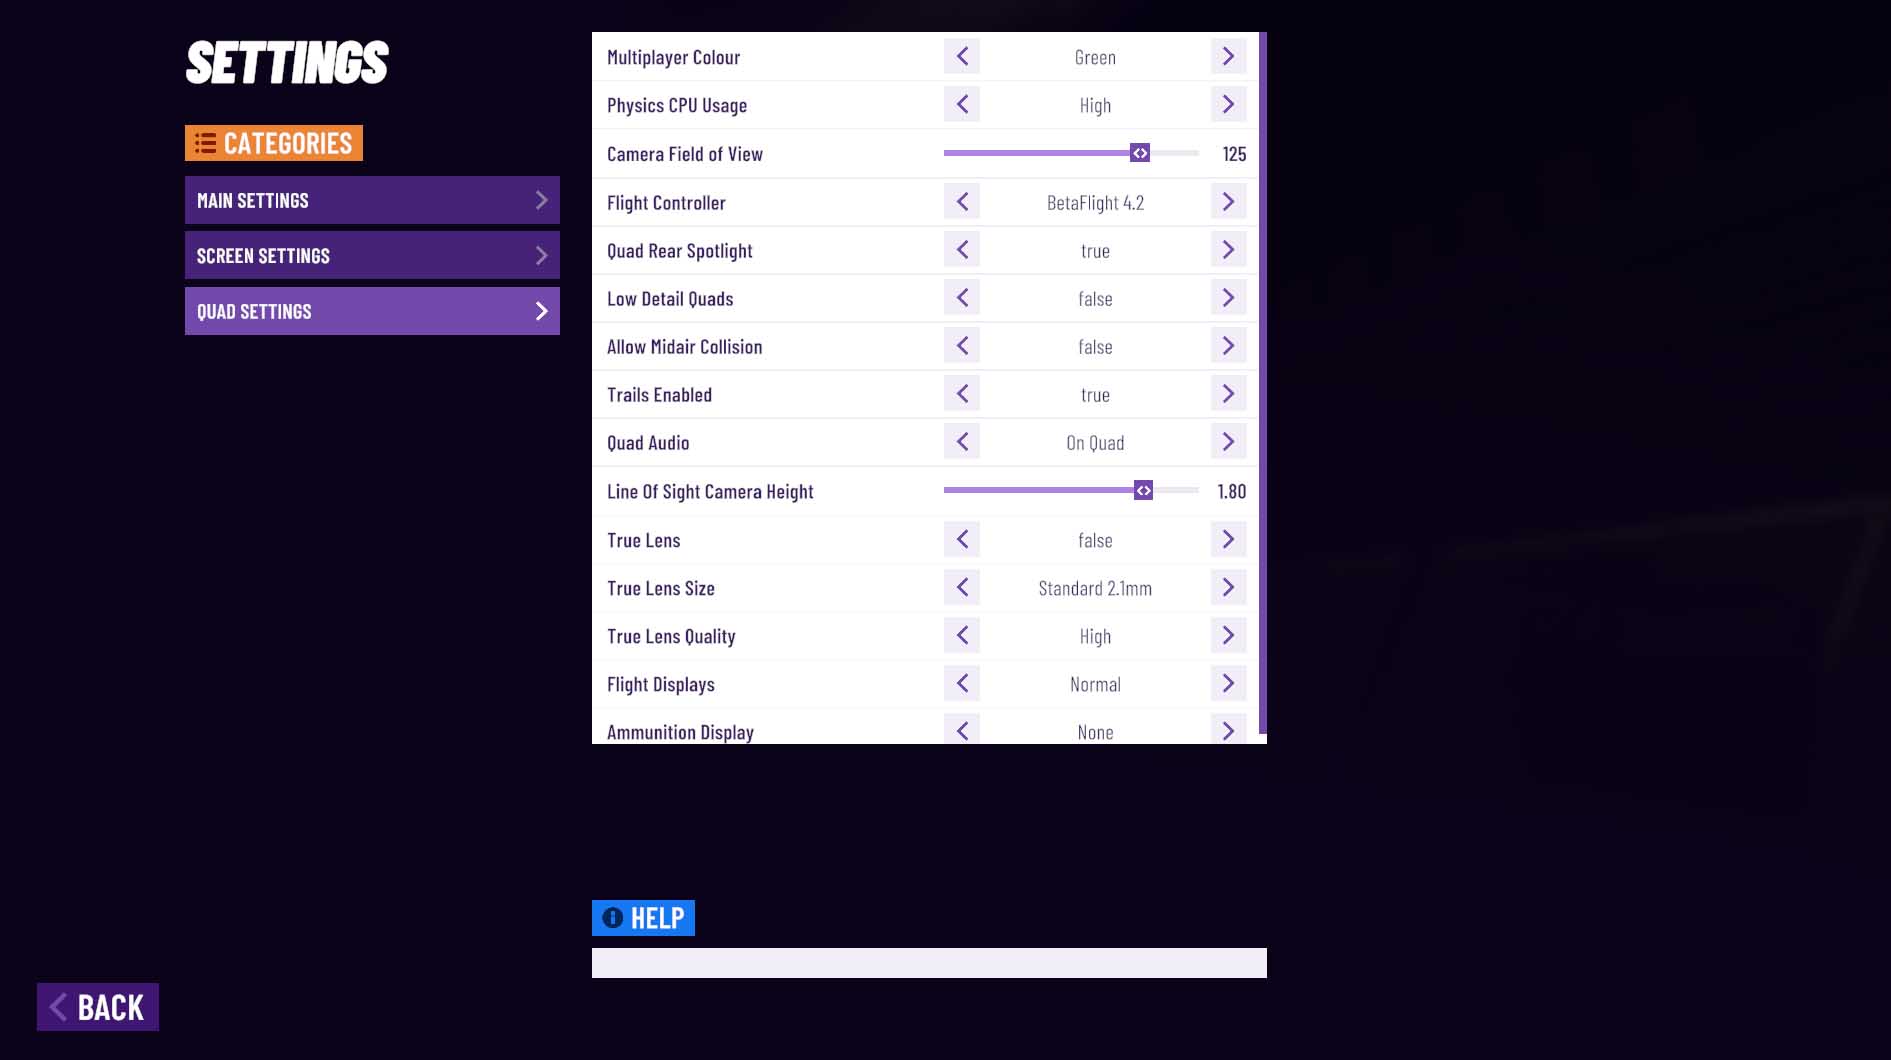
Quad Settings Panel
Quad Colour: What colour your quad will be in multiplayer sessions.
Physics CPU Usage: How much CPU resources are applied to making the physics as accurate as possible. On a powerful machine you can set this Ultra High, on a low spec machine you may have to reduce it to reduce the loading on the processor.
Camera Field Of View: Horizontal field of view of the quad camera. 115-120 is what most pilots prefer.
Flight Controller: There are two options legacy which is VelociDrone’s own fairly simplistic flight controller or Betaflight which is the Betaflight system used on many commercial flight controllers.
Quad Rear Spotlight: Whether quads have a light on the back illuminating the scenery from the LEDs. Turn this off on low spec machines.
Low Detail Quads: Time Attack quad and Multiplayer quads are displayed as low detail models(preferable for low powered computers).
Allow Midair Collisions: Prevents or allows inter model collisions during Multiplayer racing. If you turn this on it turns on your collisions, it does not mean other players with this off will be affected by collisions. This setting only applies to others if you are the race manager - all players inherit the collision settings of the race manager.
Trails Enabled: Whether quads will have a light trail in single and multiplayer. Bear in mind trails are disabled in line of sight mode by default.
Quad Audio: Whether you hear the sounds of your quad as if the audio is onboard the quad or whether the audio is heard from the point of view of the start grid position.
True Lens: Turns on true lens which changes the simulator camera to be a more accurate representation of an FPV Lens. Beware this is very resource heavy and if you do not have a powerful graphics card it will affect your frame rate (FPS) significantly. We recommend a GTX 1060 card or above for this setting.
True Lens Size: Selects which lens is used when true lens is active. Each has been modelled after real drone camera lens sizes.
True Lens Quality: How high quality the render is on true lens - again beware high settings can adversely hit frame rate.
True Lens Frustum Culling: Prevents objects that are not in the front camera's view from being rendered when enabled. True Lens uses multiple cameras to draw a picture to the screen. The default for this option is “Off” as this will prevent objects such as trees from disappearing on the edges of the screen before they are out of view of the camera. Having this option set to “Off” will have a negative impact on performance as the renderer is drawing more objects. Set this option to “On” to gain more performance when using true lens at the cost of some trees disappearing around the edges of the screen.
Ammunition Display: Selecting “Circle” or “Line” will display a bar that shows the amount of ammunition the player has remaining in combat game modes. The circle will appear around the HUD reticle in the centre of the screen. The bar appears in the bottom left corner of the screen above the shield bar. Examples can be seen in the screenshots below. These bars deplete as the player fires. “None” will only display the default count on the left side of the screen.

We support any tx that can output all of stick channels over a USB connection. Additionally over a wireless connection using a Teensy 3.2 board we can support any tx that can send output to an SBUS, DSM2 or DSMX receiver. Also we can support any controller that can connect as a usb joystick device to the operating system- be that directly or via a usb dongle.
This video covers setting up your controller:
When you are finished setting up your controller use the ‘Back’ button to return to the main menu and all your settings will be saved.
Note: A standard ‘Gamepad’ has a spring to centre on all axeswhich is not ideal for Thrust control. We therefore recommend using the throttle curve feature to tune the response of the Thrust axis which will help make this control less sensitive. It can be better to use the trigger on gamepads for throttle instead of a centering stick - this tends to provide a more precise throttle control. We do not recommend gamepads for flying racing drones as they are just not good enough in terms of stick resolution and centering of sticks - which can make the simulation quads feel twitchy and difficult to control.
Taranis / RadioMaster / Jumper Configuration for use with Velocidrone
Theseradios can connect to windows as a USB device but in default configuration theywill not work correctly. Make sure you have set up your radioin MultiRotor mode and that you have turned off it transmitting when connected via USB as there is no need for it to transmit to work with VelociDrone.
Also make sure that you set the usb connection mode in the radio setup menu on the transmitter to be USB joystick. Lastly always power on the transmitter first before plugging your usb cable. It is sensible before using a transmitter with velocidrone to run it’s internal stick calibration process - otherwise you can get spurious results when using with the simulator.
This video covers setting up the Taranis (and other similar open tx devices)..
Lastly on Windows there was a recent driver update that stopped all FrSky and Jumper tx from working as USB joysticks. This video covers how to backout this incorrect driver and restore your transmitter to working correctly. However, every driver update on windows this change will get backed out - so we recommend making sure you are on the latest OpenTX level which no longer has this bug with the driver.
We do have a full playlist on YoutTube for USB setup and if you are having issues then you will almost certainly find the answer to your problems in these videos:
Cameras
There are multiple cameras within VelociDrone that can be selected via keyboard shortcuts. There are cameras that will focus on your specific model as well as cameras that can focus on other players models. Let us deal with cameras for your own model first.
When flying your own model you can choose to have a line of sight camera or a first person view camera.
First Person View Camera
By default when you join a scene you will initially see where your quadcopter is placed on the field and then automatically be put into first person view. First person view is where you are looking through a camera that is fitted to your model, therefore this camera looks like you are flying the model whilst sittingon it.
By pressing the F key you can switch between first person view and line of sight view.
Line of Sight Camera
When a race is started your model is automatically switched to first person view for racing.
Pressing F will switch you to line of sight view where the camera is as if you are looking at your model on the ground in front of you rather than the camera being on the model itself.
Additional to the line of sight and first person view cameras there are also spectator view cameras. These are cameras that are placed in strategic positions around the scenery and will follow your quadcopter as you fly it around. You can access the spectator camera mode by pressing the S key.
After hitting S you can use the left and right arrow keys on your keyboard to cycle through the various spectator cameras.
When you wish to go back to line of sight or first person view cameras then you can do so by pressing the F key.
Multiplayer Cameras
VelociDrone also provides facility in multiplayer modes to view other players models in line of sight, first person view and spectator modes.
If you are in first person view or line of sight view then you can switch camera to another player by pressing the spacebar or the P key, you can also click on a players name during the race at the bottom of the screen to directly switch to that players camera.
The space bar / P key will cycle through all the players in the current session including yourself. You can always get back to your own quadcopter camera by pressing the F key.
If you are in spectator mode (by pressing the S key) then you can cycle through other players by pressing the spacebar/ P key or you can click on their name at the bottom of the screen.
When you join a multiplayer session if it is full (7 players or more) you will be put in spectator mode. A player can tell if they are in spectator mode when they join as an eye icon is present next to the race time display. If you are in spectator mode you will not join races when they start and you will need the race manager to activate you as an active racer in the coming race.

Spectator mode icon
The type of click used when clicking on a players name from the race positions at the bottom of the screen or the list in spectator view will determine the type of camera view.
A left click will change your view to the player using the same type of camera as you were previously viewing from (first person or line of sight).
A right click will switch the type of camera view to the other and spectate the selected player.(ie if you are in FPV view and you right click a player name then you will see that player line of sight).
A middle mouse button click can be used on a player using the Dominator model to show a follow camera view. Generally this is just for combat game play where a camera follow view mode can be preferable for live streams.
Follow camera view
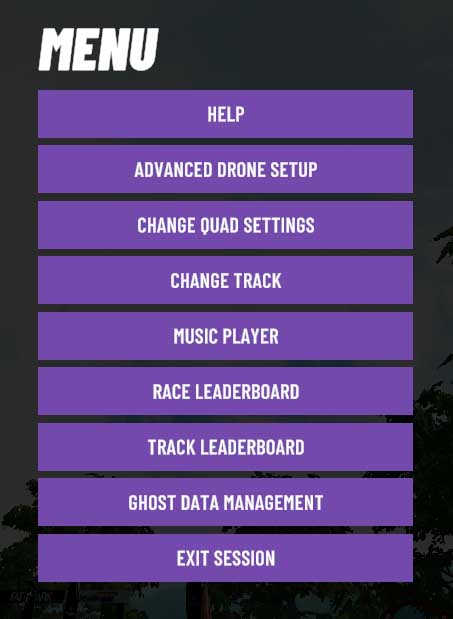
General Menus
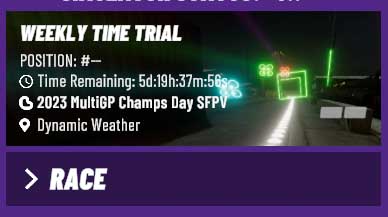
VelociDrone main menu
There are eleven buttons on the main menu four of which lead to the various sections of the game and the quit button allowing users to exit the game.
The quick start button will take users straight into a session with the most recently used quad and track.
The single player button is for time attack race practice and setting times on the leaderboards.
The nemesis button accesses nemesis mode (offline multiplayer racing using other players ghost quads)
The multiplayer button allows users to select to host or join a multiplayer game.
The combat practice button (for combat pack owners) allows you to access combat practice mode.
The track editor button allows you to author or edit your own custom tracks.
The options button takes you to the configuration of the simulators general, screen and quad settings .
The controller button will take you to the assignment and calibration of the RC controller.
The leaderboard button will display a users times and their position on the leaderboard.
The tutorials button navigates to a list of videos to help users learn flight techniques or features of the simulator.
The links on the bottom right of the screen navigate to the VelociDrone facebook page and the community discord where users can find more details about the scheduled events and voice chat with other players.
Model Selection
When you go into multiplayer or single player modes one of the actions you will have to perform is to select the model that you wish to fly. The first image below shows the model selection screen where you choose your quad. To begin with there will only be one model on this screen.
You can add another model by clicking on the add quad button which can be found in the bottom left of the screen.
The delete quad button removes the currently selected quad if you have more than one quad.
If you click the edit quad button at the bottom you can edit the quads settings, rename it or remove it.
The rename quad allows you to change the display name of a quad. The continue button takes you to the track selection menu with the currently selected quad.
Edit quad allows you to change settings such as prop size, drag and battery size on the currently selected quad.
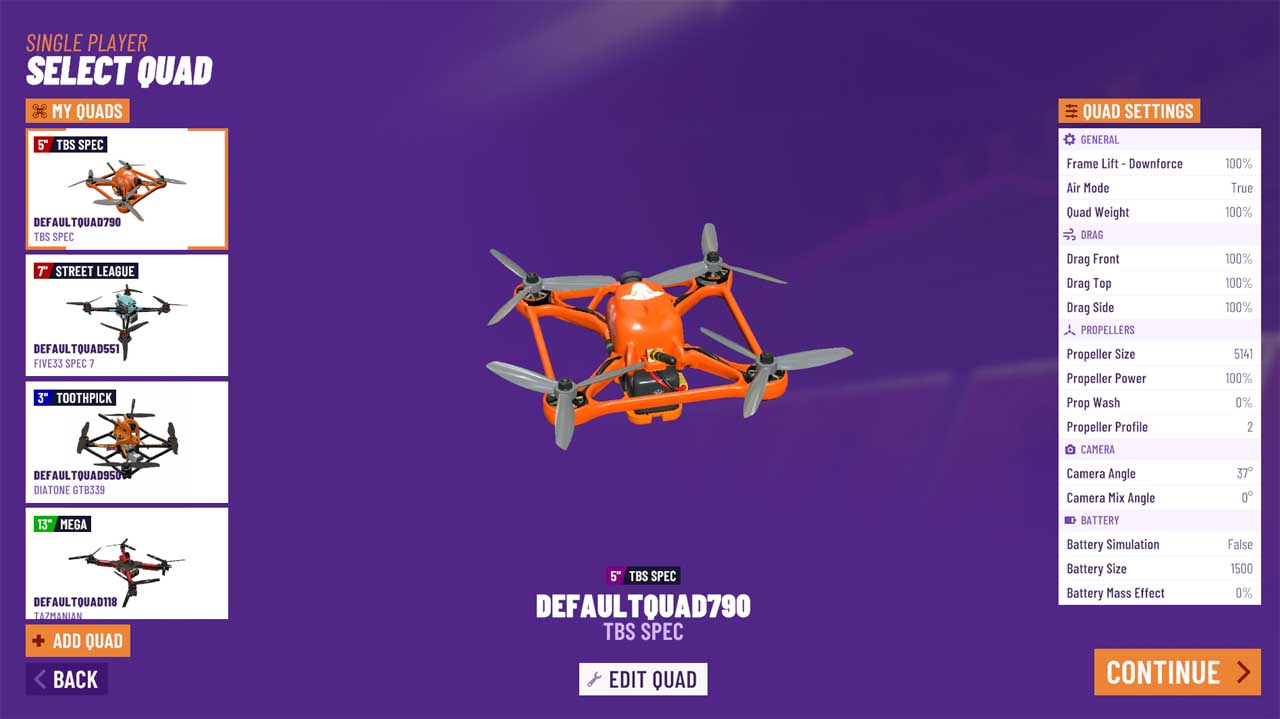
Clicking the “add quad” button brings up a similar display but with many more quads to choose from. On this screen you select the model you wish to add. Once you have chosen the model you wish to add, click the select model button and then you will be asked to name the quad. When you return to the quad selection page your newly saved quads should be available to choose from to fly.
Edit Settings Dialog

The above screenshot shows the options you are presented with when the “Edit Settings” button is clicked. Important settings of note are the propeller profile, propeller size and camera angle as these will affect flight regardless of whether you are in open or single class modes.
Camera angle allows you to quickly set your preferred angle before entering flight mode.
The throttle limit slider allows you to make a throttle cap or maximum throttle limit the same as can be done in betaflight on real life quads and works in exactly the same way.
The propeller profile determines how the prop performs with profile one being the most aggressive, profile two being the most realistic and profile three being a more gentle prop.
Propeller size determines the size and pitch of the prop. Typically the larger the prop the faster the prop.
The Onboard Video Camera setting is only available when using a quad from the Freestyle pack. This will select which onboard camera you prefer to use and will adjust the weight of the quad accordingly.
All of these options are also accessible in flight mode from the side button menu.
Scene / Track Selection
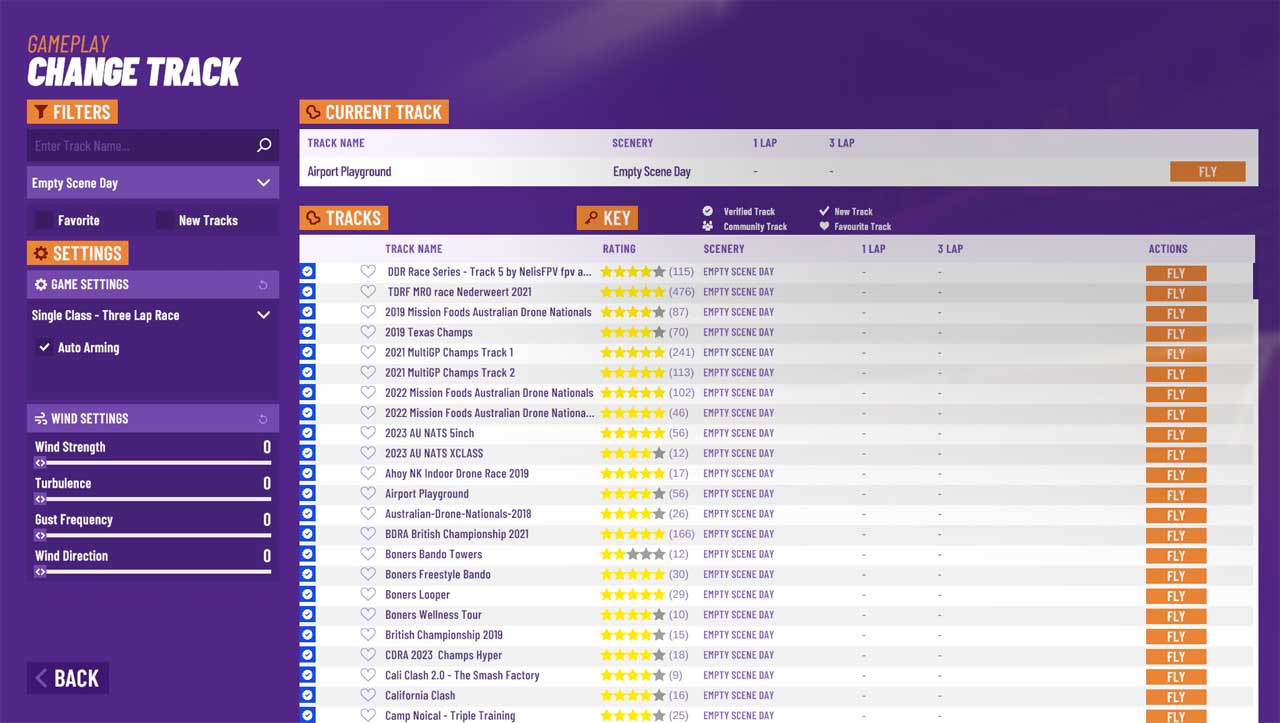
Scene / Track Selection
This selection screen can be broken down into several sections: the filter panel, track list panel, wind settings panel and the mode options panel. The select scenery button will begin the session with the track and options you have set. The back button will return you to the model selection or the multiplayer menu depending on whether you are in single or multiplayer.
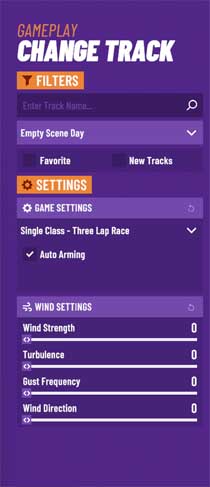
Filter Panel
The filter panel is located at the top of the screen and allows you to filter the tracks displayed in the track list panel. From left to right the filter options are: scenery, quad class, track name, favourite and new.
The scenery filter is a dropdown containing all of the scenes that are available to you. By selecting a scenery this will filter the track list to display only tracks for that scenery. The “All Tracks” option will display tracks from every scene.
The quad class filter is a dropdown containing all of the quad types available in VelociDrone. Tracks that have been designed for specific quad types can be found using this filter. For example, if you are flying a micro class quad you can filter the track list to show tracks designed for micro class using this dropdown.
The track name filter allows you to search for a specific track if you have one in mind. Typing into the text box will filter the track list to display tracks with a name that contains the contents of the text box.
The favourite toggle button will filter the track list to display your favourite tracks. To favourite a track, click on the toggle in the “Favourite” column on the track row. Clicking on the toggle again will remove the track from your favourites.
The new tracks toggle button will filter the track list to display tracks that have been added to your database in the last 14 days. New tracks will appear in the track list in orange text and have the word “New” appear after the favourite toggle button on the track row.
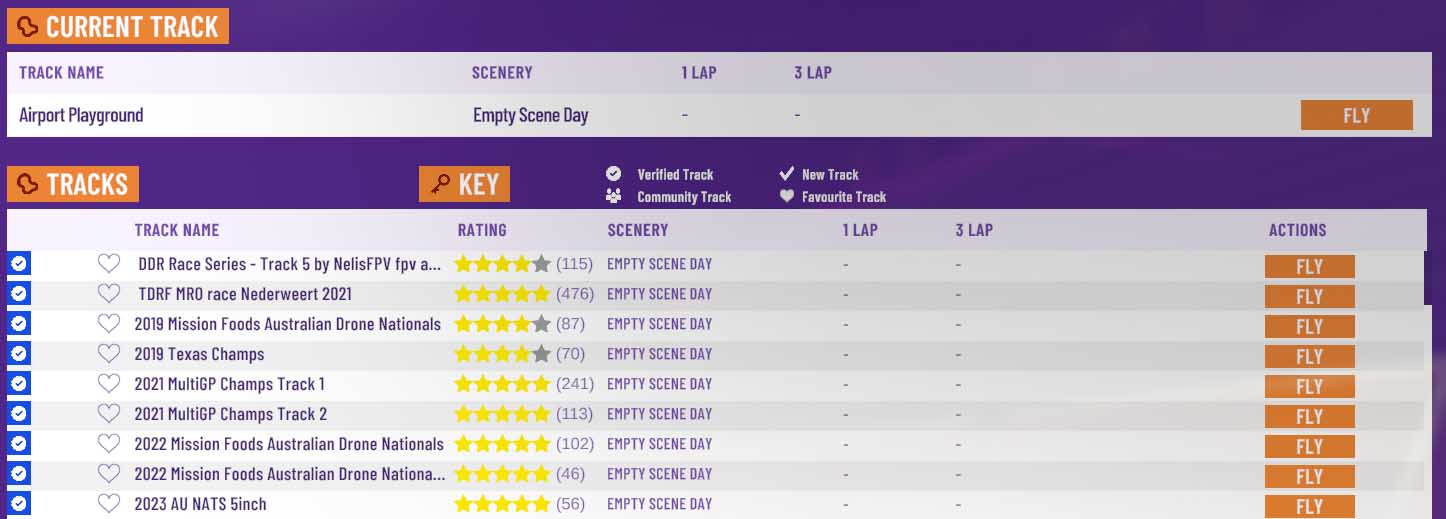
Track List
The track list rows display from left to right: the selected status, track name, scenery, type of track, best lap time, three lap time, favourite status and new status. The radio buttons on the left of the track row indicate which track is selected. The “Current Track” text above the list displays the name of the currently selected track. The list is ordered by name in alphabetical order.
The type of track shows whether a track has a leaderboard or is a custom track. Leaderboard tracks are selected by track moderators as the best tracks that they think every user should have. The “Leaderboard” refers to the leaderboard of race times that can be found on the VelociDrone website. Custom tracks are tracks that have been downloaded from the user track database or tracks that have been made using the track editor. These also have leaderboards but they are not featured on the velocidrone website.
The “Best Lap” and “Three Lap” times display your fastest times around the track. These values are stored in your local files and will not transfer over if you log in on a different machine or reset your database.
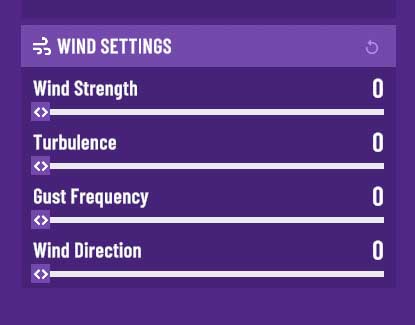
Wind Settings
The wind settings panel will display when the current selected track is built in an outdoor scenery.
The wind strength is measured in miles per hour.
Increasing turbulence makes the wind less predictable and less of a steady flow.
Gust frequency will increase how often stronger wind blows through.
Wind direction is measured in degrees with 0 degrees being north.
Watch out for the windsock object in tracks to see how the wind behaves. Not all tracks will have a windsock but if you want to use the wind feature be sure to include a windsock in the tracks you build.
Race Mode / Combat Mode Options
The game type determines what kind of race or game will take place when you click the start race/game button once you have loaded into the scenery.
There are a number of options which we will break down:
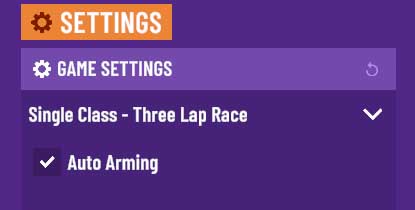
Open Class: A racing mode that allows you to use any and all quad set up parameters. Leaderboard times cannot be set in this race mode.
Single Class: A racing mode that sets the drag and weight to a defined default value for all racers to create a level playing field. Battery simulation is forced on. PID settings and all other quad modifications are permitted. Times set in this race mode are eligible for the leaderboard.
Custom Class: A racing mode that can only be selected when creating a multiplayer session. Players that attempt to connect to a custom class session must use a quad belonging to the same class. Joining players receive the exact same quad settings as the race manager when they connect to the session.
Handicap Class: A multiplayer exclusive racing mode that implements the same constraints as single class and additionally uses lap data to set a handicap. All pilots will have their start delayed except for the slowest player. Pilots are delayed by the difference between their time and the slowest player's time. This will mean that if each pilot flies their personal best they will arrive at the finish gate at the same time. This mode can produce tight racing between pilots who have a large difference in their lap times.
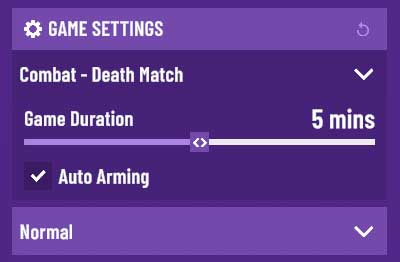
Combat: A game mode that can only be selected when creating a multiplayer session. This mode is only available after purchasing the Combat premium content pack and includes: deathmatch, team deathmatch, capture the flag, king of the hill, soccer, classic capture the flag and control. The drag and weight values are set to default similar to Single Class. Joining players must be using the same model as the race manager. All other race modes allow a maximum of 7 players to fly however combat allows up to 10 players. Ensure you have enabled a button or switch for “Fire” in the controller setup for Combat modes. Alternatively the spacebar can be used. A brief description of the game formats is available in this list. See the Combat section later in the manual for more information.
Event Mode: Crashes result in being red flagged at the next gate and removed from the race. You will place based on your lap and the gate number that you last passed. Crashed players can continue to fly and will be prevented from colliding with anyone with the “Allow Midair Collision” setting enabled. Using manual arming will prevent you from crashing. When using manual arming, ensure you have set up switches in the controller set up to use turtle mode. Turtle mode allows you to reorient your quad in the event of a crash.
Laps: This race format allows you to select the number of laps in a race. The slider in the screenshot above sets the number.
Three Lap: This race format will always run three laps per race. Running a single class three lap race will allow you to submit times to the three lap leaderboard. If you are running a race where the race slider is set to three laps this will not upload to the three lap leaderboard. This is why the three lap mode exists - it expressly makes your times upload to the three lap leaderboard rather than the single lap leaderboard.
2 Minute: Pilots race to complete the most laps in 2 minutes in this race format. Players are placed by the number of laps they have completed. If players are tied by the number of laps then the player that completed them in the fastest time is placed higher.
Relay: This race format is only available when creating a multiplayer session. Pilots are sorted into teams based on their player colour. More than two teams are allowed but teams must have the same number of players. The laps slider determines the number of laps each pilot needs to complete. Pilots are fixed to the start grid apart from one pilot from each team. Players must fly through an orange recharge gate to swap to a teammate. Players can switch at any point during their laps and pick up where they left off once their teammate switches back.
Deathmatch: This game format pits all players against each other. Players must take down each other using the power ups in order to score points. The top players will be awarded victory experience towards their combat level. See the Combat section later in the manual for more information.
Team Deathmatch: This game format is the team variant of deathmatch. Similarly to the relay format, players are put into teams using team colour. Only two teams are allowed. Each player's score is accumulated into a team score. The team with the highest score is awarded victory experience towards their combat level and the most valuable player on each team is awarded additional experience. See the Combat section later in the manual for more information.
Capture the Flag: This game format is a team based game in which players must retrieve the flag from the opposing team's side of the arena and bring it to their own team's goal. The player carrying the flag is highlighted to their team and has an effect on their model to identify them as the carrier to the opposing team. Teams must work together to protect team members carrying the opposing team's flag or to stop the opposing team from getting away with their flag. See the Combat section later in the manual for more information.
King of the Hill: This game format sees players fighting for control of a flag object. A neutral flag will appear above a neutral spawn pad in the arena. Whilst a player is carrying the flag they will accumulate points. The flag will make a ping noise to help players locate the flag or the player carrying it. The players that have accrued the most points by the end of time limit will be awarded victory experience toward their combat level. See the Combat section later in the manual for more information.
Soccer: This game format is a team based scoring game in which players must carry a flag that spawns above the start grid into the opposing team's goal. Teams are assigned by player colour and there is a maximum of two teams. The team that has scored the most goals will be awarded victory experience towards their combat level and the most valuable player on each team is awarded additional experience. See the Combat section later in the manual for more information.
Classic Capture the Flag: This game format is exactly the same as Capture the Flag except for one difference. The goal in which a team must place the opposing team's flag will disappear if their own flag has been taken or is dropped away from the home base. A team can only score a point if their flag is safely at the home base.
Control: This game format is a team based area control game in which teams must capture and defend areas. The capture zones are marked on the map as area “A“ and “B” and start off as neutral. To capture a neutral zone for their team or return a zone owned by the opposing team to the neutral state a player must stay within the zone. Once a zone has been captured it will lock and cannot be captured by the opposing team until it unlocks after some time. The zone's colour will indicate which team it belongs to. A team will accumulate points for each zone it owns. The team with the highest score is awarded victory experience towards their combat level and the most valuable player on each team is awarded additional experience. See the Combat section later in the manual for more information.
The default arming setting is auto. In automatic arming your quad will always be armed and when you crash you will be automatically reset to the last gate that you passed. Manual arming requires two switches to be set in the controller setup: Arm Motors and Flip After Crash. When using manual arming you will have to use the Arm Motors switch to arm and disarm the quad. In the event of a crash the quad is not reset. To get the quad back into the air after a crash, disarm the quad using the Arm Motors switch and enable the Flip After Crash switch before rearming the quad. This will put the quad into turtle mode after which you can push on the pitch/roll stick to flip the quad over. Disarm and disable the Flip After Crash switch before rearming and you will be able to take off again.
The laps slider appears when you select the laps race format. The number of laps can be set up to and including 10. Similarly the game time slider will only appear when a combat game mode is selected. The slider moves in 1 minute increments starting at 5 and ending at 10 with the default setting being 5 minutes.
The skill level determines how the different power ups will behave in the combat game mode. The radius affected by ice, pyro and volt shot on impact decreases as the skill level rises making it harder to hit other players. The turning speed of the homing shot decreases as the skill level rises making it slower and harder to hit others with. Players new to combat should start out using Easy mode as it is a more enjoyable experience. The higher skill level is for more experienced players with a more practiced aim.
Single Player
Single Player allows you to practise and improve your flying abilities, whether you prefer to fly freestyle or race for the fastest lap time. You can race against yourself or even others!
Time Attack
Time attack allows you to race against your own fastest lap of that session. This gets you into the competitive zone that racers get into whenever they fly but also sets you on a path of improvement. Racing your ghost in Time Attack allows you to see your previous mistakes, make alterations to your flight paths and see whether you can beat your ghost.
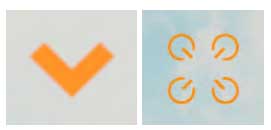
You can access the ghost data management menu by pressingthe following icon in flight mode:
The ghost data management dialog allows you to set up the ghost to behave as you wish and appears as follows:
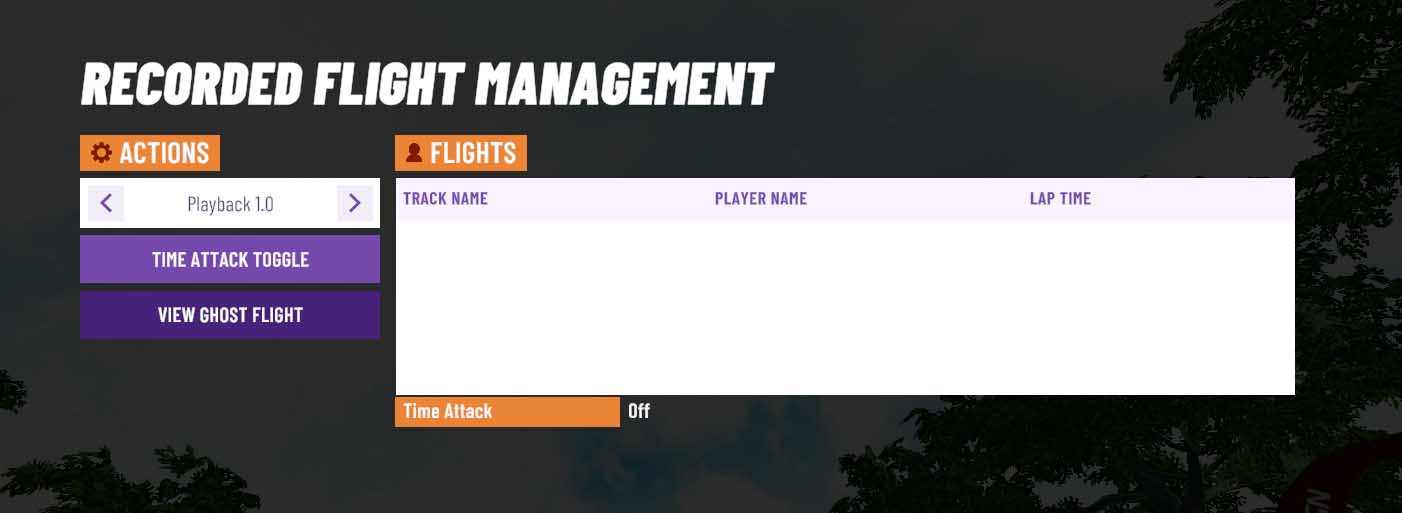
Pressing the time attack toggle will change the time attack mode between recording the ghost of your best lap, the ghost of your previous lap or disabling time attack mode. The ghost will begin flying whenever you pass through the first gate in a single player race. The full ghost management menu allows you to select which lap you wish to load. From the full ghost management menu you can export ghost lap data to or import lap data from your documents folder. Viewing the ghost flight will show the first person view of the lap with a display of the sticks at the bottom of the screen. You can set the playback speed of the ghost flight to be half or quarter speed.
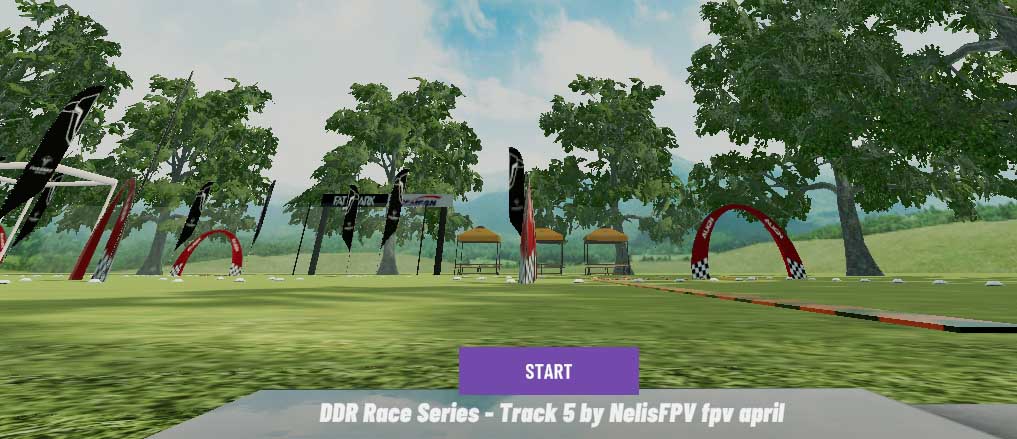
Racing
At any time in single player mode you can enter a single player raceby clicking the race button.
Racing can be enabled and disabled by clicking the following icon in flight mode:
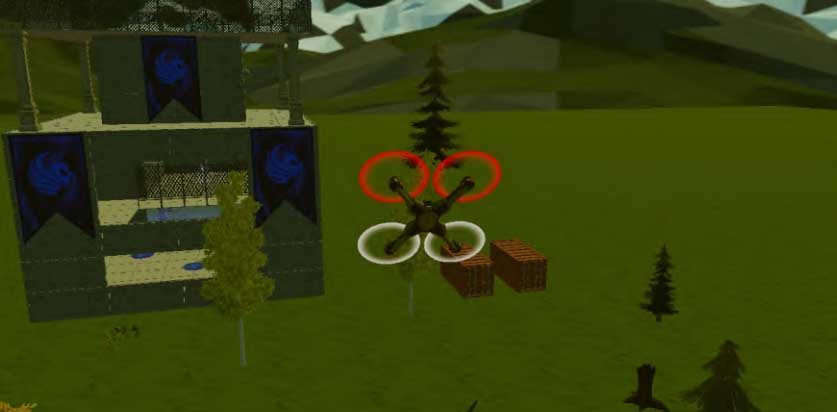
When “Gate Navigation” is enabled in the Main Settings, the icons below are displayed on the screen to show the next gate you need to pass through. The arrow appears on the side of the screen in the direction of the gate if it is not visible on your screen. The Velocidrone indicator appears in front of the gate when it is on screen. If you are approaching the gate from the wrong side the icon turns red. The indicator colour can be changed to your preference choosing from: orange, white, yellow and cyan.
Gate Indicators
When racing in “Single Class” battery simulation is enabled and it is possible to damage the props. When the battery voltage reaches 0% the model will crash and the race will end. Props will receive damage in the event of a bad crash. Damage is applied in 25% steps but you can sustain more than 25% damage depending on the severity of the crash. Damage will make the quad slower and at 100% it will introduce vibration making the quad harder to control.
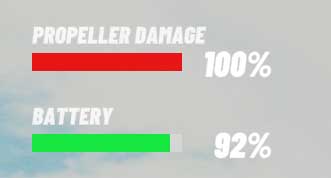
Battery Voltage and Prop Damage
Recharge gates (pictured below) may be placed on a track that you may not be able to get through three laps of with a one full battery. Flying through a recharge gate will restore the battery charge to full and remove any prop damage you have sustained. In a multiplayer relay race the orange recharge gate is used to start the next pilot on the relay team.
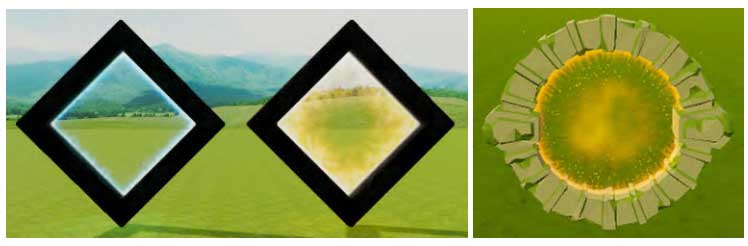
Recharge Gates
Leaderboards
VelociDrone wouldn’t be complete without leaderboards. You can bring up the in game leaderboards for the current track you are racing by clicking on the following icon:
The leaderboard displays 15 race times which you can change by pressing the navigation buttons at the bottom of the dialog to show the next, previous or first set of times. The export button creates a .csv file of the leaderboard which can be imported into spreadsheet creation software. This allows you to generate a leaderboard for tracks you create and use the times to seed a race or tournament. After completing a single class race you have the option to log your times for others to see on the leaderboards. Simply click the button and then brag to your friends about it!
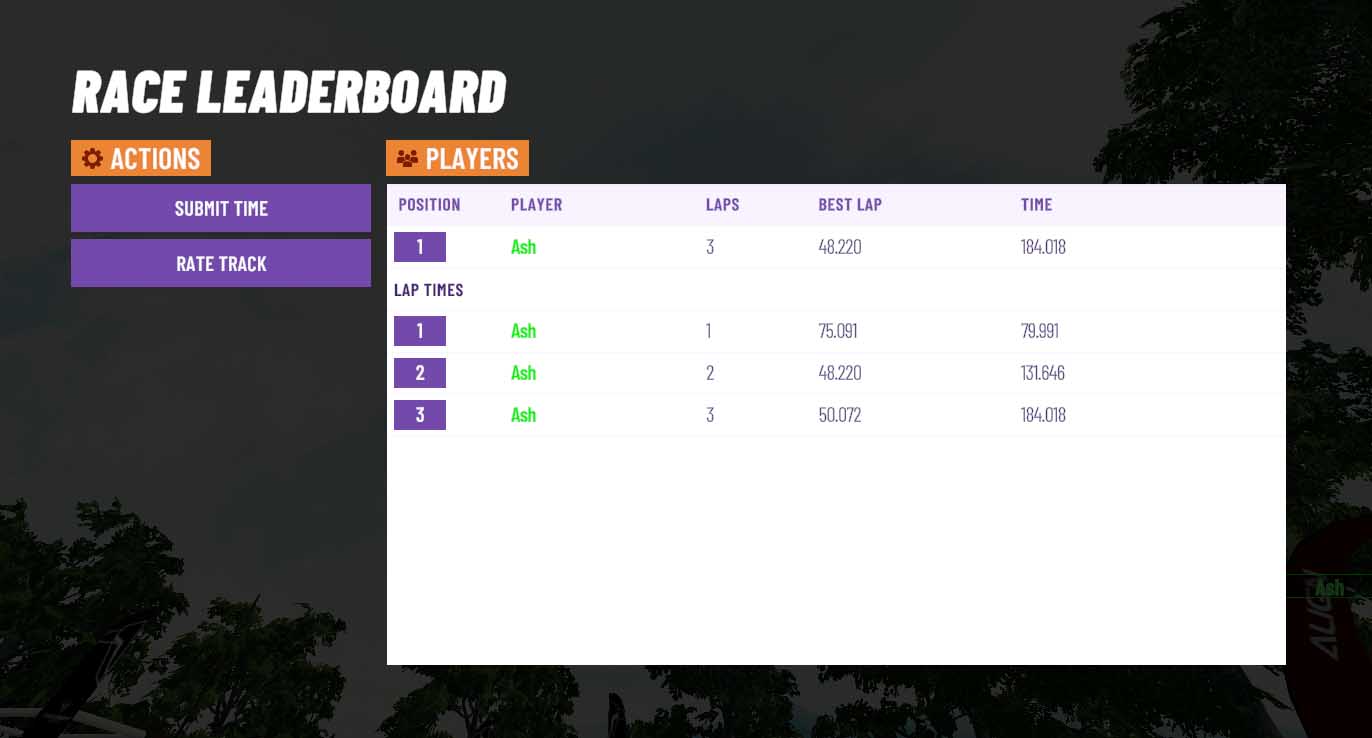
Upload button for best lap time
Nemesis Mode
Nemesis Mode pits you against other racers' best times on the leaderboard in the single class three lap format. This gives you the feeling of racing in a single player experience pitting you against racers achieving race times similar to your own. On a race start the ghost data of the pilots 2 positions above and below you on the leaderboard are loaded if the data is available. The player name and lap time of each pilot is displayed on the left side of the screen. At the end of a race pilots that you have beaten will have a red skull (pictured below, left) next to their name and time. Pilots that are faster than you will have the checkered flag (pictured below, centre) next to their name. Upload your time if it is faster and press the reload button (pictured below, right) which can be found next to your own name under the list of nemesis pilots in order to see the next set of pilots and times. The nemesis list is reloaded at the beginning of each race. You must upload your new fastest time in order to race against new pilots.
If you beat all pilots and upload a time then nemesis will automatically give you new (faster) pilots at the next race start without hitting the reload times button.
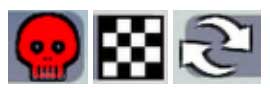
Nemesis Icons, from left to right: nemesis beaten, nemesis finished, reload times.
While in nemesis mode, the leaderboard will allow you to download, view and race against the nemesis data of any player with nemesis data on the leaderboard. The buttons pictured below will appear next to each player in the leaderboard that has uploaded nemesis data.
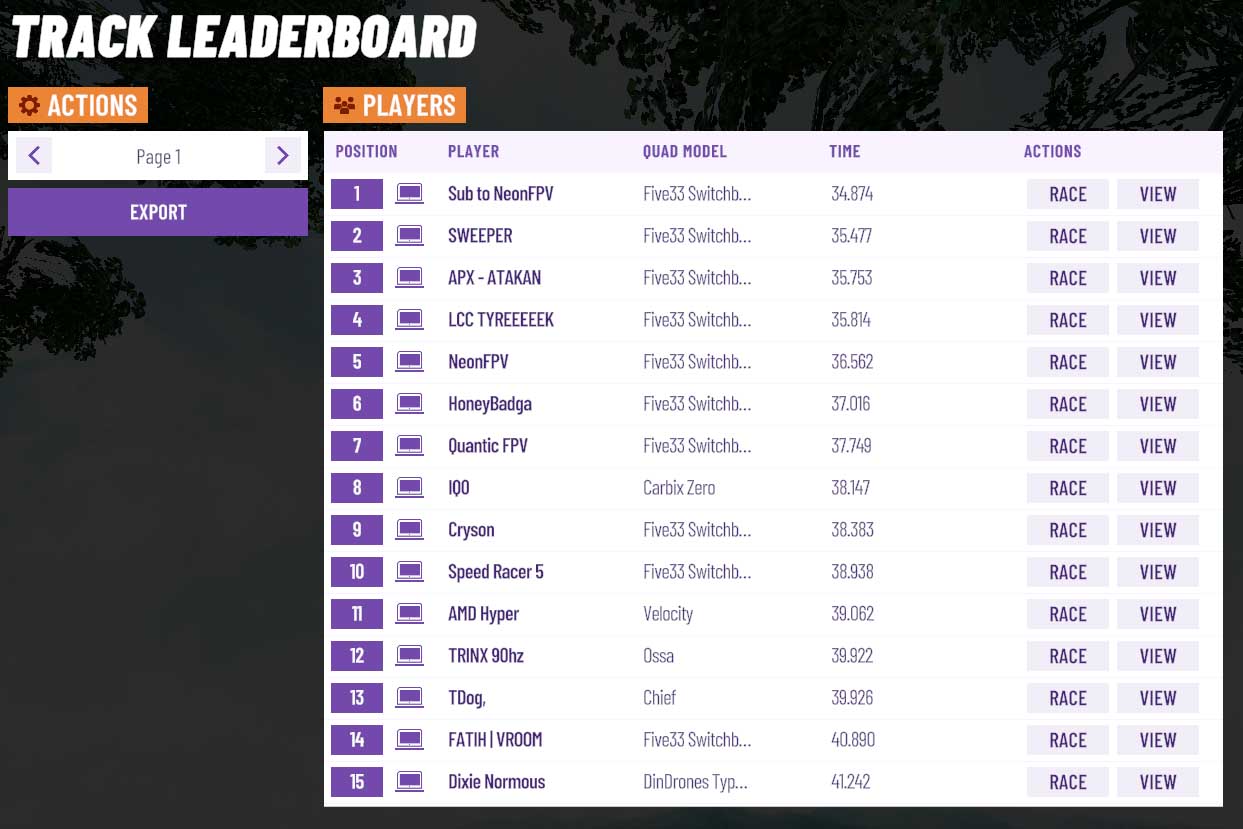
The race button will load the player's ghost data and allows you to race against that player one on one. The view button will load the data exactly the same way but will bring up the ghost data management menu in which there will be a new button that allows you to watch the nemesis flight in first person using the same playback speed options. Starting a race after pressing the view button will begin a nemesis race against the loaded player. To unload the selected player you can click on another player on the leaderboard to race or press the reload button (described earlier in this section) to get the 4 times closest to your uploaded time.
The race line visualisation tool can be used in nemesis mode allowing you to analyse yours and others flight lines and use them as a guide during a race. This tool creates a line that follows the approximate path of the first lap using nemesis ghost data.
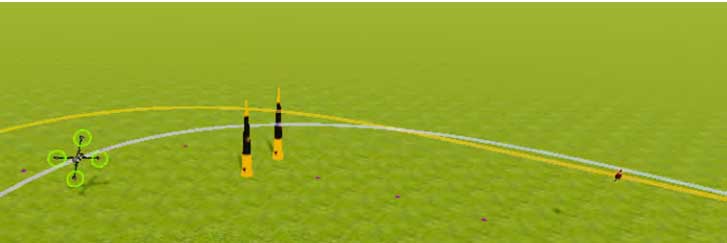
Race Line Visualisation
Click the race or view button on a time on the leaderboard and then press the F1 key to produce a line visualisation of that ghost's first lap. The colour of the line gradually changes from cyan at the start of the lap to magenta at the end. The line does not refresh when you load a new nemesis allowing you to continue following the race line of your choosing. To hide the line press the F1 key again. The line will use the nemesis data of the currently loaded player when shown.
Once you have flown a race, you can press the F2 key to produce a line visualisation of the first lap of your last race. The colour of the line will change from red at the start to yellow at the end. In order to refresh your race line press the F2 key twice which will hide and then reload the line using your last race.
The line analysis slider, pictured below, can be enabled by pressing the F3 key when your own race line is visible. This slider will appear above the nemesis times on the left side of the screen. Moving the slider will show you where you were on the race line at that point in time in the lap. If you have another player's race line the slider will show you where that player was in relation to your time. An example of this can be seen in the image above, as the quad approaches the first gate the nemesis quad had already passed through.

Line Analysis Slider
Multiplayer
VelociDrone supports racing online for up to 7 players in a session. Anyone can host a session and sessions are open to all owners of VelociDrone.
The host of a session owns a “room” on one of our professionally hosted servers. Players always connect to our professional online servers with the “host” only controlling the session rather than actually hosting it on their own machine / broadband connection.
When entering a multiplayer session, after selecting a model you will be taken to the following screen:
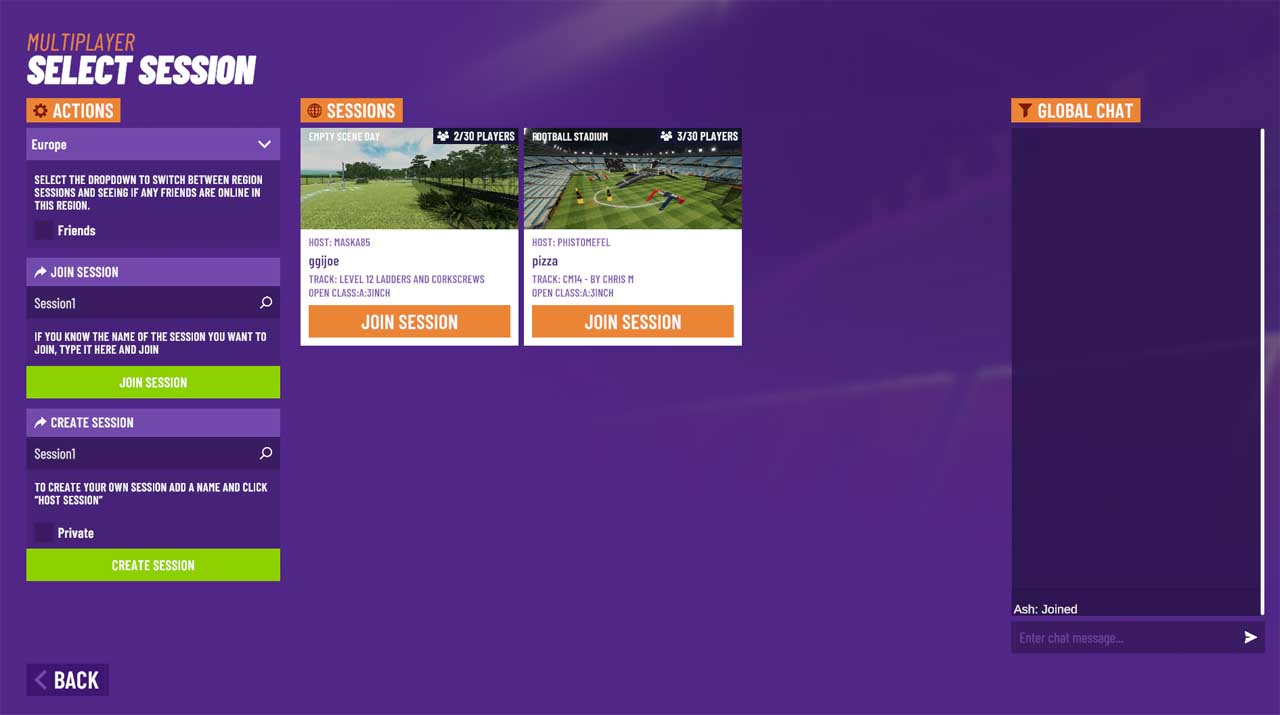
Multiplayer Menu
There are many session servers across the world and you will need to select the one that is nearest to your area for the best online performance. Select your region server using the server region panel in the top left of the multiplayer options menu. You will only be able to connect to sessions that have been hosted in your selected region.
Hosting a Session
The create session panel allows you to create a lobby on the selected server region. Enter the name you wish to give your session in the text box. Session namesmust be unique so please change the default session name to something unlikely to be used by other session hosts. If you create a duplicate session you will be notified and the hosted session will fail. If left blank the session will be assigned a name beginning with “Session” followed by a random number.
A session can be started by a Race Manager as a hidden session by enabling the hidden session toggle. These sessions are not shown as publicly in the sessions available panel. Players can only join a hidden session by name using the join session panel or through the friends session list. If the Hide my ID from Friends option is enabled, friends will be unable to see the hidden session in their list.
The session join method setting in the main settings will determine the restricted status of joining players. In a restricted session the player model is not loaded in until the race manager presses F4 or a race begins / ends. This minimises the effect of loading joining players on racing. Unrestricted sessions allow players to load in and fly immediately. A sessions join method is set on creation of the session and does not change regardless of race manager switches and their session join method setting.
The host session button will take you to the track selection screen where you choose the scenery, track and game format. Once the session is created the host is the race manager and controls all of the racing, starting/ stopping races, changing scenery / tracks and having the ability to control who is in the session.
Joining a Session
The session list will display all open sessions in the selected region. The information displayed for each session includes: the session name, the name of the race manager, the current scenery, the current track, the number of players in the session, the lock status of the session, the race format and the type of quad the race manager is using. Enter a session on the list by clicking the join session button on the end of the row. A session with a red lock icon has been locked by the race manager and cannot be joined. Hidden sessions will not appear in this list.
Sessions can be joinedby typing in their name and pressing the join session button at the top of the multiplayer options menu in the join session panel. A hidden session can be joined using this method. You must be within the same region as the session in order to join.
The find friends session toggle will display all friends sessions both open and hidden. To allow your friends to see your session when they enable the toggle you must have the Hide my ID from Friends setting disabled.
If you are joining an online session then you will not select the scenery, track or number of laps as these will be sent to you over the network by the session host.
The chat at the bottom of the multiplayer options screen will show players connecting across all regions. Players can chat with any other player in the multiplayer options menu regardless of which region they have selected.
Race Manager Controls
As a host of a session you are the Race Manager. This provides you with certain privileges which are as follows:
Changing scenery / track / race settings is all done through the same in-game dialog and accessed via system menu or ESC key.
In Game Scenery / Track / Lap change
The in-game dialog functions exactly the same as the main menu in that you select the scene / track, race mode, race format and lap count that you wish. You don’t need to change all of them, you can change the number of laps or the track in the current scenery. All players in a session with you will automatically change to match.

Starting and aborting races is done by pressing the start button above. Once pressed and a race has started the button will change to the following:
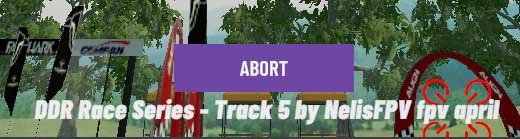
Pressing the button when in this state will abort a race.
The Race Manager is responsible for controlling the players in the session and can access the player list using the player list button in the sidebar:
This Button opens the player list dialog. For players who joined the session they can also access the player list but they cannot access the buttons to kick players from the session. The kick button is provided to allow Race Managers to remove problematic or abusive players.
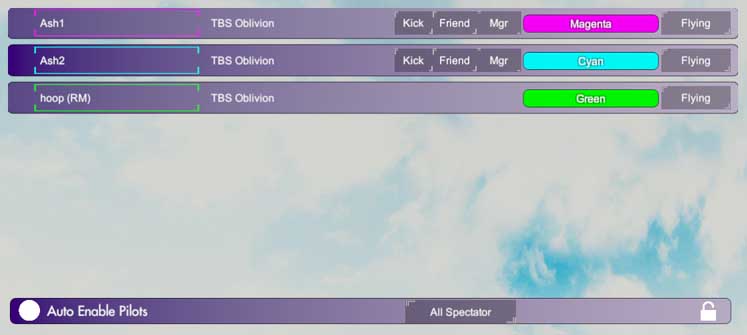
Player List with Kick Buttons
Auto enable will set any joining player to flying if there are not enough flying players for a full race or game. Joining players are set to spectator if there is a full number of flying pilots. When a flying pilot leaves, auto enable will set a spectator to flying. Turning off auto enable gives the race manager full control over the flying and spectator status of each player.
The “Mgr” button will pass the role of race manager to the selected player. In the event the new manager does not own the current selected track, the “Pylons” track for the current scenery will be loaded.
The lock icon, seen in the bottom right corner of the player list above, locks the session preventing more players from joining. This allows races and games in progress to go uninterrupted by joining players. The icon will change to the following red icon once the session has been locked.

As a race manager all of the above is the additional functionality provided over and above what you get as a player who has joined a session.
Host Migration
If the Race Manager leaves the session or has an unfortunate loss of internet connection then a race manager migration will occur. VelociDrone will pick a new race manager from the remaining players and notify them as above that they are now the new race manager. When this happens any race currently in progress is aborted and the session will migrate to a known state.This involves loading the pylons track if the new host does not have the current track in their database and establishing the new race manager with the controls they need to run the session.
If the old race manager rejoins the session they will be an ordinary player and the new race manager will maintain control of the session.
Track Sharing
Track sharing in VelociDrone is automatic or viral as we like to call it.
If you create a new custom track in the track editor and then host an online session on that track then anyone joining your session will automatically be sent your track over the network when they join. So effectively you can race on the new track straight away without ever having to do anything other than start a session with that track loaded. You could also change to that track within a session and similarly it will be sent over the network to the players in the session.
If you join a session and race on a new track that you like then you can save it for playing on later or for hosting with other people.

The save button in the sidebar allows you to save a track and give it a name of your own. You can notsave the official tracks supplied with VelociDrone, it only works for custom tracks .This button is not available to the Race Manager.
Chat
The chat box can be accessed by pressing the C key but by default will be shown in multiplayer sessions and hidden in single player sessions. The C key toggles its visibility on/off.
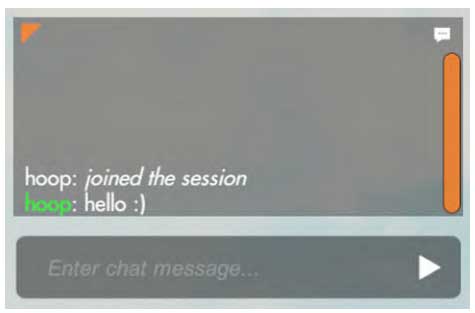
Chat Box
You can click in the input field and type your message for all other players to see, receive responses, session information (joiners / leavers). There is a scrollbar to look back through the chat and also a resize tab top left to change the size of the chatbox. The chat icon in the top right of the box will disable / enable keyboard shortcuts when pressed to prevent triggering a shortcut when attempting to type in the chat box without the input field selected. You can also click on the top of the chatbox and drag to move it around the screen to a position of your choice.
Track Editor
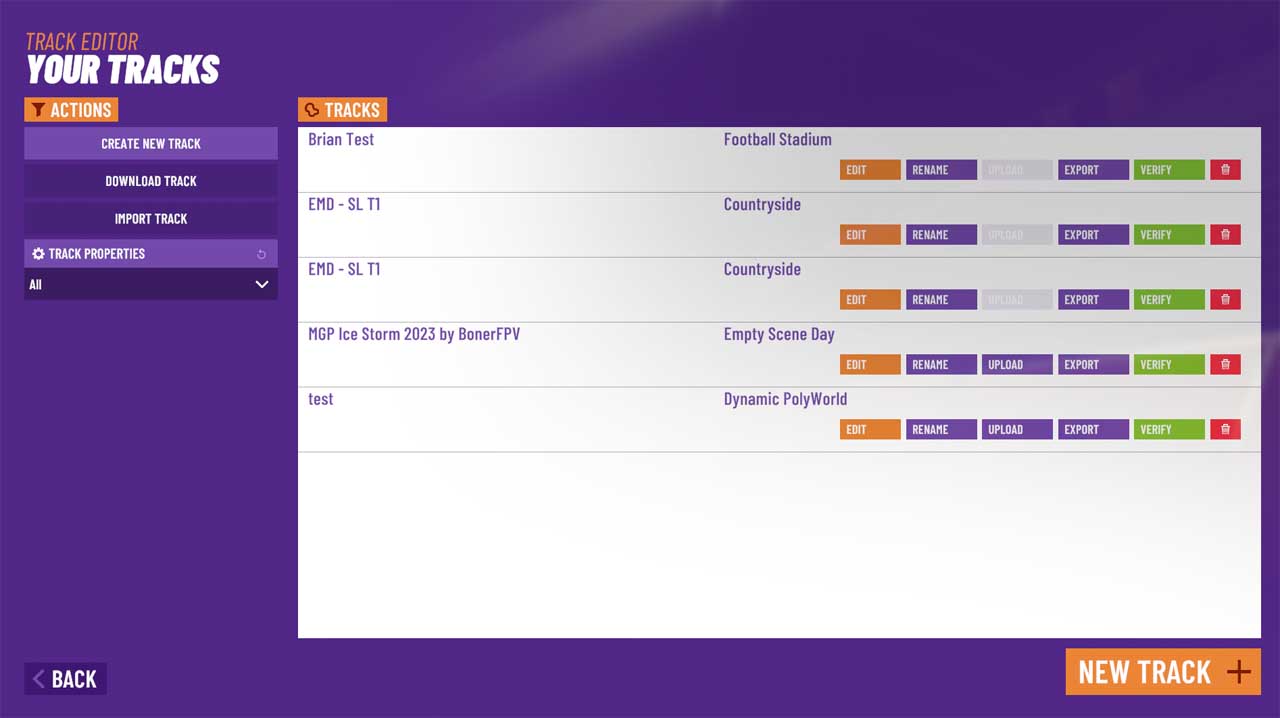
Track Editing Selection
The initial screen shows you your custom tracks (if you have made or saved any) plus offers the options of deleting, renaming, editing, uploading or exporting already created tracks. Uploading a track posts it to the online track databasein which all users uploaded tracks can be found. Exporting a track creates a file in the “Documents” folder for Windows users and the “Home” folder for OSX and Linux users. The “Import Track” button at the bottom of the Track Editing Selection screen can find and import a track file in the “Documents” (Windows) or “Home” (OSX / Linux) folder by pressing the “Import” button on the track of your choosing from the list presented.
Clicking the “Download Track” button at the bottom of the screen will take you to the list of user uploaded tracks. The panel on the left provides you with options to filter through the user tracks. You are able to search by player name, track name, scenery and difficulty with the option to order by date (newest first) or by rating (total ratings descending).
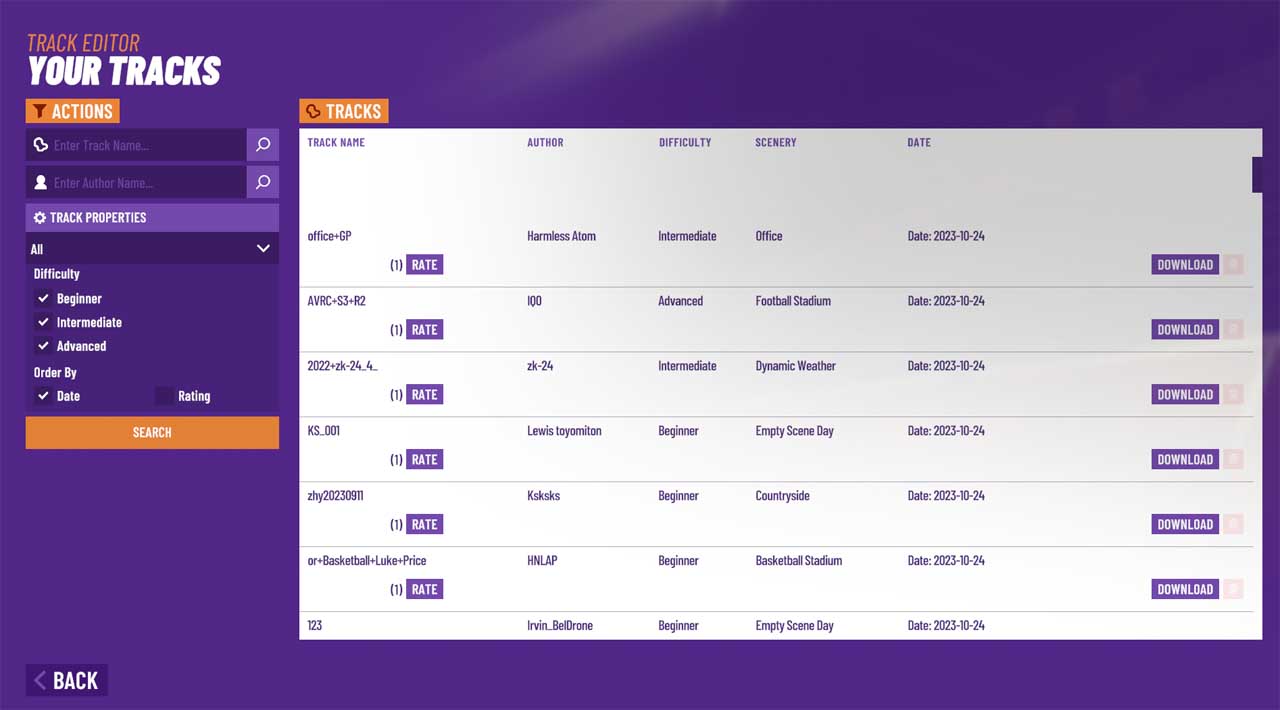
Download Track Menu
Alternatively you can click “Create New Track”to start on an empty fresh scenery. Pick a scenery from the list and press the select scenery button in the bottom right of the screen which will take you to the Track Editor.
Editing a Track
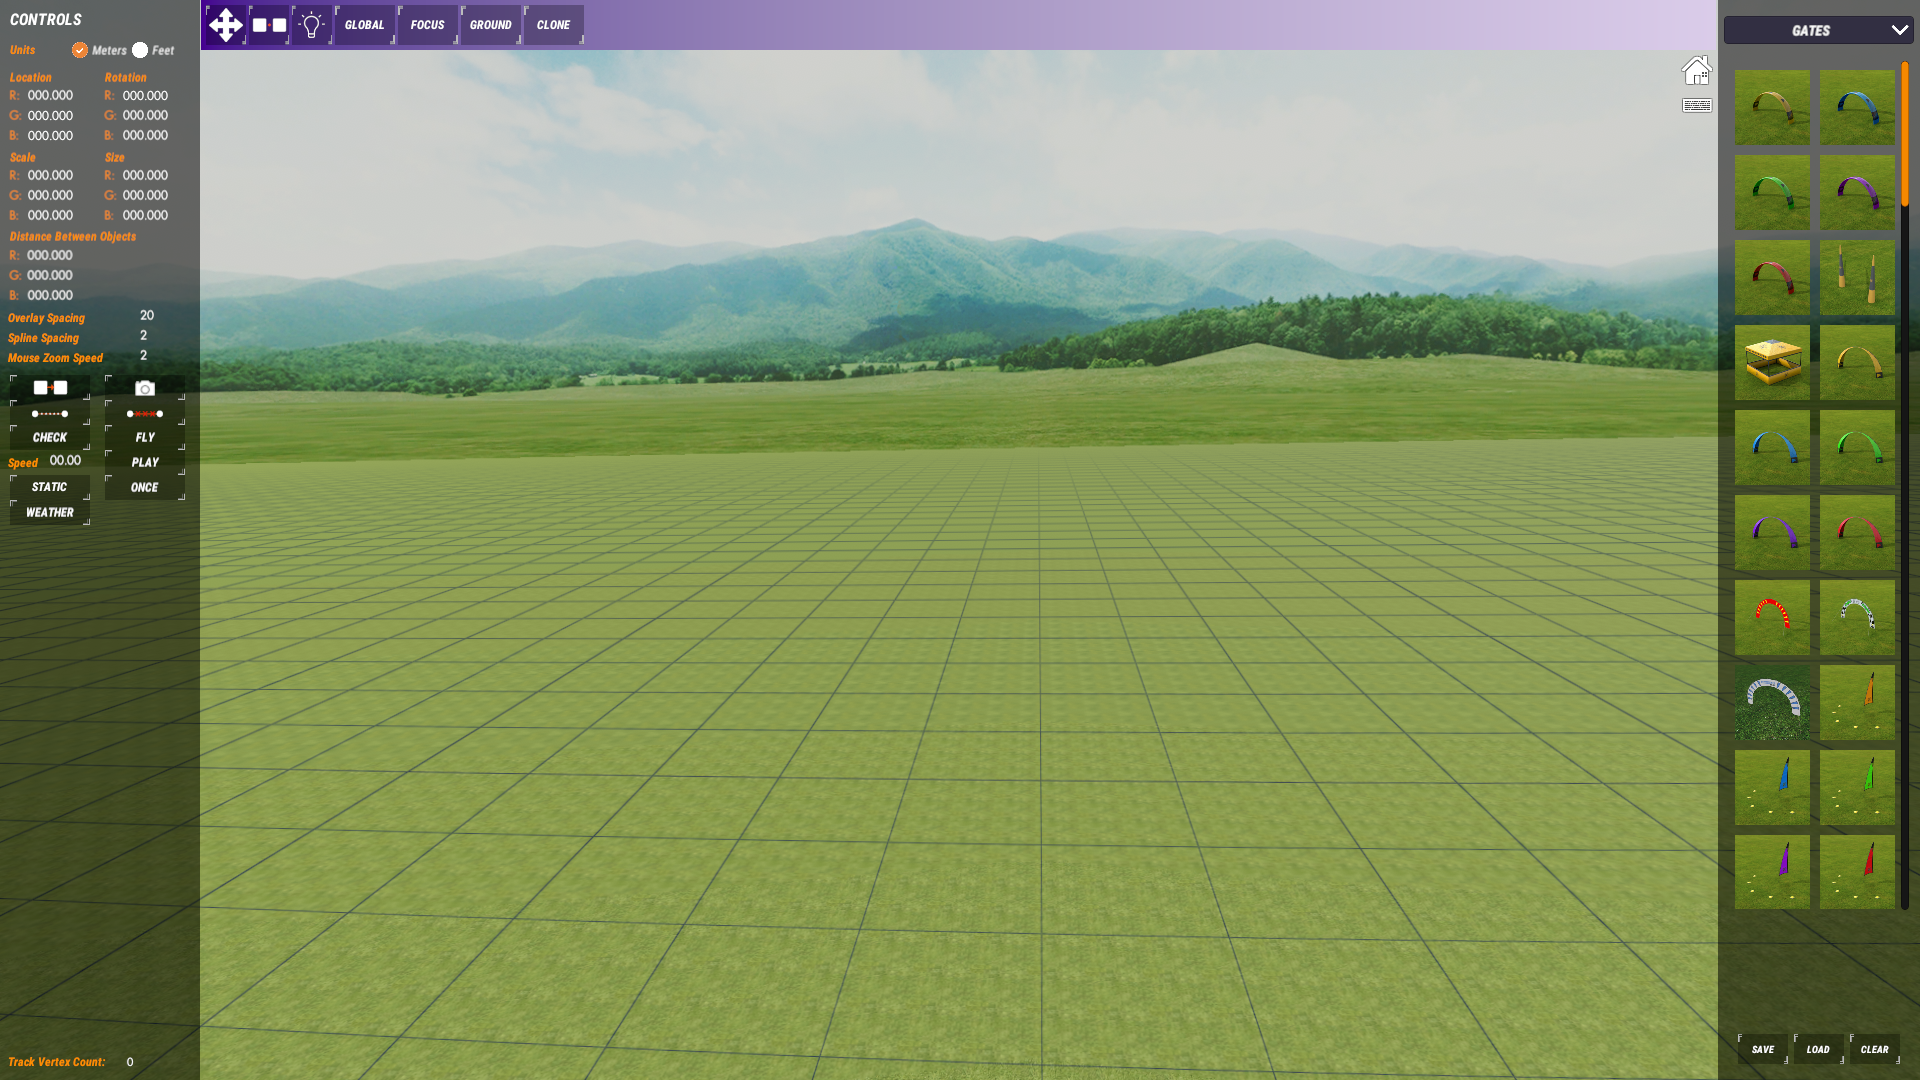
Track Editor
Once inside the track editor the track editing interface becomes available. This is one of the more complex areas of VelociDrone and as such we have made a playlist of tutorial videos on how to use the track editing functions :
Track Editor Tutorial Videos Playlist
Model Setup
The model setup dialog is accessed from the side button:
This dialog is dependent on the ‘Flight Controller’ you have selected in the ‘General Settings’ panel.
Legacy Flight Controller

Legacy Flight Controller Dialog
Once in model setup you are presented with a tabbed panel containing all the setup information for the currently selected model you are flying.
Each TAB provides different elements of setup.
The basic tab contains rotation rates, exponential settings and so forth. Additionally, depending on what bank you have selected you may have other settings you can adjust such as maximum angle (attitude / rattitude modes) and crossover point (rattitude mode).
If you want your quad to roll / pitch faster, then increasing the rates on the basic tab will achieve that. Exponential changes how the sticks feel (soft control in the middle moving to faster control towards the extremes).
The angle setting controls how far the attitude mode will allow you to roll / pitch before it limits the rotation of the model.
The crossover point changes where the attitude mode changes to rate mode based on control stick offset amount.
Any changes you make in this dialog are updated instantaneously to the model but will not be saved unless you click the save button.
BetaFlight 4.2:
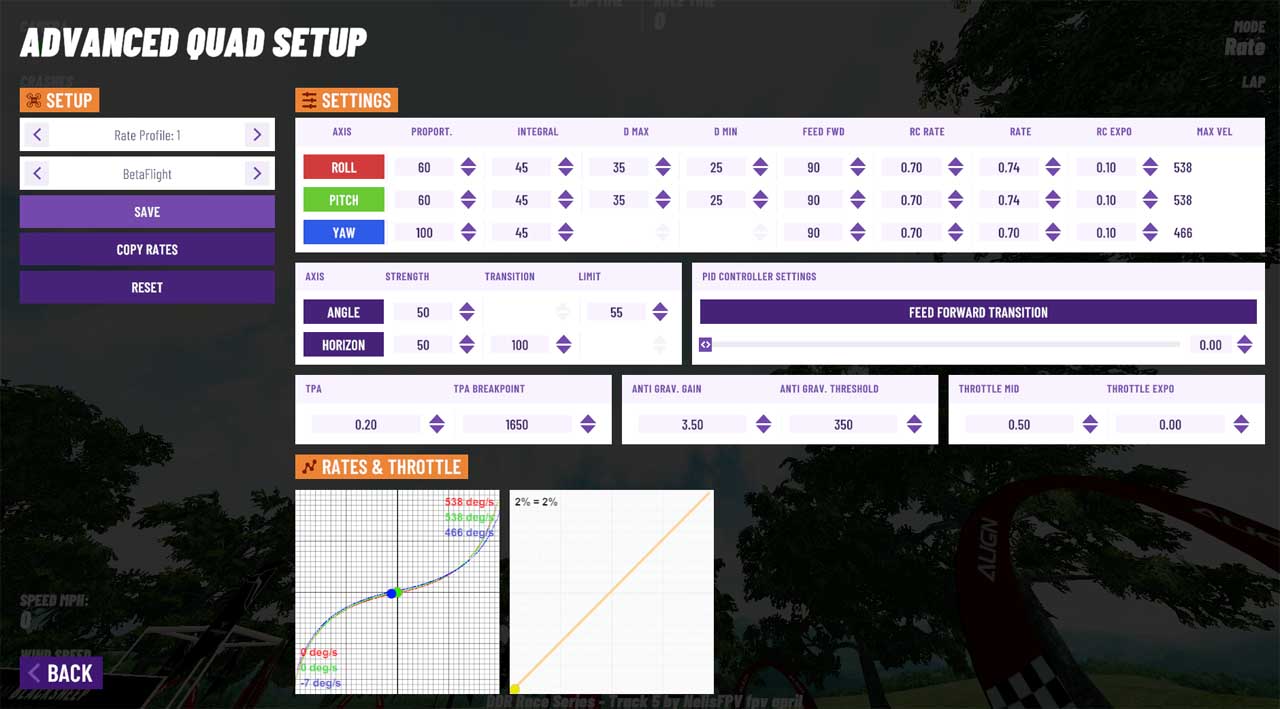
BetaFlight Flight Controller Dialog
The performance of the BetaFlight Controller is identical to the popular controller of the same name used by many experienced FPV pilots. This dialog controls all the same settings found on the real device. You should refer to the originalBetaFlight documentation for details of the settings. These documents can be found at: https://github.com/betaflight/betaflight/wiki.
There are another 4 different rates types that Velocidrone supports for those that are familiar with them including: QuickRates, Actual, KISS and FL1. You can switch between the rates types at the top of the BetaFlight Configuration Dialog. When you switch between rates types your rates setup in the current type will be converted to the new rates type.
Velocidrone allows you to set up three different rates profiles which you can change at the top of the rates configuration. This allows you to configure your model for extended sessions racing across different scenes and track types. The models introduced with the Micro premium content pack feature a configuration on rates profile 2 which replicates the Project Mockingbird set up for angle mode (do not try and run this rates profile in rate mode as it will not work).
The copy rates button will display a dialogue showing the other models you have added. By selecting a model and pressing the “Copy Rates” button the profiles of the selected model will be copied to the model being used in the session. The reset button will restore the rates profile to defaults. The save button must be pressed in order to keep any changes made to the rates setup.
Bank Selection

Bank Display
The bank selected is what mode your quadcopter is running. There are several provided and can be changed by pressing the numbers 1 through 4 atthe top of the keyboard or left click on the bankdisplay box in the top right corner of the screen to cycle through the bank options (pictured above). The bank options below are in order of the keyboard shortcut required to switch to each mode (1 to 4).
Angle: Self levelling mode, not really ideal for fast racing but good for beginners to get acquainted with the controls.
Horizon: Self levelling but at 80% of stick throw the self levelling deactivates, allow flips / rolls etc.
Rate: Generally what is used for racing, no self levelling at all.
Acro: For aerobatics, much faster roll / pitch rates are available in Acro mode(only available when using the Legacy flight controller).
PID Tuning

PID Settings
We do not recommend playing with PID settings unless you know what you are doing and understand PID controllers. We recommend reading or watching through an online tutorial regarding PIDs before attempting to adjust the VelociDrone models settings.It is very easy to get it in a mess and ruin the flight dynamics. By default all the models come with a setup that is race ready, it can be tuned to taste of course but it should not need much tweaking.
Throttle Curve Adjustments

Throttle curve adjustment
Change how the throttle comes in based on your stick position. This can be very useful for tuning gamepads where you may want to fine tune the sprung loaded centre position of the gamepad to allow the quad to be falling gently rather than half throttle.
TPS / TPA
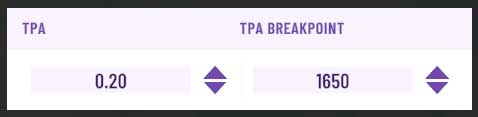
TPS / TPA adjustment
These settings allow you to adjust the PID settings based on throttle position. In general you want to reduce the rates with higher throttle and possibly increase them a little at lower settings. TPS / TPA is a complex area and we recommend reading up about this online before attempting to change it significantly.
Combat
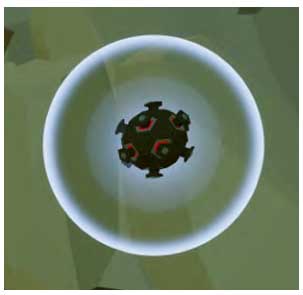
Combat is a multiplayer exclusive gamemode made available when you purchase the Combat premium content pack. You can use any quad to play combat but we designed and created the Dominator quad (pictured below) specially for combat. With the size of a beast class and the speed of a micro class, the Dominator is an easier target than any of the other models in Velocidrone. However, FPV combat is much harder than it looks. Your aim and ability to predict your opponent's movements are put to the test against the unrivaled maneuverability of a quad all whilst having to stay airborne and not get taken out yourself. Combat is a whole new challenge.
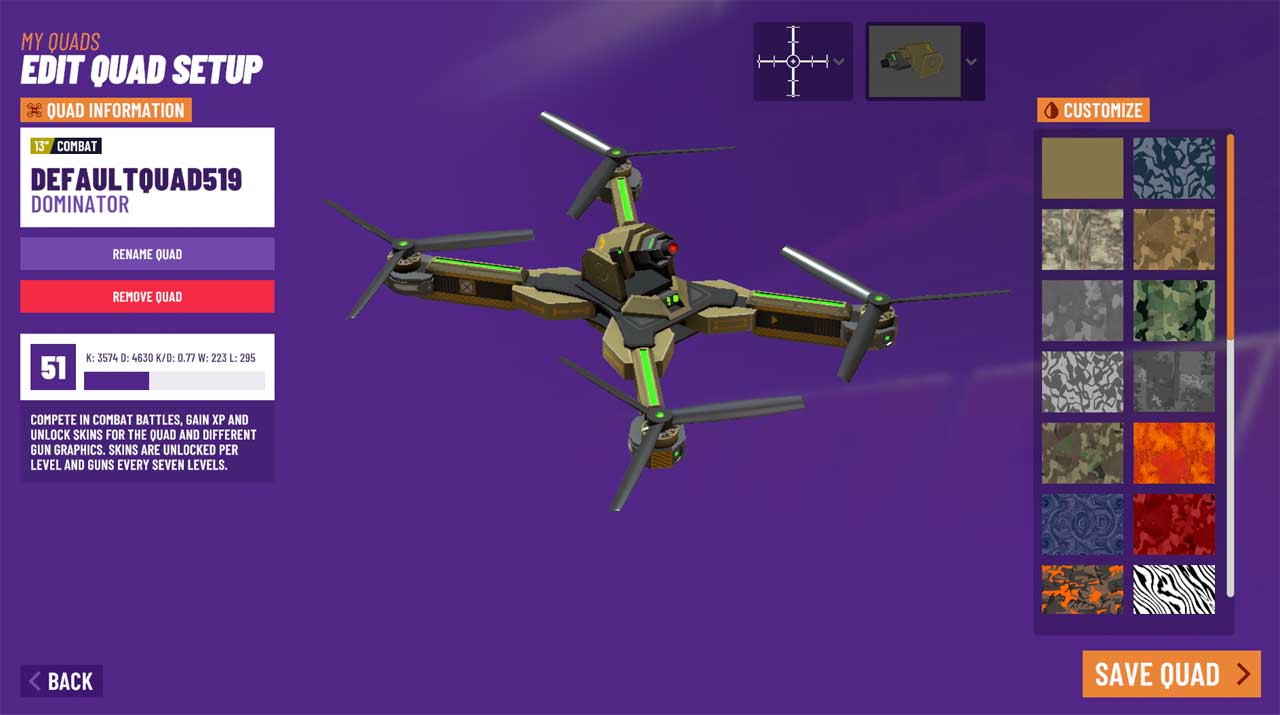
The Dominator Quad in the Model Selection Screen
The Dominator has 30 skins to choose from that change its appearance. Skins are earned by playing combat to gain enough experience to level up. As you climb in levels the skins become more flashy and detailed so you can really show off your combat prestige! To select a skin, click on the “Skins” button on the right of the screen under the “Edit Settings” button when you have the Dominator quad selected.
The Dominator can be further customised with 6 turrets to choose from as you grow in experience and levels. Every seventh level you will unlock a new turret which changes the appearance of the Dominator setting you further apart from the rest. To change the Dominator turret click on the turret dropdown which can be found at the top of the screen to the left of the skins panel (pictured below).
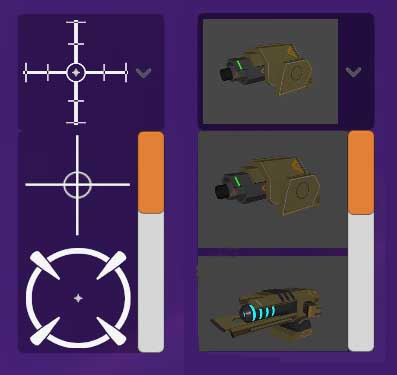
Dominator Turret Dropdown and Crosshair Dropdown
When you begin a combat gamemode the crosshair is auto enabled. If you have not selected your crosshair of preference it will use the default crosshair (see above, crosshair at the top of the dropdown). You can choose your crosshair from the dropdown next to the turret dropdown when you are in the model selection screen and have the Dominator selected. Alternatively, if you are in a lobby and the crosshair is enabled you can hold the Shift key and press the H key to cycle through the available crosshairs. You can toggle the crosshair on and off by pressing the H key.
Level and Stats Display
When you have the Dominator selected in the model selection screen your combat level and stats can be seen at the top of the screen to the right of the models list. The badge on the left changes when you level becoming more decorated as you reach higher levels. The number to the right of the badge is your level. The XP bar shows the total experience needed to reach the next level, the blue bar shows your progress to the next level. Below the level and experience are your player stats. “K” shows your total kills or knockouts. “D” shows your total deaths or downs. “K/D” shows your kill to death ratio the higher the better. “W” shows the total combat rounds you have won and “L” shows the total combat rounds you have lost.
To play combat you must be in multiplayer. When creating a combat session be mindful of the model you have selected as players will only be able to join if they are using the same model as you. We enforce all joining players to use the same model as the host to ensure a level playing field in terms of model performance. Combat game modes are only available on the Polyworld scenes: PolyWorld, Combat Canyon, Empty PolyWorld and Dynamic PolyWorld.
Power Ups
At the core of combat mode you have the power ups. Glowing icons that imbue your quad with the power to shoot, fly faster or fend off damage. Power ups can be identified by their unique colour and icon. Each power up is listed and explained in detail below. Learn how best to use each of these to dominate in your combat lobbies.
In order to use the power ups ensure you have decided which fire method to use. You can set up a button or switch in the controller setup for “Fire” which when pressed will use your stored power up. Alternatively, the X key or the spacebar can be pressed to use your power up. Holding the button will allow for continuous firing. Crashing or being knocked out by a player will remove any power up you currently hold.

Random Power Up and Ice Shot
The random power up will give you one of the following power ups: ice shot, pyro shot, volt shot, power shield or homing shot. The power shield can only be obtained from a random power up when playing deathmatch, team deathmatch or control. In deathmatch game modes there is a 75% chance to get one of ice, pyro or volt shot from a random power up. In other game modes there is a 90% chance to get one of the aforementioned three. This is a good power up to get when you are in the midst of a fight and need a power up quickly.
Ice shot is a slow firing but powerful weapon. It will knock out a player with a single hit. Picking up ice shot will give you 8 rounds that fire at 2 shots per second. The shot speed is faster than any of the other shot power ups which makes it harder to master than pyro and volt shot as you have to adjust how you aim and predict your opponent's movements.

Pyro Shot and Volt Shot
Pyro shot is a faster firing weapon but takes two hits to bring down an opponent. When you hit a player with pyro shot they will receive 100% prop damage and the Dominator will begin to smoke to indicate that they have been hit. You must hit a quad inflicted with the pyro shot effect again to knock out the player. A player that has been hit with pyro shot can heal or repair their quad by flying through a recharge gate or a repair pack. Pyro shot gives you 20 shots and has a fire rate of 4 shots per second.
Volt shot is the fastest firing weapon at 4.4 shots per second and has the largest ammo pool of 25 shots. Similarly to pyro shot you need to hit an opponent inflicted with the volt shot effect again in order to bring them down. A player hit once with volt shot will have their battery output reduced and the Dominator will begin to smoke. A repair pack or flying through a recharge gate will remove the volt shot effect.
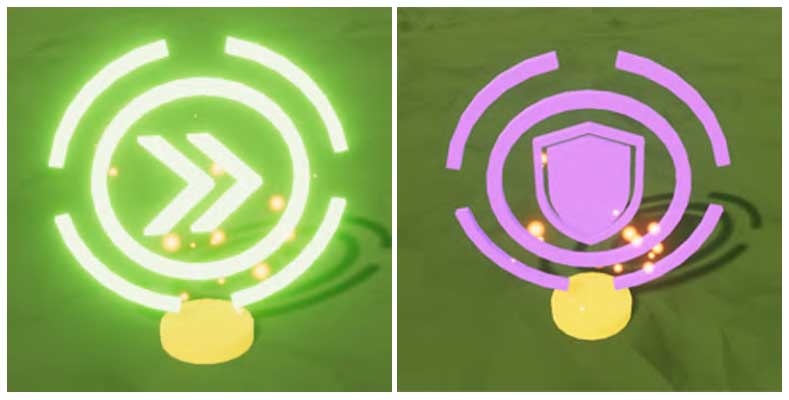
Speed Boost and Power Shield
Speed boost is available in most game modes with the exception being both deathmatch modes. This increases the voltage output of the battery and motor torque whilst reducing drag which allows the Dominator to reach up to and over a 50% increase in speed. Speed boost overrides the effects of volt shot allowing you to outpace attackers.
Power Shield active on a player
The power shield provides you with protection against all of the offensive power ups. You can store up to three charges of the power shield which is indicated at the bottom left of the combat HUD. Each charge will protect you from one hit. You can find this power up in control and both deathmatch game modes.
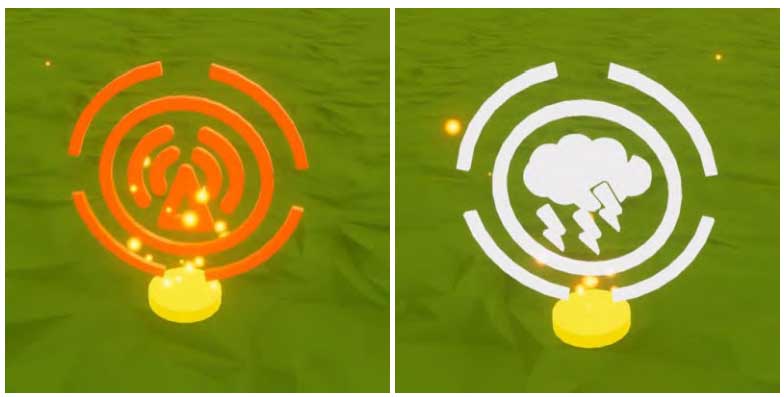
Signal Jam and Thunder Wave
Signal jam is one of two powerful area of effect power ups. All enemies within a 20 metre radius of the point of fire will experience camera interference. A huge particle particle effect of arcing electricity and a blue aura emit from the users model. Once you use signal jam your quad is immediately given the volt shot power up allowing you to pick off your surrounding enemies while their vision is imparied. Enemies under the effect of signal jam are indicated by sparking electrical particles on their model.
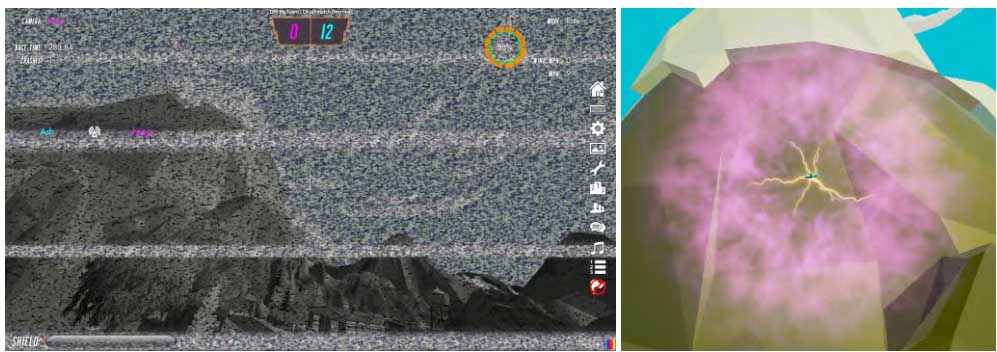
Signal Jam interference and Thunder Wave particle effect
Thunder wave is the second area of effect power up acting as a wide range volt shot. The user emits a particle effect similar to that of signal jam, arcing electricity and a purple aura. All enemies within a 20 metre radius are afflicted with the effect of volt shot. The user is immediately given the volt shot power up. Enemies that were hit with the initial effect can be knocked down from a single hit with volt shot unless they had a power shield active. Weakened enemies will be indicated with the smoke effect.
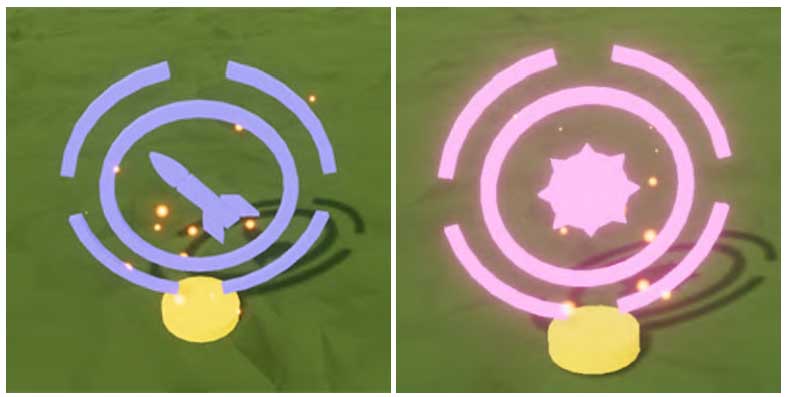
Homing Shot and Trip Mine
Homing shot is a lock on missle that will knock down an enemy on hit. The shot will only lock onto an enemy if you are looking in their direction. If a homing shot has locked onto you the crosshair in the centre of the screen will turn red and a high pitched beeping noise will play. A target has time to react to a lock on and can take evasive action to dodge the shot as it has a set turning speed. The turning speed of homing shot is decreased in higher difficulties to reduce its power.
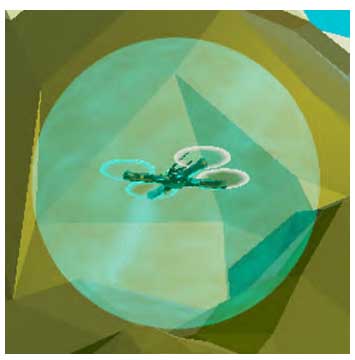
Deployed Trip Mine
Trip mine will drop a mine at the point of fire. The mine is inactive for 1.2 seconds after being placed after which it activates and can be triggered. An energy field surrounds the mine which indicates the proximity that will set off the mine (see below). If the mine is placed in a way that the field or the mine intersects with an object, the terrain or a combat flag / goal / control zone then it will detonate after the 1.2 second activation delay. The trip mine has a 5 metre explosion radius that will knock out any player, friend or foe, unless they are equipped with a power shield. Trip mines can be set off from range by hitting them 3 times with ice, pyro or volt shot. The trip mine is a neutral weapon as it can hit any player regardless of team or who placed it. The trip mine can be a useful defense tool but fly with caution when placing them as you may end up taking out yourself or a teammate.
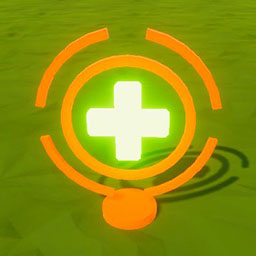
Repair Pack
When you have been hit and are under the effect of volt shot, pyro shot, signal jam or thunder wave your quad will be slower and you will be easier to take down. A repair pack will remove any effects on your battery, props or camera and restore your quad to full strength by removing the effects and charging the battery to full.
Combat UI and HUD
The crosshair is placed in the centre of the screen and indicates where your shot will hit. Be sure to account for your target's speed and direction as shots have a travel time. When using the “Circle” ammunition display, a ring will appear around the crosshair indicating how many shots you have remaining of your currently held power up.
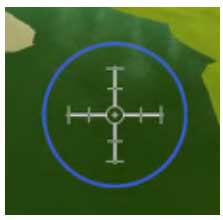
Crosshair with circle ammunition display
Your currently held power up is shown on the left of the screen along with the number of charges or shots you have left. Not all power ups are held as the power shield, speed boost and repair pack are instantly activated on picking them up. Instinct activating power ups do not replace or remove your currently held power up but picking up another held type will replace your held power up.
Below the power up display on the left is the game notification feed. This is where game updates will be displayed, primarily hits and deaths of players. A notification will display when one player hits another with a power up, the power up used and whether the player was knocked out as a result indicated with a skull icon. In game modes that use flags flag notifications will appear in the feed to show which player has interacted with the flag. There are a multitude of other flag status notifications keeping players informed about the flags at all times.

Ammunition display and game notification feed
The shield bar is found on the bottom left side of the screen in game modes where the power shield is enabled. The bar is empty by default and when you pick up a power shield will fill one third. You can store up to 3 charges of the power shield which you can keep track of using the bar. When using the “Line” ammunition display, a line will appear above the shield bar to indicate the number of shots remaining of your currently held power up.

Shield bar with line ammunition display
The score is displayed at the top of the screen in the centre. In free for all game modes (deathmatch, king of the hill) your score, indicated by colour, will always be displayed alongside the top scoring player. If you are the top scoring player then the next highest scoring player is displayed. In team game modes the team scores are displayed in their respective colours. The scores of individual players can be found in the scoreboard which can be shown by pressing the tab button to toggle in on and off.
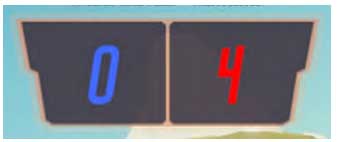
Score display
The scoreboard shows each player and their colour. The number in orange is the number of points that they have accumulated which will hold a different meaning depending on the game mode. In deathmatch game modes and king of the hill the number is their game score. In other team based games the number represents their team contribution score. The number at the top of the teams rankings will be awarded more experience as the most valuable player. The 3 numbers displayed afterwards are the kills, deaths and hits that each player has accumulated.
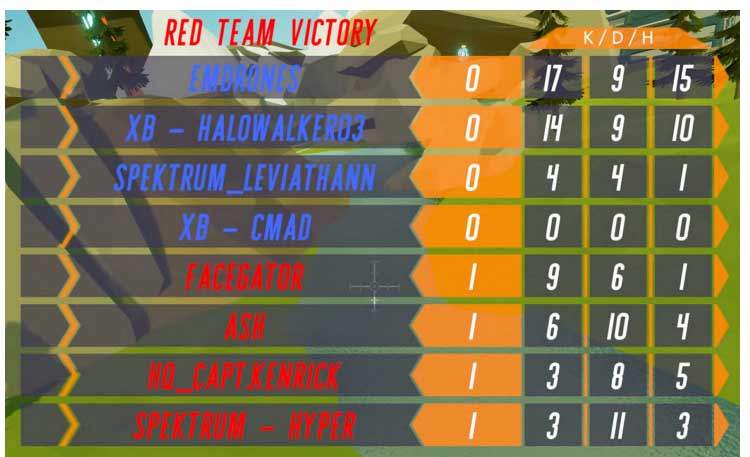
Scoreboard at end of game screen
The state of the flags and zones can be found at the bottom centre of the screen. The capture progress of each zone is shown at all times when playing control. The bar colour indicates which team is capturing when the zone is neutral. The zone icon is white when the zone is neutral and when owned by a team the icon is the same colour as the owning team. When a zone is captured it locks and the zone icon will change to a lock icon. Whether a flag is home, dropped or carried is constantly displayed in game modes that use a flag. When it is picked up, dropped or returned a status message will appear in the centre of the screen above the crosshair.
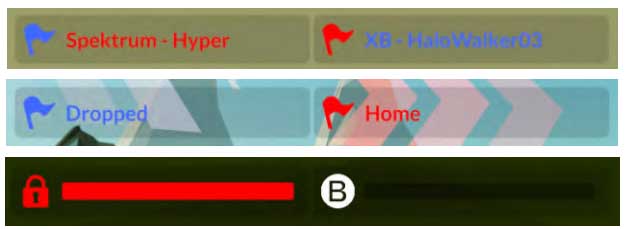
Flag and Zone status indicators
A flag indicator is placed on a player carrying the flag that can only be seen by players that belong to the same team as the flag carrier. This notifies a team which player is carrying the flag and where they are allowing a team to coordinate and protect their flag carrying teammate.
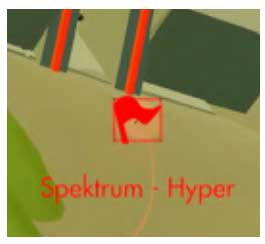
A team member carrying the flag highlighted by player indicator
While in spectator mode the players are listed on the left of the screen. Their combat level, currently held power up and number of shots remaining are displayed alongside their name and colour. Right clicking on a player name in the list will show you their first person view. Left clicking will change the third person camera to focus on that player. If combat is being played with the dominator, clicking with the middle mouse button will show the follow camera, a third person view directly behind the selected players model.
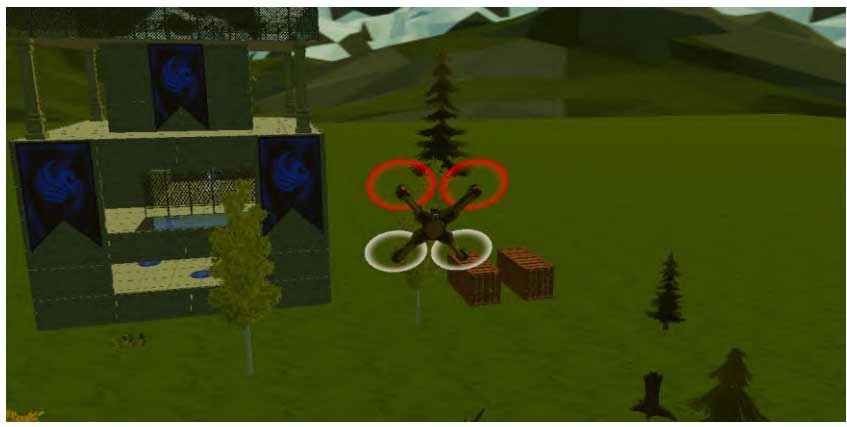
Follow camera view
Team based game modes such as team deathmatch, capture the flag and control can only be played with two teams. To set up teams, all flying players in the session should be one of any two colours. As the host of a combat session you can organise teams in the player session panel. The host is able to change player colours by clicking on the colour of a player in the player session panel and clicking on the chosen colour from the available selection. A balance teams button can be found at the bottom right of the player session panel when in a combat scene. This sets the player colour of players in the session based on their combat level to attempt to create teams that are even in combat ability.
Balance teams button on player list
Team Game Features
Combat will always begin with players being reset to the start grid, however, during combat players may be reset to spawn pads. Spawn pads are objects that a player can be reset to upon crashing or being knocked out by a player. A player is reset to a random point either on the start grid or at one of the spawn points placed in the track. The arrow on the spawn pad texture indicates the direction that players will be facing when they reset to the pad. There are two types of spawn pad: neutral and team. Anyone can be reset to a neutral spawn pad regardless of game mode. In free for all game modes anyone can be reset to a team spawn pad. However, in team game modes players can only be reset to team spawn pads that are the same colour as their team colour. The blue and red team objects on a track will change to match the colours of the two teams. All blue objects will change to match the colour of one team and all red objects will change to match the colour of the other team.
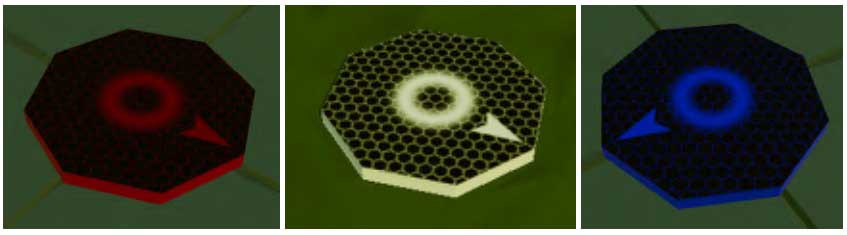
Team (left and right) and neutral (centre) spawn pads
Some combat tracks will utilize barriers. There are two types of barrier: team and track. Team barriers or force fields are red and blue when you first load a track along with the team spawn pads and the other coloured team objects. Team barriers will change colour to match one of the team colours. These barriers cannot be passed by a player belonging to the opposing team, however, a player the same colour as the barrier can freely pass through. Players that come into contact with a barrier belonging to the opposing team will crash and be reset. Ice, pyro, volt and homing (???) shot will not pass through the barrier. Flag carriers cannot pass through the barrier with the flag and attempting to do so will result in the flag being reset to its home position.
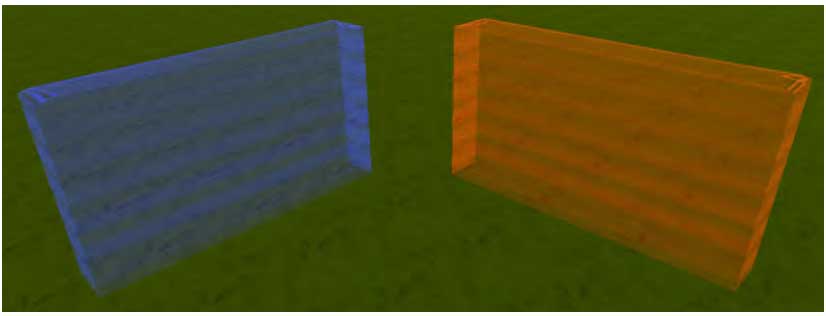
Team Barriers
The track barrier is a neutral object that track creators will place around a track in order to set the boundary of play. The barriers prevent players from taking game objectives outside of the intended area of play and using underhanded tactics to win. The barrier is split into two sections: the primary barrier or warning zone and the secondary barrier or reset zone. Within the track editor the warning zone is the orange and white box and the reset zone is the red and blue forcefield. The warning zone cannot be seen in game but players will know they have entered the warning zone as it will reveal the reset zone. Players are able to fly within the warning zone, however, carrying a flag in the warning zone will result in the flag being reset to its home position after 3 seconds. This prevents players trying to skirt around the outside of the track boundary carrying a flag. The reset zone works similarly to the team barrier. Players that attempt to fly through the reset zone will crash and be reset to a spawn position. If a player is carrying a flag and hits the reset zone the flag will be reset to its home position. “Unauthorised” can be heard through game announcements when a flag is reset with the track barrier.
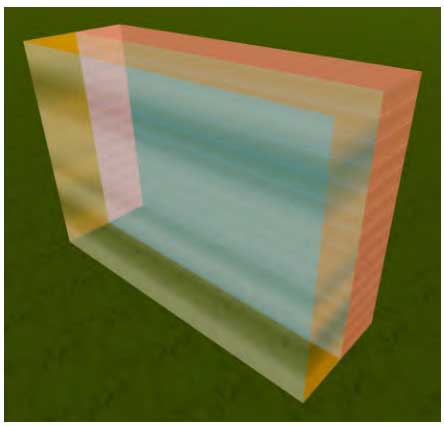
Track Barrier Object
Capture the flag requires the use of the three flag objects: the flag, the goal and the flag marker. Upon loading into a combat multiplayer lobby the objects will be red or blue but similarly to the other team objects will change colour to one of the team colours on a game start. The flag holder is not required in order to create a capture the flag track or to start a capture the flag game, however, it plays an important role. The flag holder when placed under the flag in a track will indicate the flag's home position. The location of the flags home position is crucial game knowledge and including a flag holder will make a track user friendly.
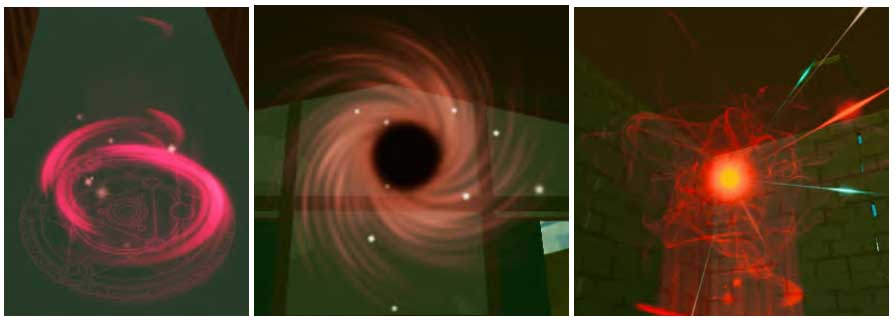
Flag Holder, Goal and Flag
Soccer uses the neutral flag which is a white flag that appears above the start grid at the beginning of the game. The start grid acts as it’s home position so the best placement for the start grid on a Soccer track is central between each team's goal. The neutral flag can be picked up by any player regardless of colour. It is also used in King of the Hill.
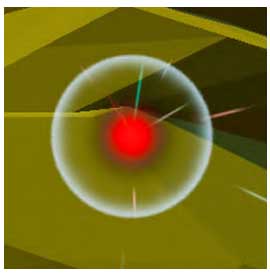
Neutral flag
Control zones are large, white rectangular areas with a hexagonal texture. Staying within the area will contribute to capturing or freezing the capture of the zone. Once a zone is captured it will change colour to match it’s controlling team.
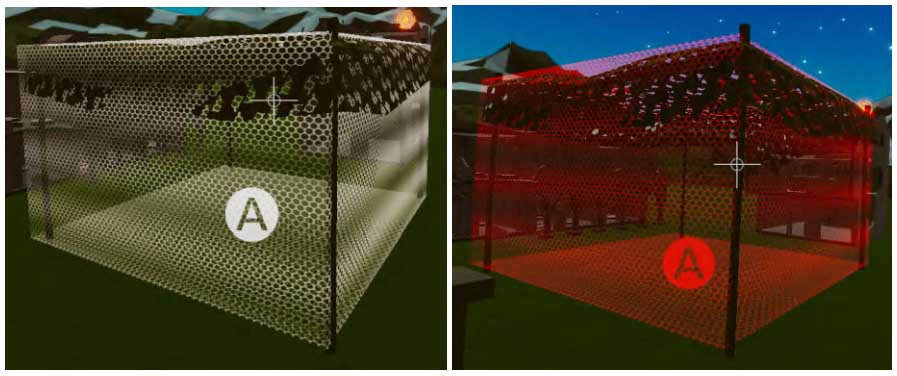
Neutral and captured zone
Coloured objects that are not part of game modes can be found in the combat section of the track editor including: team banners, neon lines, arrows. These can be used to decorate opposing sides of a track to clearly indicate to players which side of the track is for each team. These objects will change colour to match one of the teams.
Coloured objects being used to clearly mark a team side
When creating a track for combat there are some requirements that have to be met in order to play a combat game mode. To start any combat game mode the current track must contain power ups. When adding a team object such as a flag or a goal one of each colour must be present. In order to start capture the flag, soccer or control the objects necessary for the game must be within the track (one of each team flag and one of each team goal, one of each goal, 2 control zones). Velocidrone will only use one of each object (such as a flag or goal), therefore when creating a track ensure that the objects you intend to be part of the final design are the only ones of their kind in a track.
Combat Game Modes
Deathmatch is an all out free-for-all in which the player with the most points will be the victor. A single point is awarded for hitting a player with a power up or 3 points are awarded if the player is knocked out when hit. The highest scoring half of players are awarded additional victory experience towards their combat level. The power ups available in deathmatch include: ice shot, pyro shot, volt shot, power shield, signal jam, thunderwave and homing shot. Some track creators specify that their track was designed for deathmatch combat by starting the track name with “DM”.
Team deathmatch is a cooperative skirmish in which the team with the highest score wins. Teams accumulate points using the same scoring system as deathmatch, however, each individual player's score is combined into a team score. The winning team is awarded victory experience and the player with the greatest points contribution to each team is awarded additional experience as the team MVP (most valuable player). The same power ups used in deathmatch are used in team deathmatch.
Capture the flag is a team game in which opponents attempt to take each other's flag and return it to their team goal. Teams must work to attack the enemy and maintain a defense of their own flag. A player can pick up an enemy flag or return their own flag to its home position by flying into the flag object. A player carrying a flag is indicated by a particle effect that surrounds their model similar to the shield effect. The flag carrier is pointed out to all friendly players with a flag icon that follows their model. Flying into a friendly team barrier while carrying the flag will return it to its home position. The flag carrier must fly into the team goal in order to capture the flag and score a point for their team. The flag will be dropped at the point the carrier crashed if they are knocked out with power ups or crash. A flag will remain at it’s dropped location for 20 seconds before returning to its home position. A dropped flag can be picked up by the enemy team or instantly returned home by the owning team. The team with the most captures will win and be awarded victory experience. The top player on each team is awarded an MVP experience bonus. All power ups except the power shield are available when playing capture the flag. Tracks designed for capture the flag may have a track name starting with “CTF”.
Classic capture the flag has one major difference from the other capture the flag game mode. The team goal is only active when the team's flag is in the home position. This can lead to a situation where neither team can capture the flag and score a point forcing teams to seek and take out the enemy flag carrier.
King of the hill is a battle between all players to maintain control of a flag that spawns above a random spawn pad at the start of the game. Whilst holding the flag players accumulate points over time. An audio ping will play to alert players to the flags location. Once dropped by a player the flag will remain in place for 10 seconds before returning to the spawn pad it originated from at the start of the game. The player with the most points will win with the top half of players all receiving victory experience. The power shield and trip mine are unavailable when playing king of the hill. We recommend playing king of the hill on tracks designed for deathmatch as they keep the action close.
Soccer is a team game in which players must carry a flag into the opposing team's goal. The flag spawns above the start grid at the start of the game. Once dropped, the flag will remain in place for 10 seconds before returning to the start grid. Carrying the flag into the opponents goal will score a point for the team. The team with the most points wins receiving victory experience. An MVP experience bonus is awarded to the top player of each team. The power shield and trip mine are not available when playing soccer. We recommend playing on tracks built for capture the flag that have a central start grid such as “CTF Battle Bases” for a fair and even game.
Control is a struggle for dominance between two teams over two areas that can be captured. The two zones, labelled “A” and “B”, will start neutral and can be captured by flying into the zone and remaining in the zone to accrue capture progress. Once the capture progress has reached 100% the zone's ownership will be given to the capturing team indicated by the zone's colour. When a zone is captured it becomes locked for 10 seconds preventing the opposing team from gaining any capture progress on the zone. To take a captured zone it must first be flipped back to neutral. Using the same method as capture, remaining in a zone belonging to the opposing team will slowly deplete their capture progress. If the player reverting the zone to neutral is knocked out the capture progress will slowly tick back to 100% for the owning team. All changes to capture progress stop when players from both teams are within the zone. Once players from only one team are within the zone capture progress will begin to move again. When a zone is owned by a team they will gain a point for every 2 seconds that they have control of the zone. The team with the most points wins and is awarded victory experience. An MVP experience bonus is awarded to the top player of each team. All power ups can be used when playing control.
Experience
Experience is awarded at the end of a combat game mode. A summary of the experience gained and level progress is presented at the bottom of the screen at the end of the game. A breakdown of the experience gain shows players what they were awarded experience for.

End of game experience summary
Experience is gained for offensive contributions such as: knocking out an enemy, capturing the flag and capturing or attacking a control zone. Additional experience is given for streaking, when a player takes out multiple enemies without being knocked out themselves. Streak experience given is equal to the streak, for example, when a player takes out 5 enemies without crashing or being knocked out they are awarded 5 streak experience. Players on a streak have a bounty on them. When a player takes out another player on a streak they are awarded experience equal to half of the streak. Players that are less experienced may find themselves on a death streak where they are taken out multiple times without taking out another player. Players on a death streak are worth less experience on take down to players on a streak and are given more experience when they break their death streak. When a player breaks their death streak they are given experience equal to their death streak. Also players on a death streak are given experience for hits until their death streak is broken.
Knocking out an enemy that is carrying a flag or attacking a control zone owned by your team will earn you defense experience. Returning your team's flag to the home position will also earn you defense experience. The majority of experience will be earned through offense contributions as the nature of the game is one of confrontation. However, players are rewarded for making team oriented decisions through defense experience.
MVP, victory and match experience are awarded at the end of a game. MVP experience is given to the top player on each team when playing a team based game. The top player is determined by their points contribution. Placing in the top half of players in free-for-all games or being on the winning team will earn victory experience. In the case of a draw both teams are awarded additional match experience. Match experience is determined by the length of the game mode with each minute equating to 10 experience. The majority of combat players run 5 minute matches which would give a base match experience of 50.
Keyboard Shortcuts
VelociDrone features many keyboard shortcuts to help you get things done quickly. These shortcuts differ between the different modes that VelociDrone can be in. The following sections describe what these shortcuts are.A list of the shortcuts is available in play and editor modes and can be displayed by pressing the icon seen below.
Keyboard Shortcuts Icon
General Shortcuts
These shortcuts are only operational in flight mode.
|
Key |
Function |
|
Esc Key |
Exit to main menu |
|
F Key |
Switch between FPV and line of sight camera |
|
B Key |
Recharge battery |
|
1, 2, 3 and 4 Key |
Select the bank flight modes |
|
PgUp and PgDown Key OR - and = Key |
Adjust the FPV camera angle up or down |
|
Home or Shift = Key |
Reset the camera angle back to zero degrees |
|
R Key |
Reset the model position to the last gate checkpoint they passed or the race start position |
|
End or Backslash Key |
Capture a screenshot and save the “MyDocuments” or “Home” folder (Windows or OSX/Linux) |
|
T Key |
Toggle trails on or off |
|
H Key |
Toggle crosshair on or off |
|
Shift H Key |
Change crosshair (if the crosshair is toggled on) |
|
C Key |
Show or hide chat box |
|
S Key |
Enter spectator view and cycle through spectator cameras |
|
Spacebar |
In spectator view: Cycle through spectator cameras forwards During combat: Fire weapon |
|
Shift Spacebar |
In spectator view: Cycle through spectator cameras backwards |
|
P Key |
In spectator view: Cycle through spectator cameras |
|
Insert and Delete Key OR [ and ] Key |
Lower or raise field of view in FPV mode |
|
0 Key |
Show or hide user interface |
|
V Key |
Reset field of view in FPV mode |
|
A Key |
Start or abort a race / game |
|
M Key |
Visualise controller inputs |
|
I Key |
Toggle gate indicators on or off |
|
Shift I Key |
Cycle through gate indicator colours |
|
Q Key |
Cycle through different OSD layouts |
|
D Key |
Decrease quality level and turn off auto quality for this scene |
|
E Key |
Increase quality level and turn off auto quality for this scene |
|
L Key |
Set custom reset point at current position |
|
K Key |
Toggle microphone mute |
|
F12 Key |
Show or hide FPS monitor |
|
Shift C Key |
Reset chat panel position |
|
Tab Key |
Open or close the race / combat leaderboard panel |
|
J Key |
Open or close leaderboard times panel |
|
Shift L Key |
Set line of sight camera position at current position (must be in FPV mode) |
|
W Key |
Lock or unlock quad in current position |
|
F4 Key |
Join any players waiting to enter the multiplayer session |
|
X Key |
Fire weapon |
|
F1 Key |
Display a flight path for a loaded pilot (must be in nemesis mode) |
|
F2 Key |
Display your own flight path for the last flown race in this session (must be in nemesis mode) |
|
F3 Key |
Show flight path analysis slider (must have a flight path on display) |
|
Left and Right Arrow Keys |
Change spectator camera |
|
Up and Down Arrow Keys OR Mouse Scrollwheel |
Zoom in or out third person camera |
Track Editor Shortcuts
These shortcuts are only operational when in the track editor.