VelociDrone Mobile Simulator Manual
Table of Contents
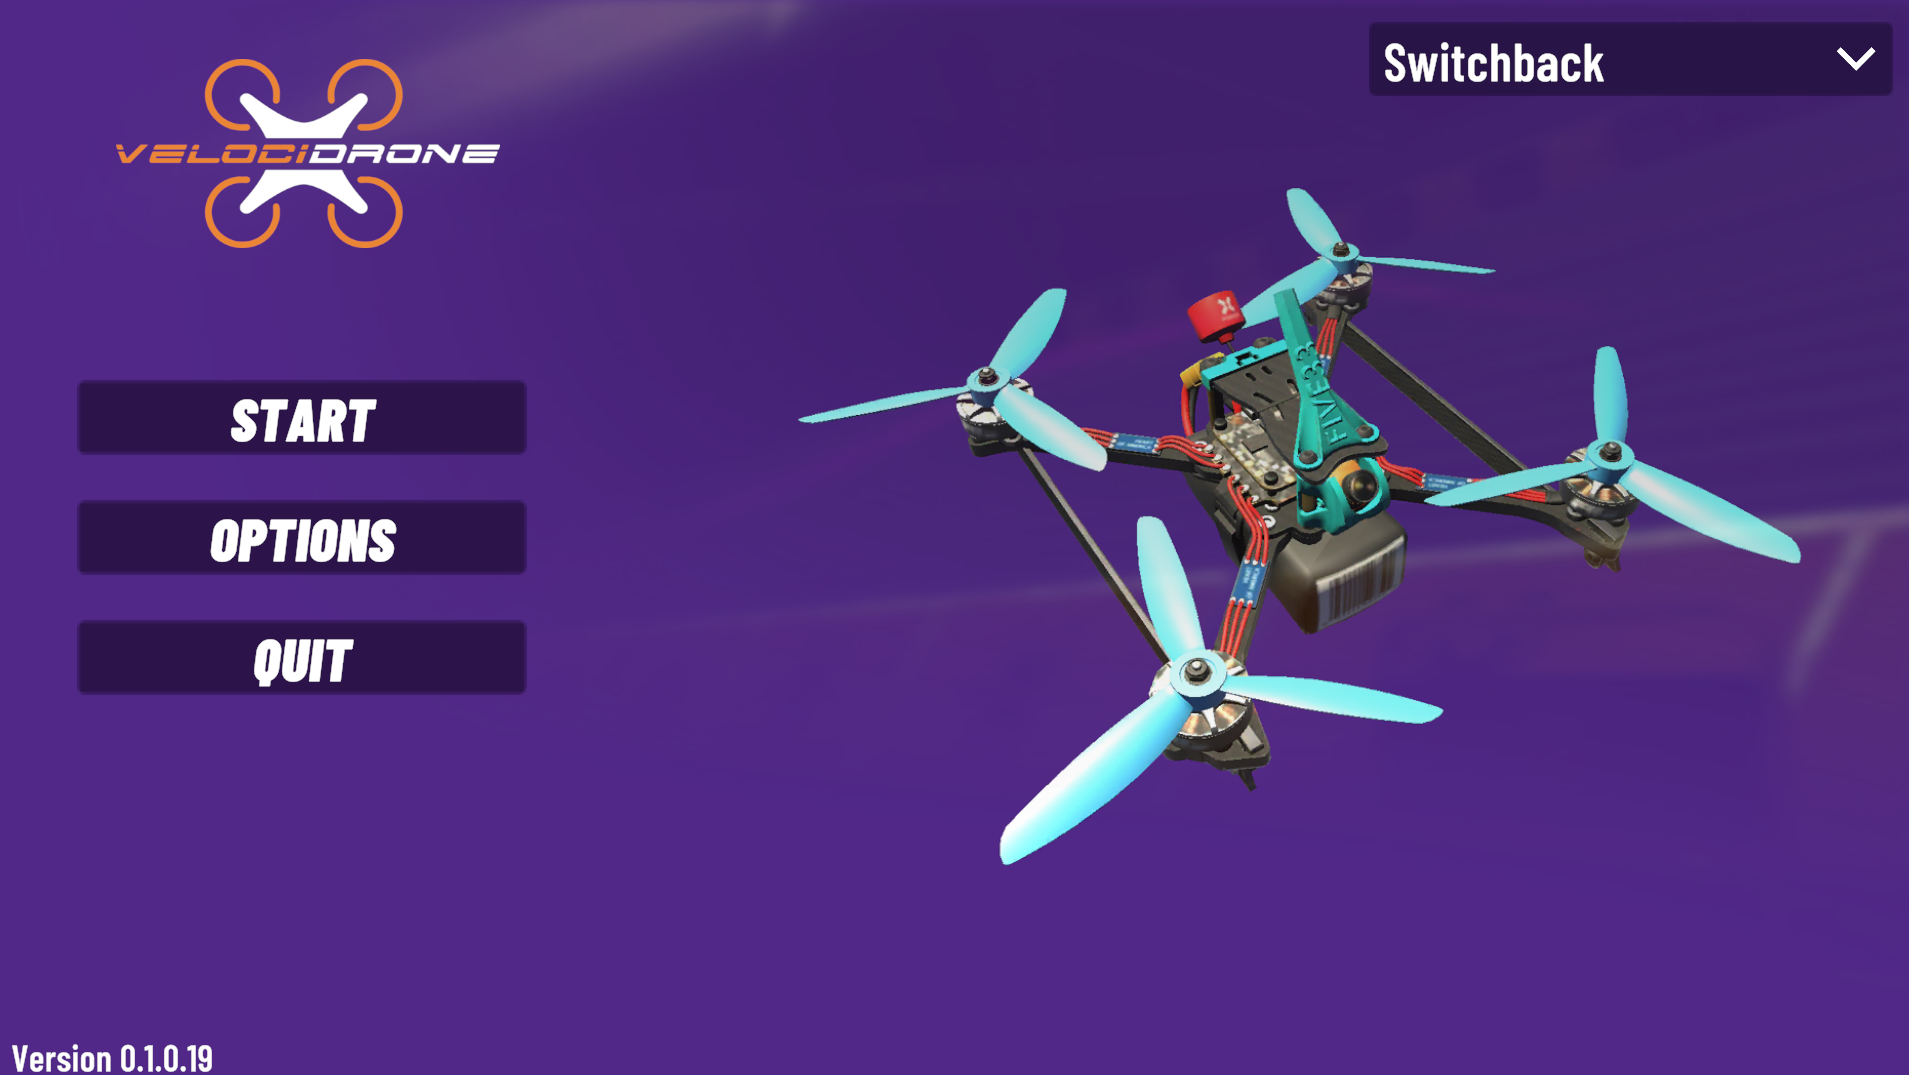
The VelociDrone main menu gives you the top level entry to the functionality of the simulator.
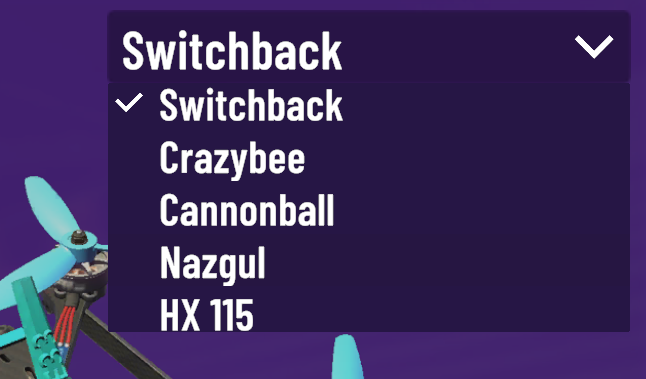
The drop down top right allows for the selection of the quad you are going to fly.
There are five quads to choose from:
The selection of models falls into different model classes:
Switchback: 5inch racing quad
Crazybee: Micro quad
Cannonball: Mega quad (10inch props)
Nazgul: 5inch Freestyle
HX 115: Toothpick (2.5inch props)
Once a quad is selected from the main menu this will be used when you go to flight mode. You can change quads whilst in flight mode and do not need to return to the main menu.
The buttons on the left hand side of the main menu take you one of three routes:
Start will take you to scenery selection where you can select a track and fly.
Options will take you to simulator setup, including resolution settings, physics settings, game settings and controller setup.
Quit will leave the simulator.
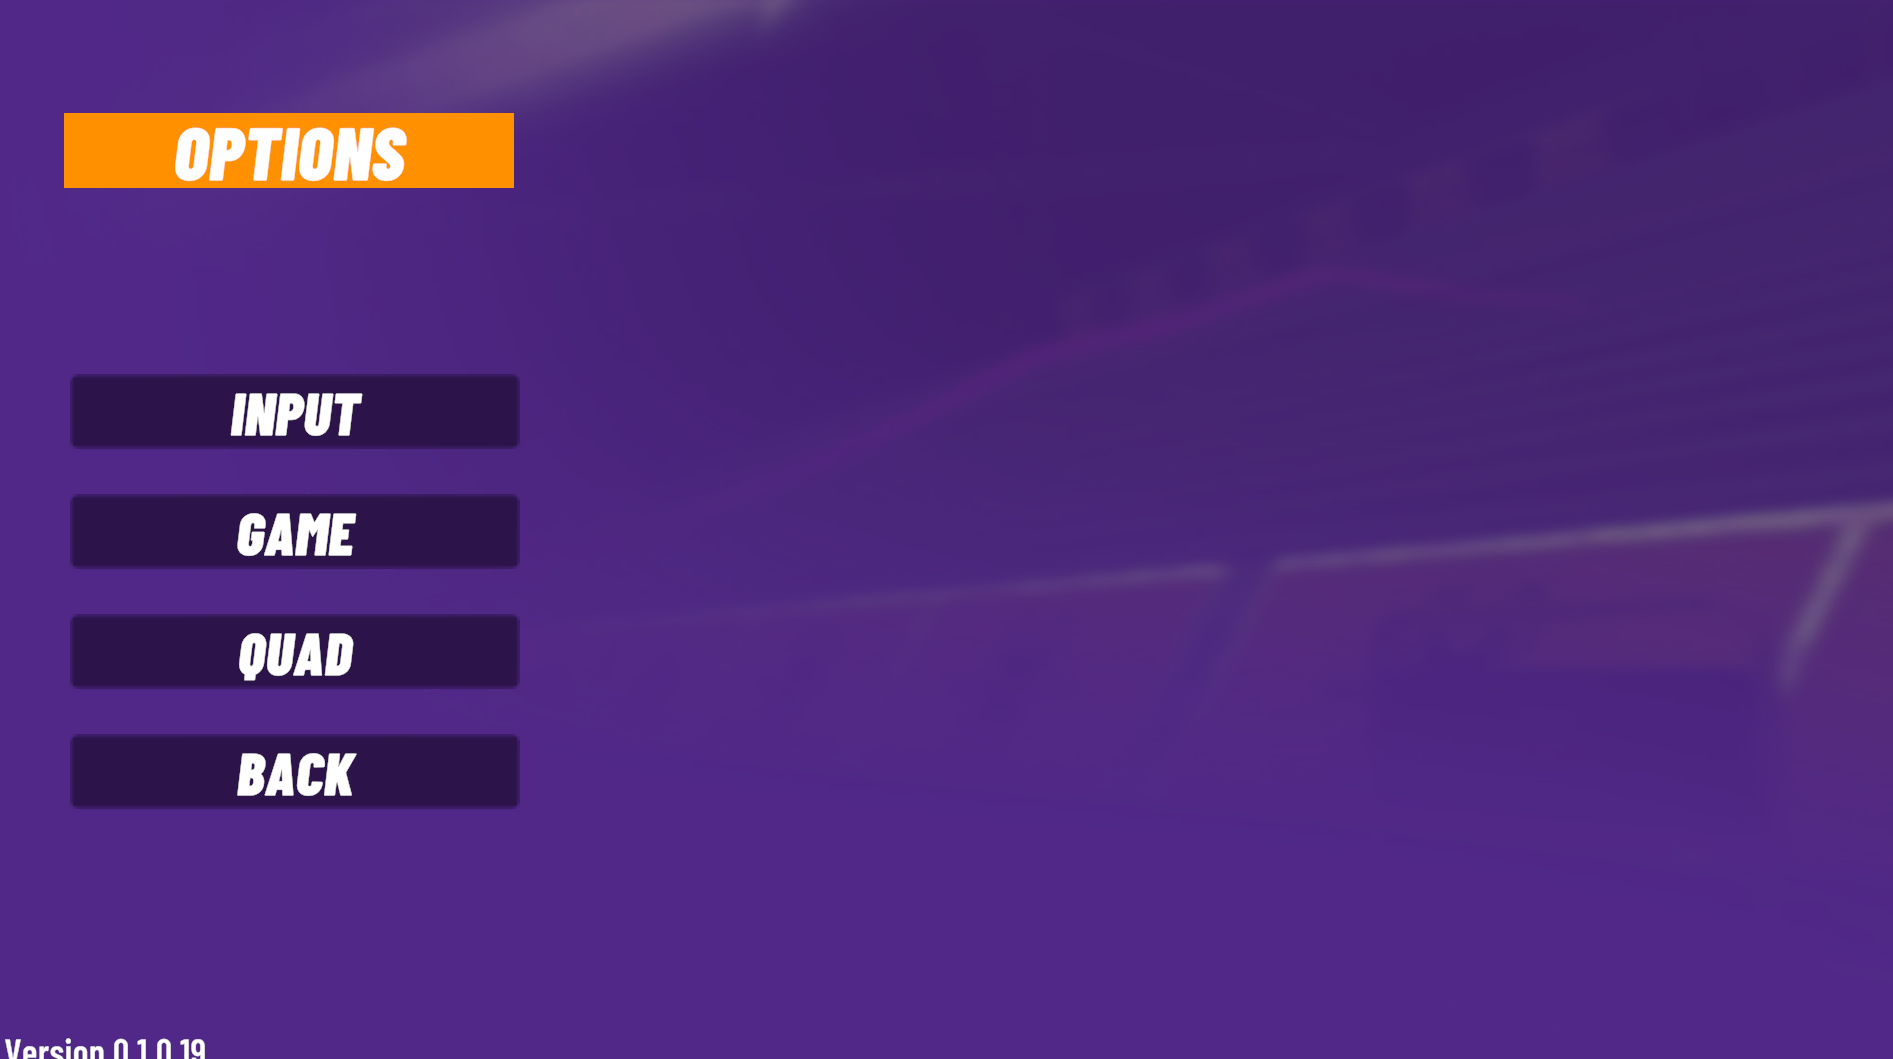
The options menu provides access to the various setup menus.
Input allows you to configure your controller and switches.
Game allows you to configure overall game settings.
Quad allows you to configure your quads settings.
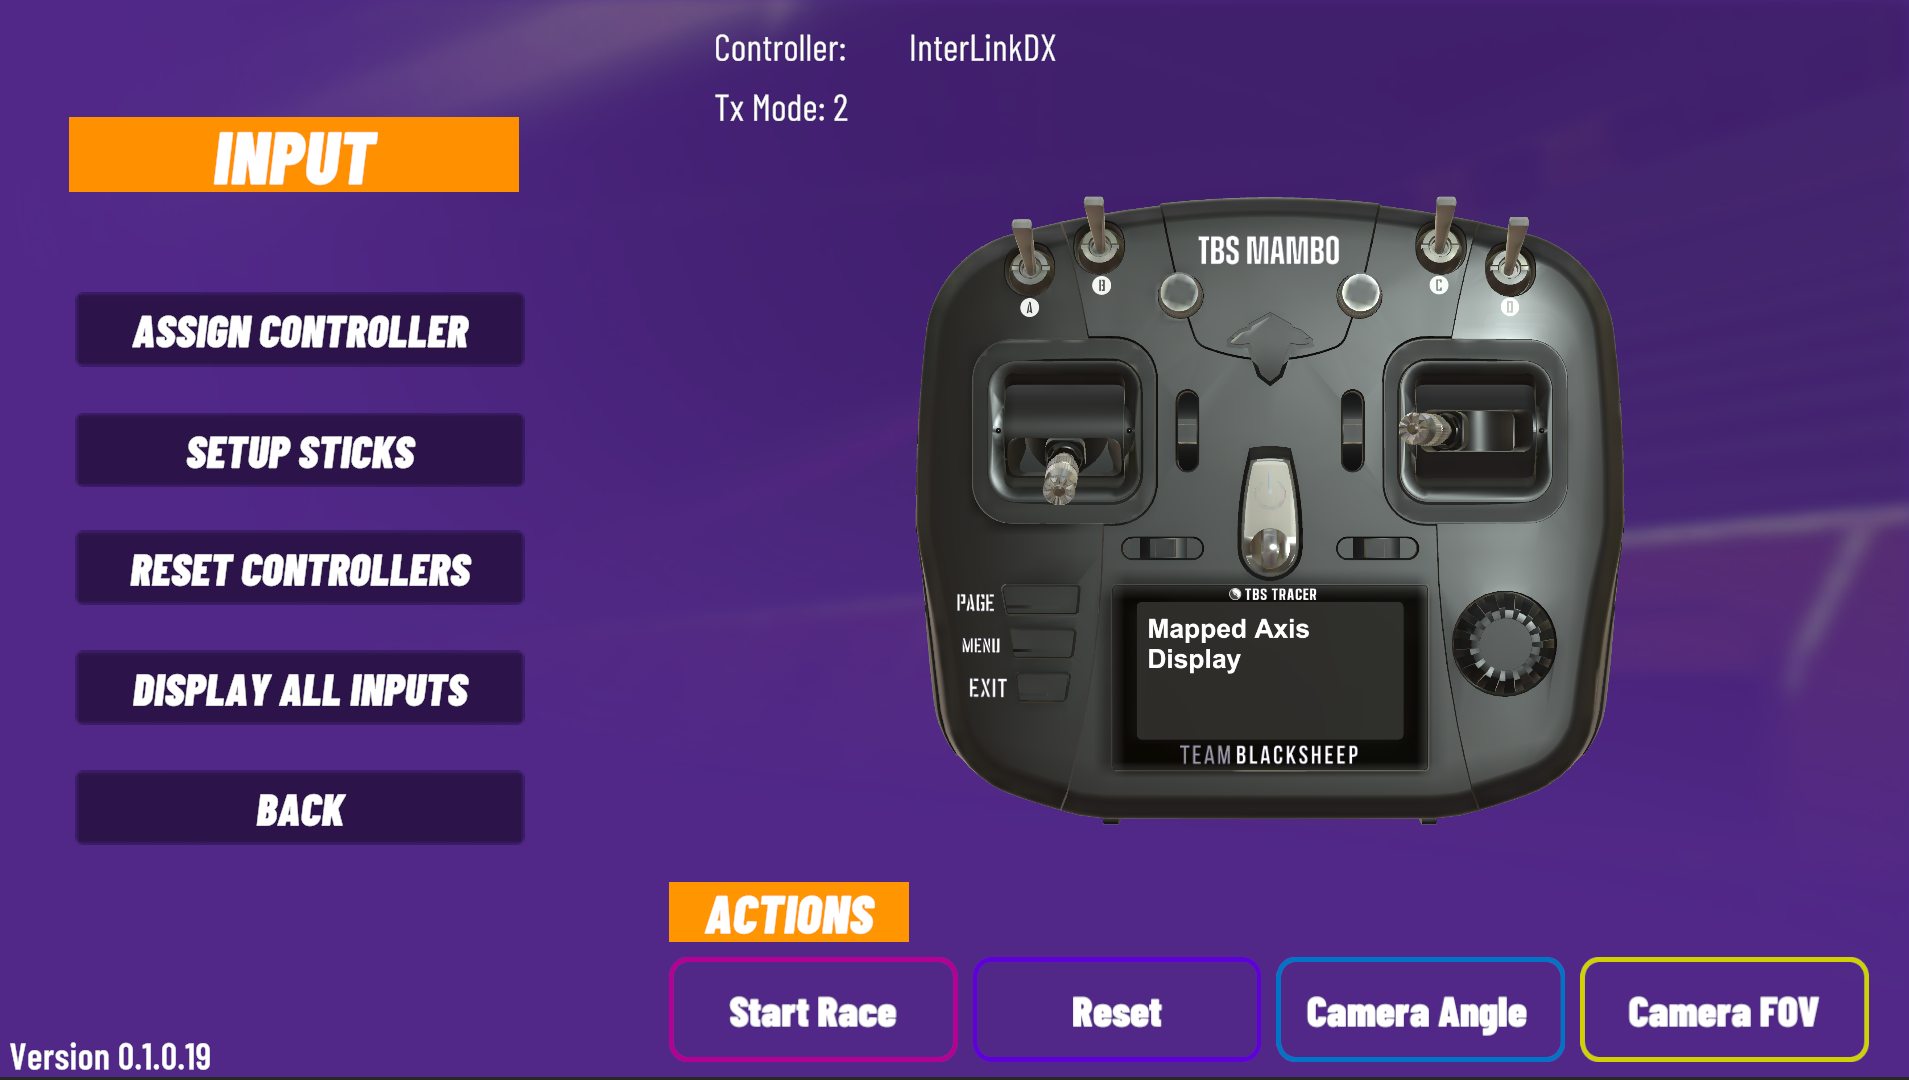
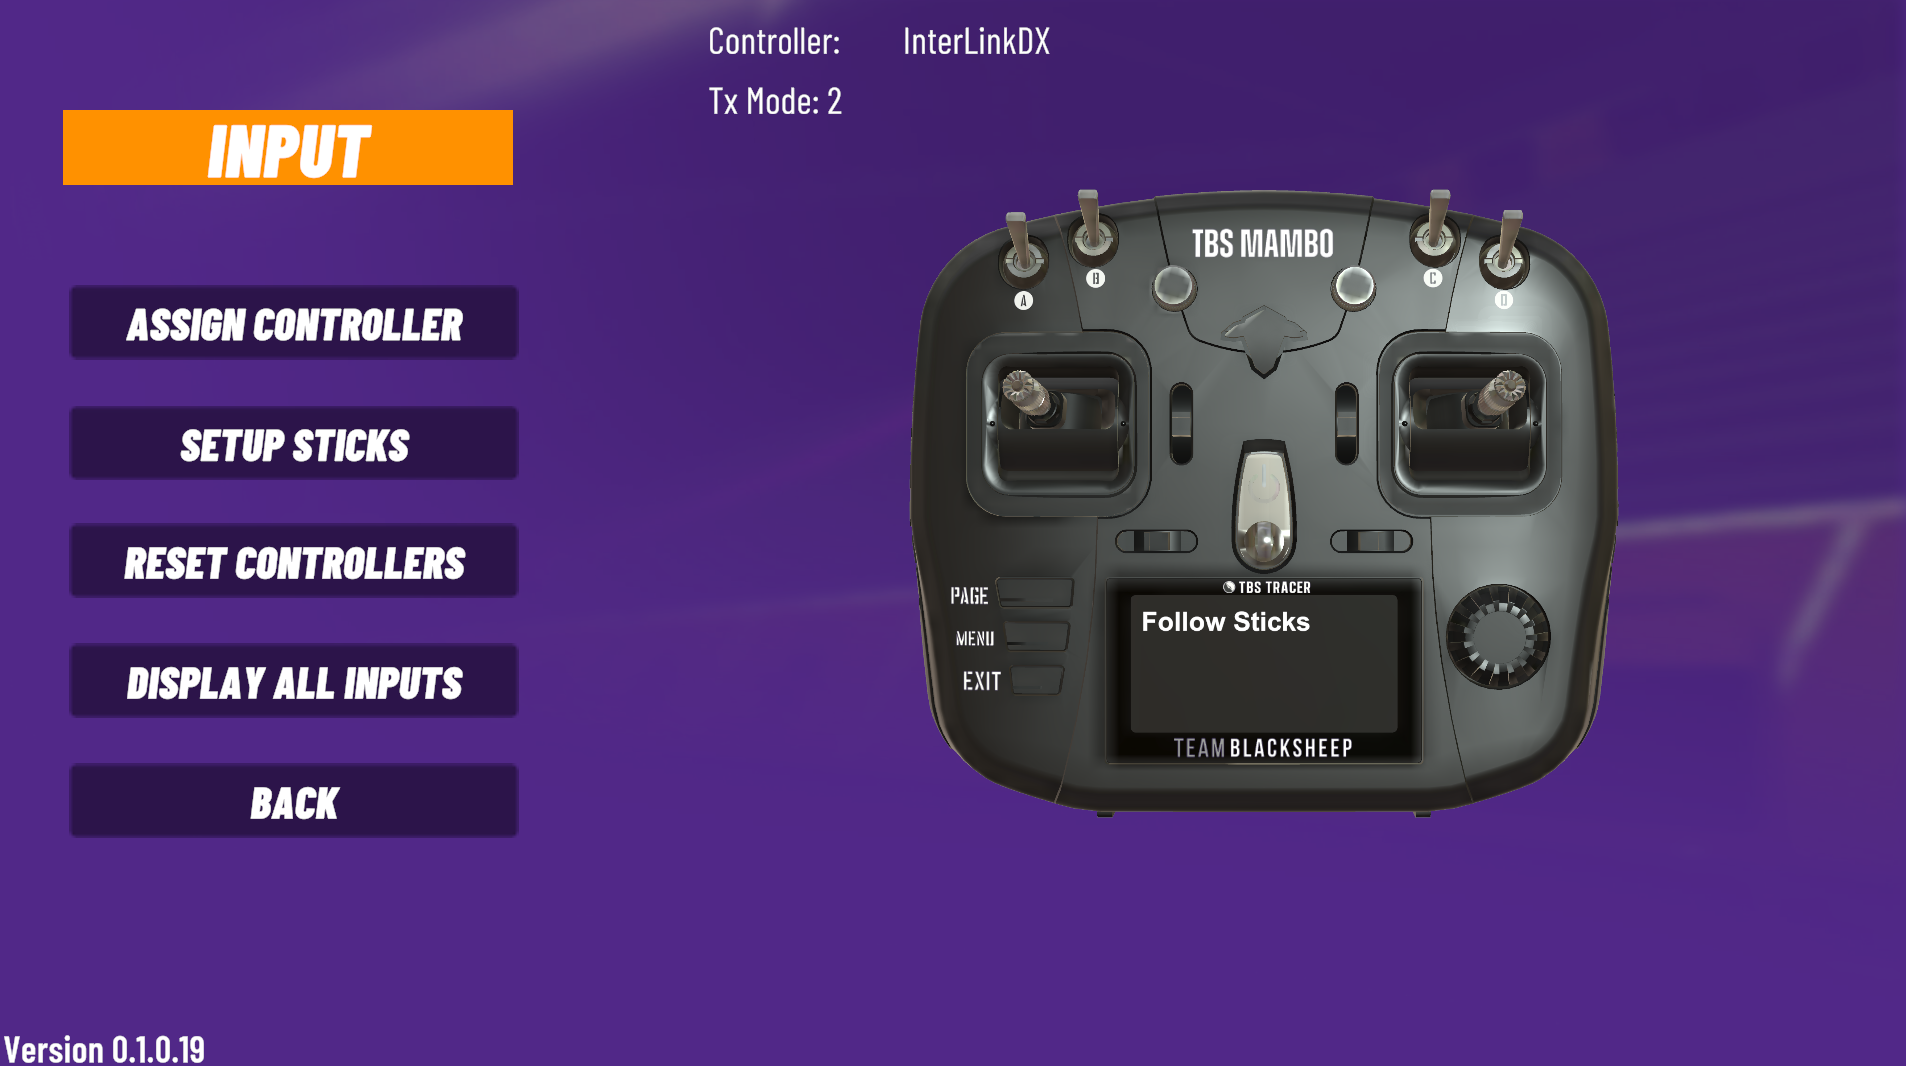
The input menu allows you to set up your controller. You do not have to set up a controller in order to use the simulator as it does provide on screen touch controls. However, if you are serious about flying quickly and accurately we would not in any way recommend trying to use touch control, it has too much latency and provides no tactile feedback - which makes flying something as fast and reactive as a racing drone really quite difficult to control.
For Android users you can plug in your controller using an OTG cable and as long as android can recognise the controller it should work. Common radios such as FrSky, RadioMaster and TBS radios should just be recognised automatically.
You can also connect controllers via bluetooth and they should work fine (such as Express LRS BLE control - as long as it is a very recent version).
You can detect your controller by plugging it in and if it isn;t recognised instantly then the assign controller button will ask you to move a stick and it should detect it. If it doesn’t then there are problems at either the hardware or OS level that need to be resolved.
Once your controller is detected you need to press the setup sticks button to go through the controller setup wizard and configure your controller for flight.
The reset controllers button will reset all configured controllers (like a hard reset for controllers).
The display all inputs button will show you your axis and if they are working. If they aren;t then there is a hardware or OS level issue to solve.
When you press setup sticks the controller setup wizard will run, you should follow the instructions on the controller screen and do exactly as it says. It will run through a series of instructions asking you to move various sticks and assign sticks to various controls of the drone (like throttle or yaw). Do not leave the wizard until you have completed all actions (the last part is reversing any inverted controls, once this is done the setup is complete).
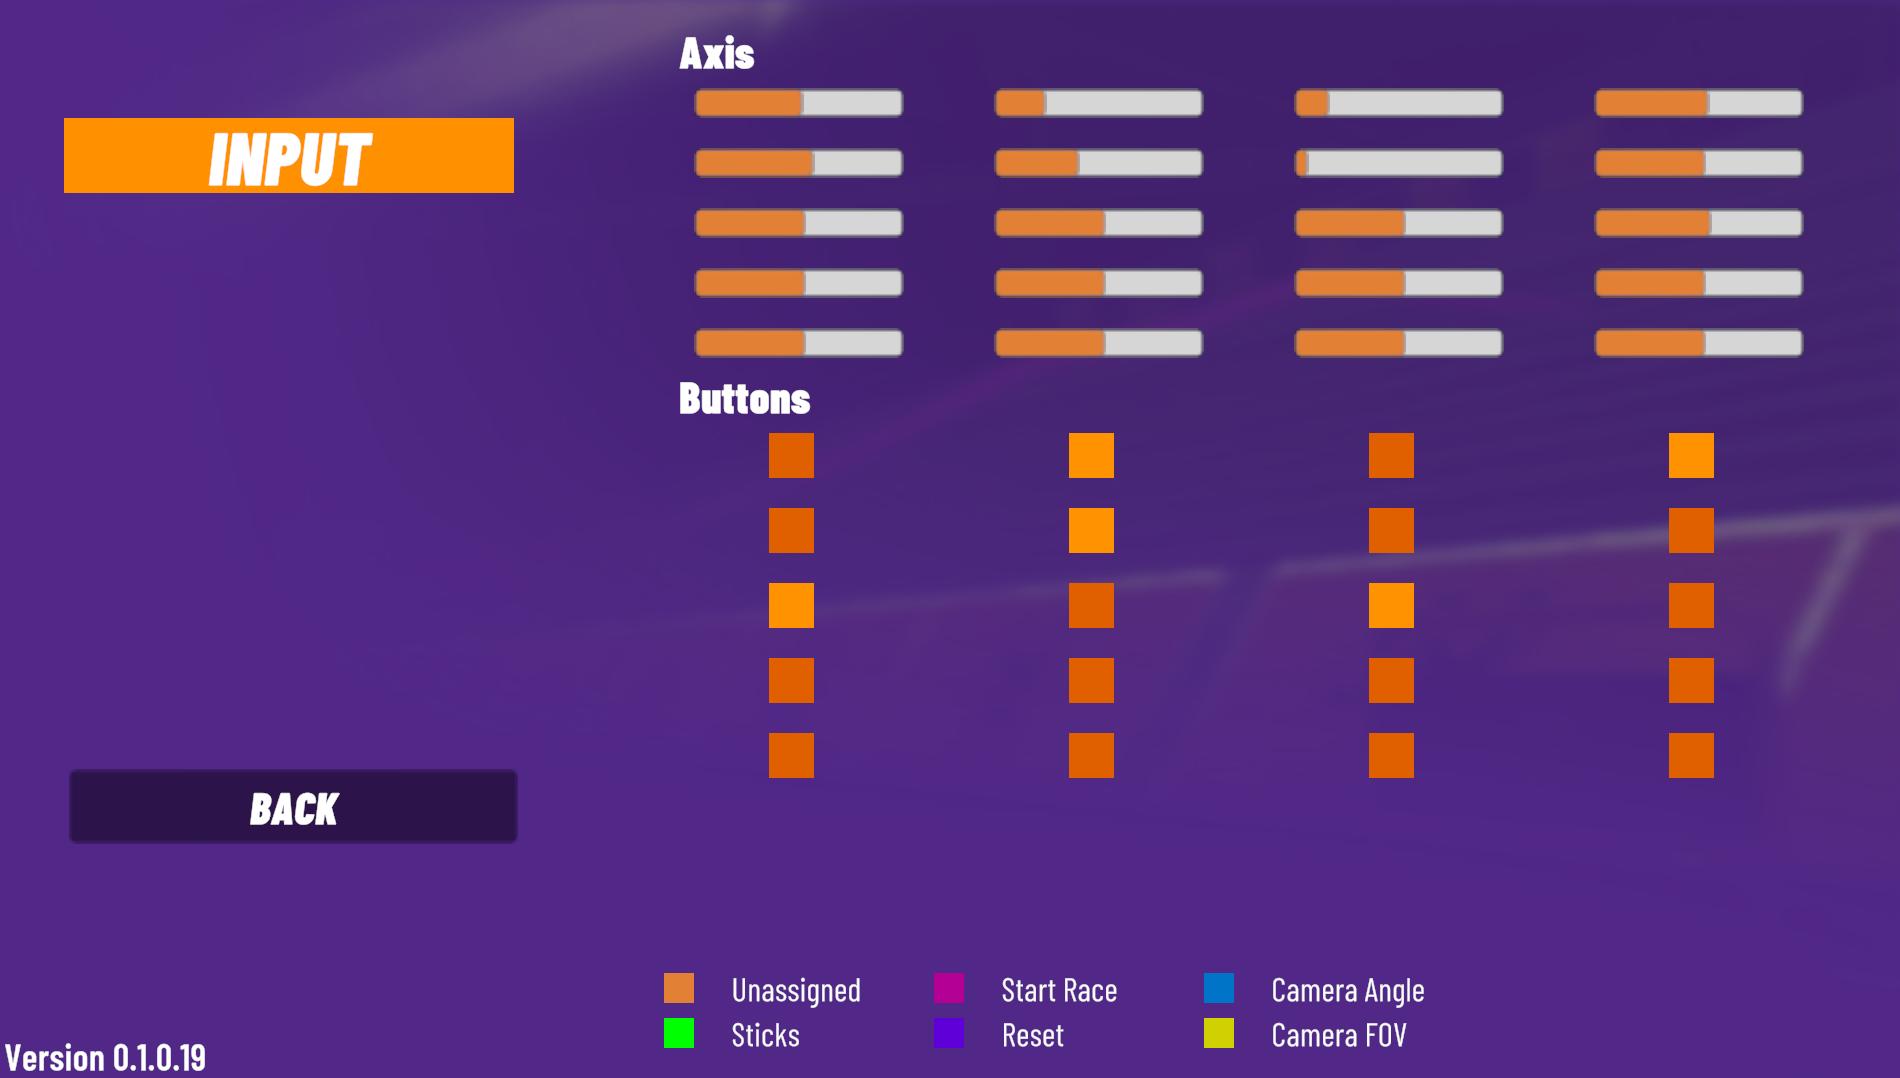
This screen is purely informational but it will show you all of your axis for your controller and the orange bars or buttons should move or change colour when you are moving sticks or activating switches. If you do not see any orange bars moving when you access this screen then your controller is either not assigned or it is assigned but there is a hardware or OS level issue with getting input data from your controller.
Please note that switches and or buttons will only work on most RC controllers if you have assigned those switches to a channel and mixer on the controller itself (FrSky, RadioMaster, OpenTX, Edge TX).
In general switches assigned to channels 1 through 8 will work as an axis on OpenTx and EdgeTx controllers and channels 9 through 16 behave as buttons.
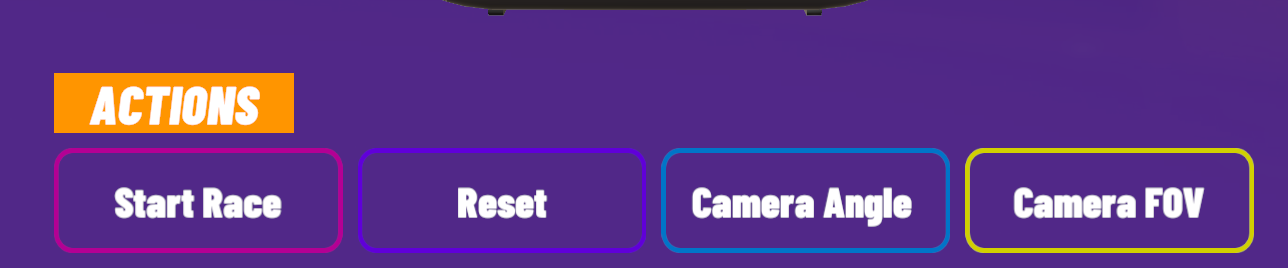
If you wish to assign one of the shown actions to a switch or button then you click one of these buttons and then toggle the switch or button you wish to assign.
To unassign an action you click the assigned action button twice.
|
Music Volume |
Sets the volume for all in game music, including menu music and any in game musical effects. |
|
SFX Volume |
Sets the volume for UI interaction and any other in game effects like gate pass noises, wind and bird song effects. |
|
Quad Motor Volume |
Sets the volume for your motors on the quad you are flying. |
|
Resolution |
This configures the DPI resolution (dots per inch) for your screen. This setting when very low can make text blurry on a very high resolution display. You should set this to make the UI comfortable to read. If you have a very modern high end device you can set it to its highest setting. Bear in mind that the higher you set the DPI the more impact it will have on the simulator frame rates. |
|
Quality |
This setting controls the amount of processing we do for making things look pretty. At its lowest setting things like shadows, bloom and post processing effects will be switched off. At higher settings then shadows, bloom and colour post processing will be turned on. This setting can also significantly affect performance, especially turning on shadows at the higher levels. You should set your resolution first and then the quality taking careful note of how this affects FPS in game. |
|
Target FPS |
This is the FPS the simulator will run at. You should set this to the hz rate of your screen. There is no value in setting this to 120 if you have a 60hz screen. However, if you have a 120hz screen but it cannot deliver 120 fps in game then there is no issue with setting a lower target frame rate than the screen hz rate. Setting target FPS below the screen hz rate can also reduce overheating in phones. Bear in mind that the simulation feels much better to fly at 120fps on a 120hz screen than 60 fps on a 60hz screen. |
|
Gate Indicator Colour |
This sets the colour for gate indicators when racing, |
|
Auto Upload Times |
This will automatically upload your time at the end of a race instead of having to manually press the submit button for times. |
|
ELRS Enabled |
This turns on ELRS wifi support for controller connection. You should leave this off if you are connecting via an OTG cable or bluetooth (including ELRS BE). |
|
ELRS Joystick Hz |
This controls the speed at which joystick data will be sent via ELRS wifi to the simulator. We have found around 100hz is the most stable. If you set this too high you can saturate your wifi and you may get pauses or stutters in your control inputs. |
|
Physics CPU |
This controls how fast the simulator runs the physics simulation. The quads will fly better the higher you set this - however, this also will heat up phones faster and cause a drop in overall FPS. Set it according to what your hardware can best cope with without overheating or killing frame rate. |
|
Full Reset |
This button will completely reset your simulator to defaults as if it was just installed. You will lose all user configuration when you do this as all the databases will be reset. |
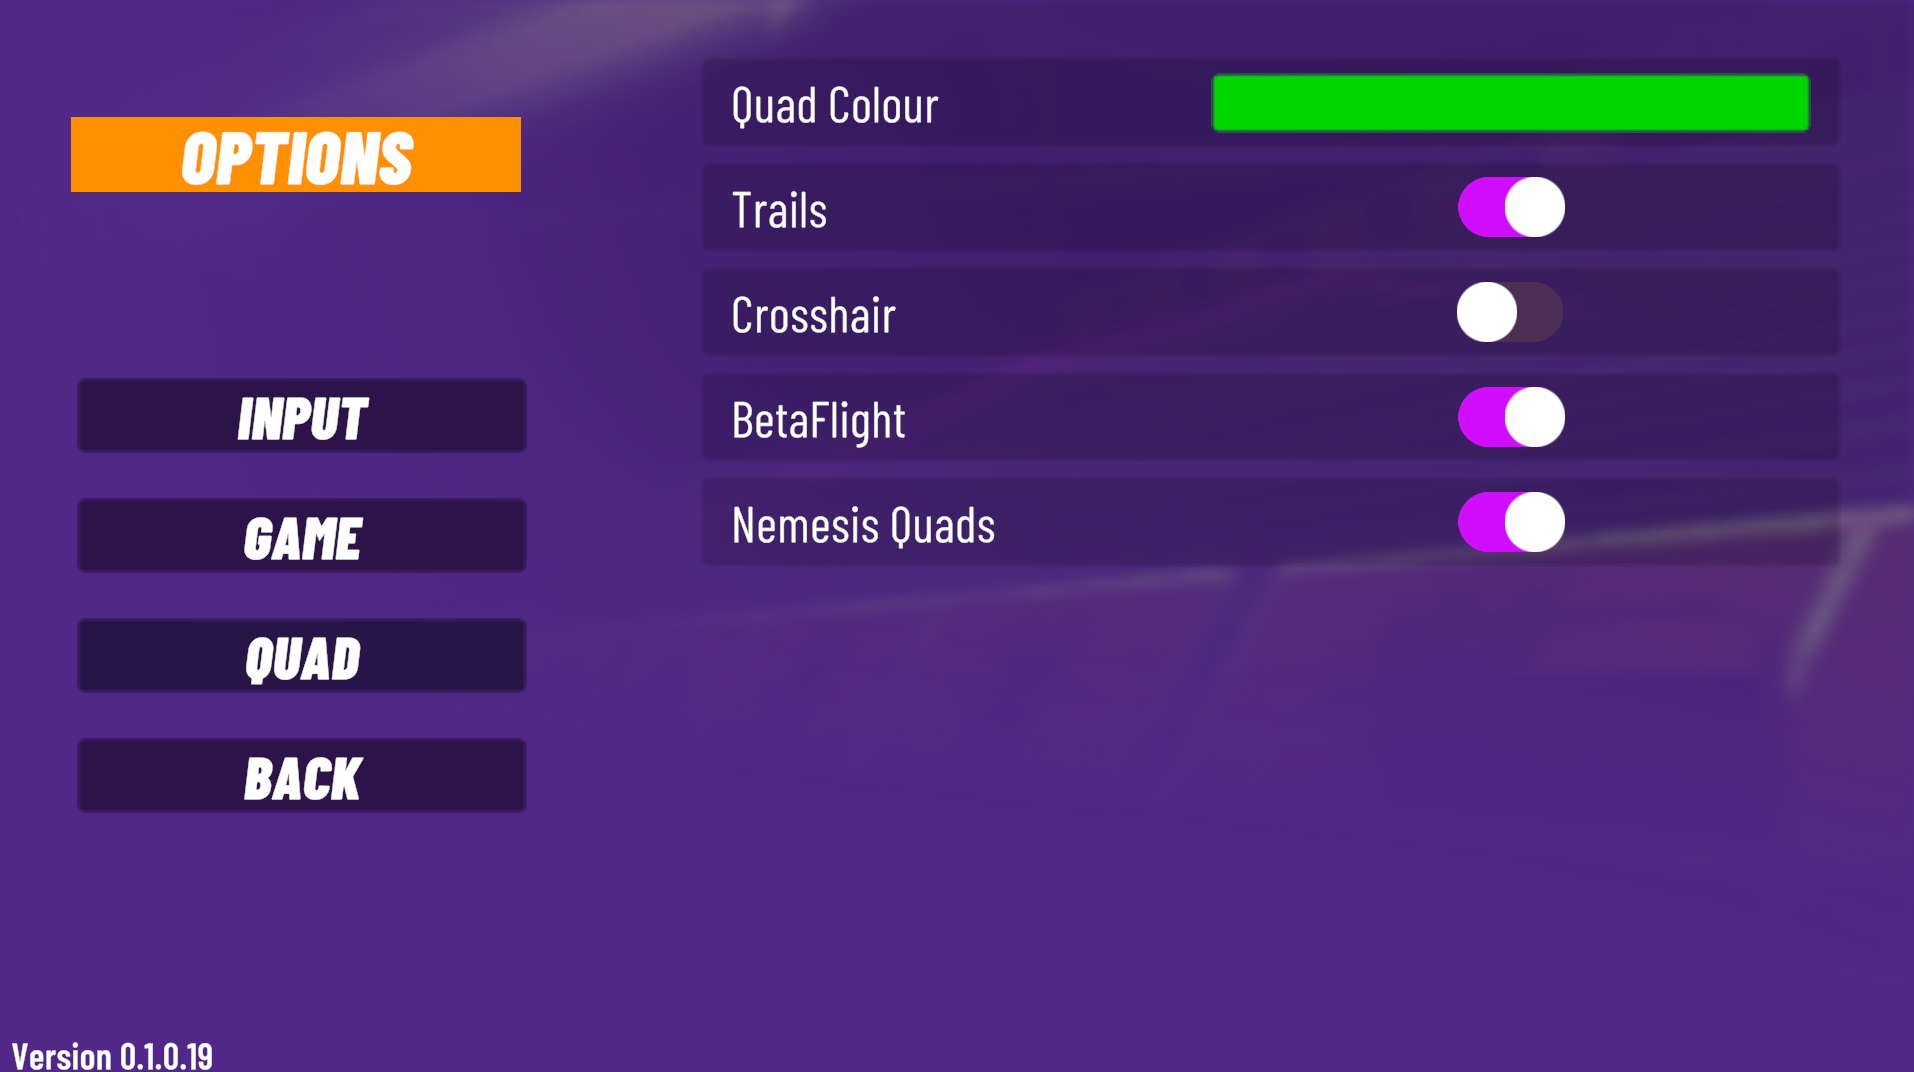
Quad colour - sets your quads prop colors and trail colours.
Trails - turns on or off the light trail behind quads.
Crosshair - turns on or off the middle of screen crosshair.
Betaflight - switches between betaflight or the legacy flight controller - we recommend you leave this on betaflight.
Nemesis quads - turns on or off the existence of nemesis quads to race. By default the mobile simulator runs in nemesis 3 lap mode all the time. If playing back nemesis quads causes performance issues for your device then this slider will let you turn off the nemesis quads and allow you to just race on your own.
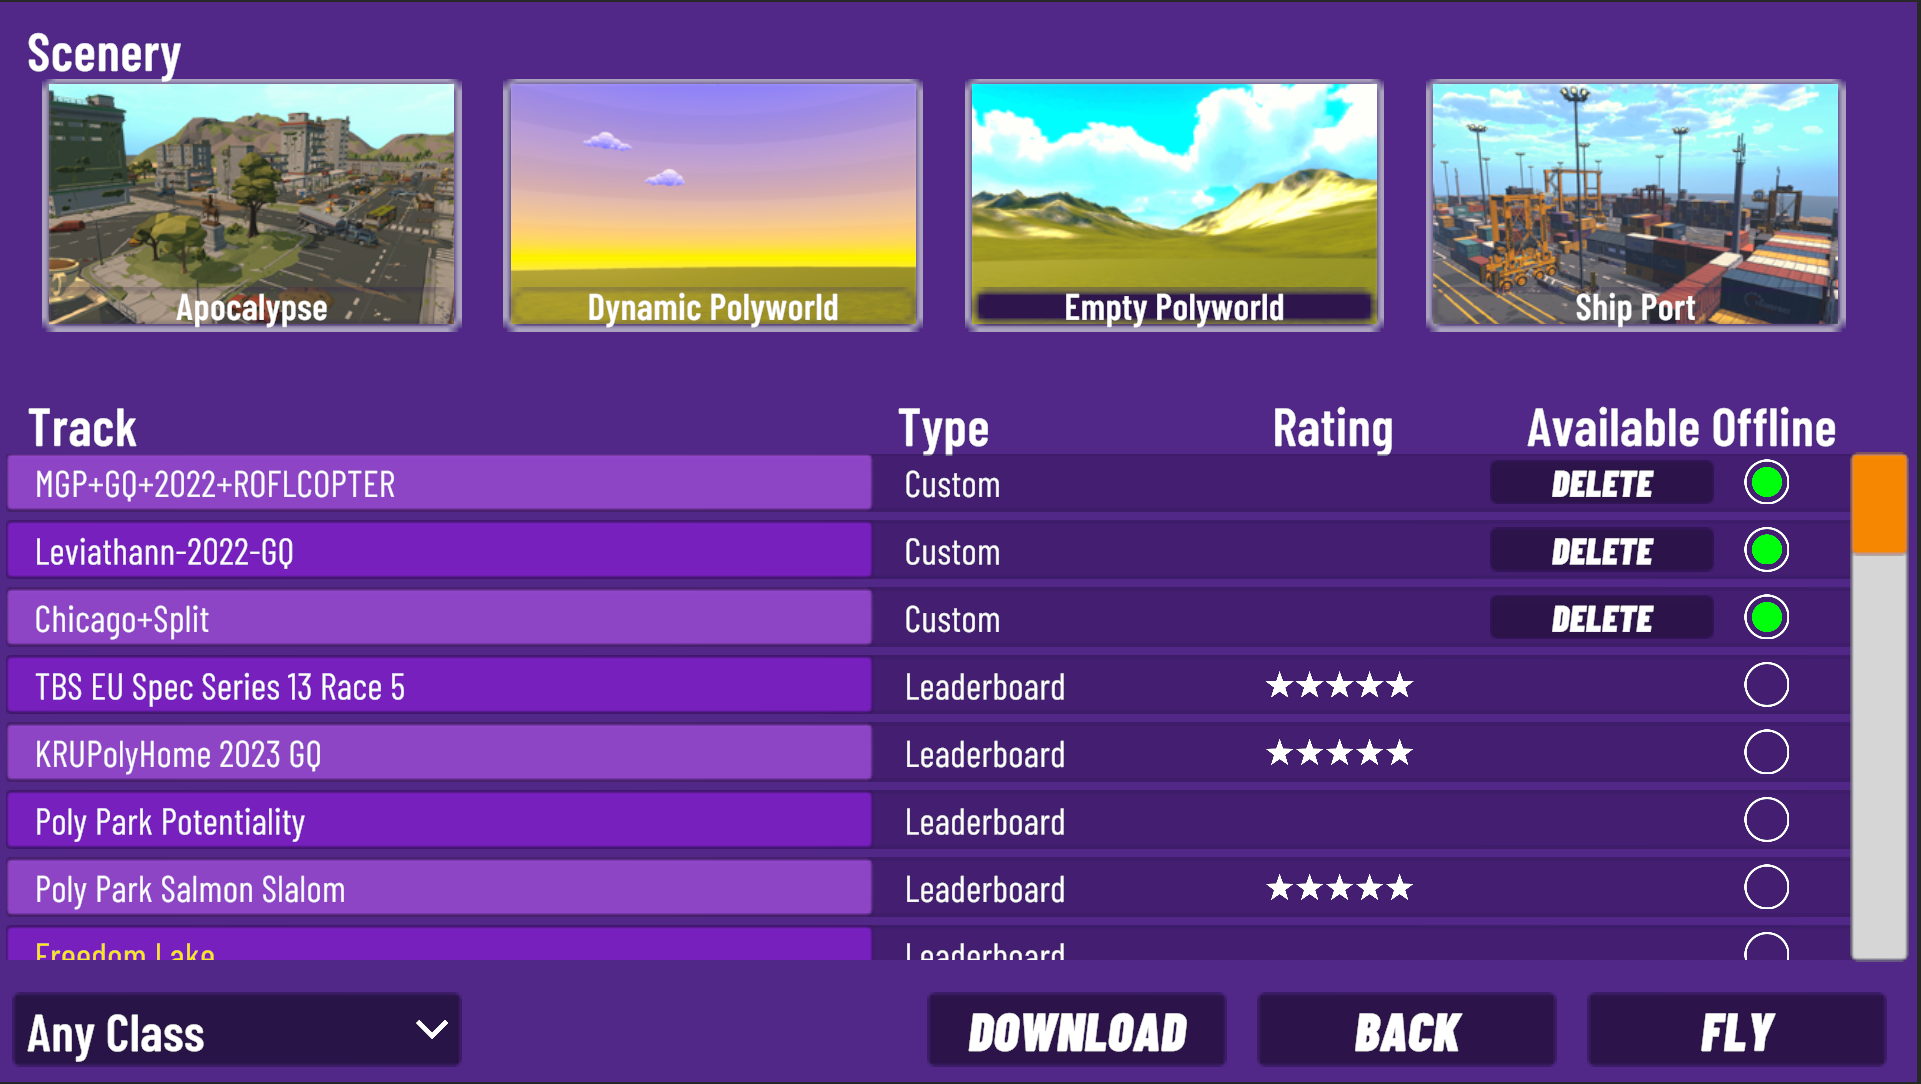
When you press the Start button you will be taken to the track selection screen.
VelociDrone Mobile has four scenes to fly, they are all done in a low poly styling suitable for use on a mobile simulator. This allows good frame rates whilst ensuring a very broad and diverse set of track building capability. Whilst VelociDrone Mobile does not have track building capability, it is directly cross compatible with our desktop simulator and therefore any track built by desktop users will be available on mobile. Similarly all nemesis leaderboards include both desktop and mobile submitted times, so as a mobile VelociDrone owner you can race both desktop and mobile players.
The four scenes are Apocalypse, Dynamic Polyworld, Empty Polyworld and Ship Port.
Two of the scenes (Apocalypse and Ship Port) are pre built scenes populated with an apocalyptic town or a ship port to fly around. The other two scenes are empty landscapes, one in which track builders can control the day / night lighting and the other permanent day time.
Dynamic PolyWorld and EmptyPolyworld contain some of the biggest and most complex builds our track building community have completed. So don;t be fooled into thinking they are just empty, they contain a hugely diverse set of custom tracks to race and freestyle.
You will also find tracks from our desktop simulator combat players on these two scenes - which offer another different and diverse set of environments to fly.
You select your scene by clicking its picture at the top and then the track list will update to show you the names of the available tracks.
You can filter those tracks by type of track using the drop down in the bottom left.
For each track there is a track entry …
This shows the track name, if it is an official leaderboard track or a custom track (both have leaderboards but only official leaderboard tracks are shown on our website). Then there is a rating for what players have rated the track out of 5 stars and then whether the track is available offline.
This last option is different to the desktop version of VelociDrone where all tracks can be played offline. For the mobile version we only hold a limited number of tracks in the database - so as not to use up lots of storage space. When you select to fly a track the track is downloaded from our server and then becomes available to fly offline if you do not have an internet connection - such as on an airplane. Only a limited number of tracks are held in this status and as you download and fly more tracks the oldest tracks will be deleted from the database (and therefore no longer available offline).
If you always have an internet connection then this is of course unimportant as it will always download the track if a connection is available.
If you know you are going to be doing a trip without internet then it is a good idea to fly the tracks you want to practice before you leave (so they are downloaded and marked as available offline).
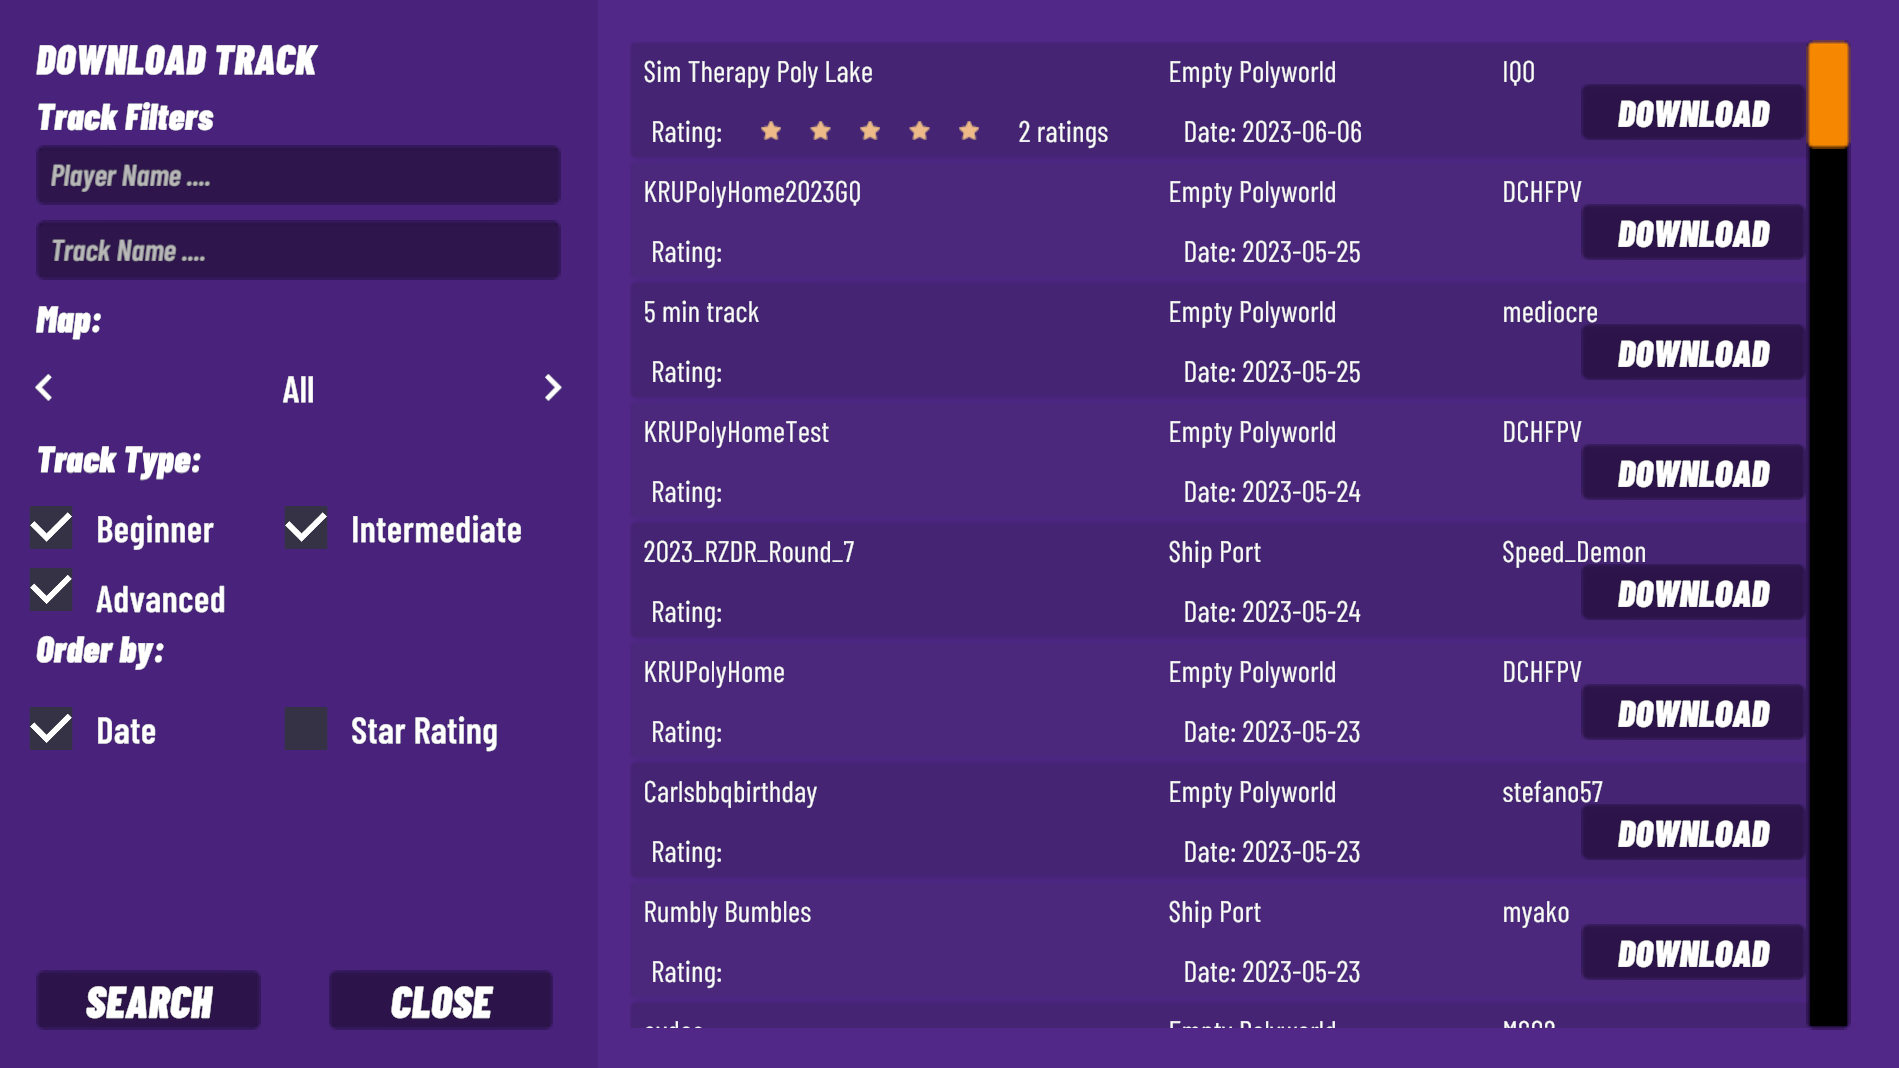
At the bottom of the screen are three buttons . back to return to the main menu, Fly to go and fly the track you selected and download - to access the online database of tracks where you can download new tracks to fly.
The download track page allows you to search for new tracks by author or track name.
You can filter those tracks by map and by the type of track. Filters are also available to order the results by date and by star rating.
If you download a track then it will be added to your track list as a track you can fly.
VelociDrone will manage whether the track is available offline or not just the same as any other track to make sure that tracks do not fill up your device's storage.
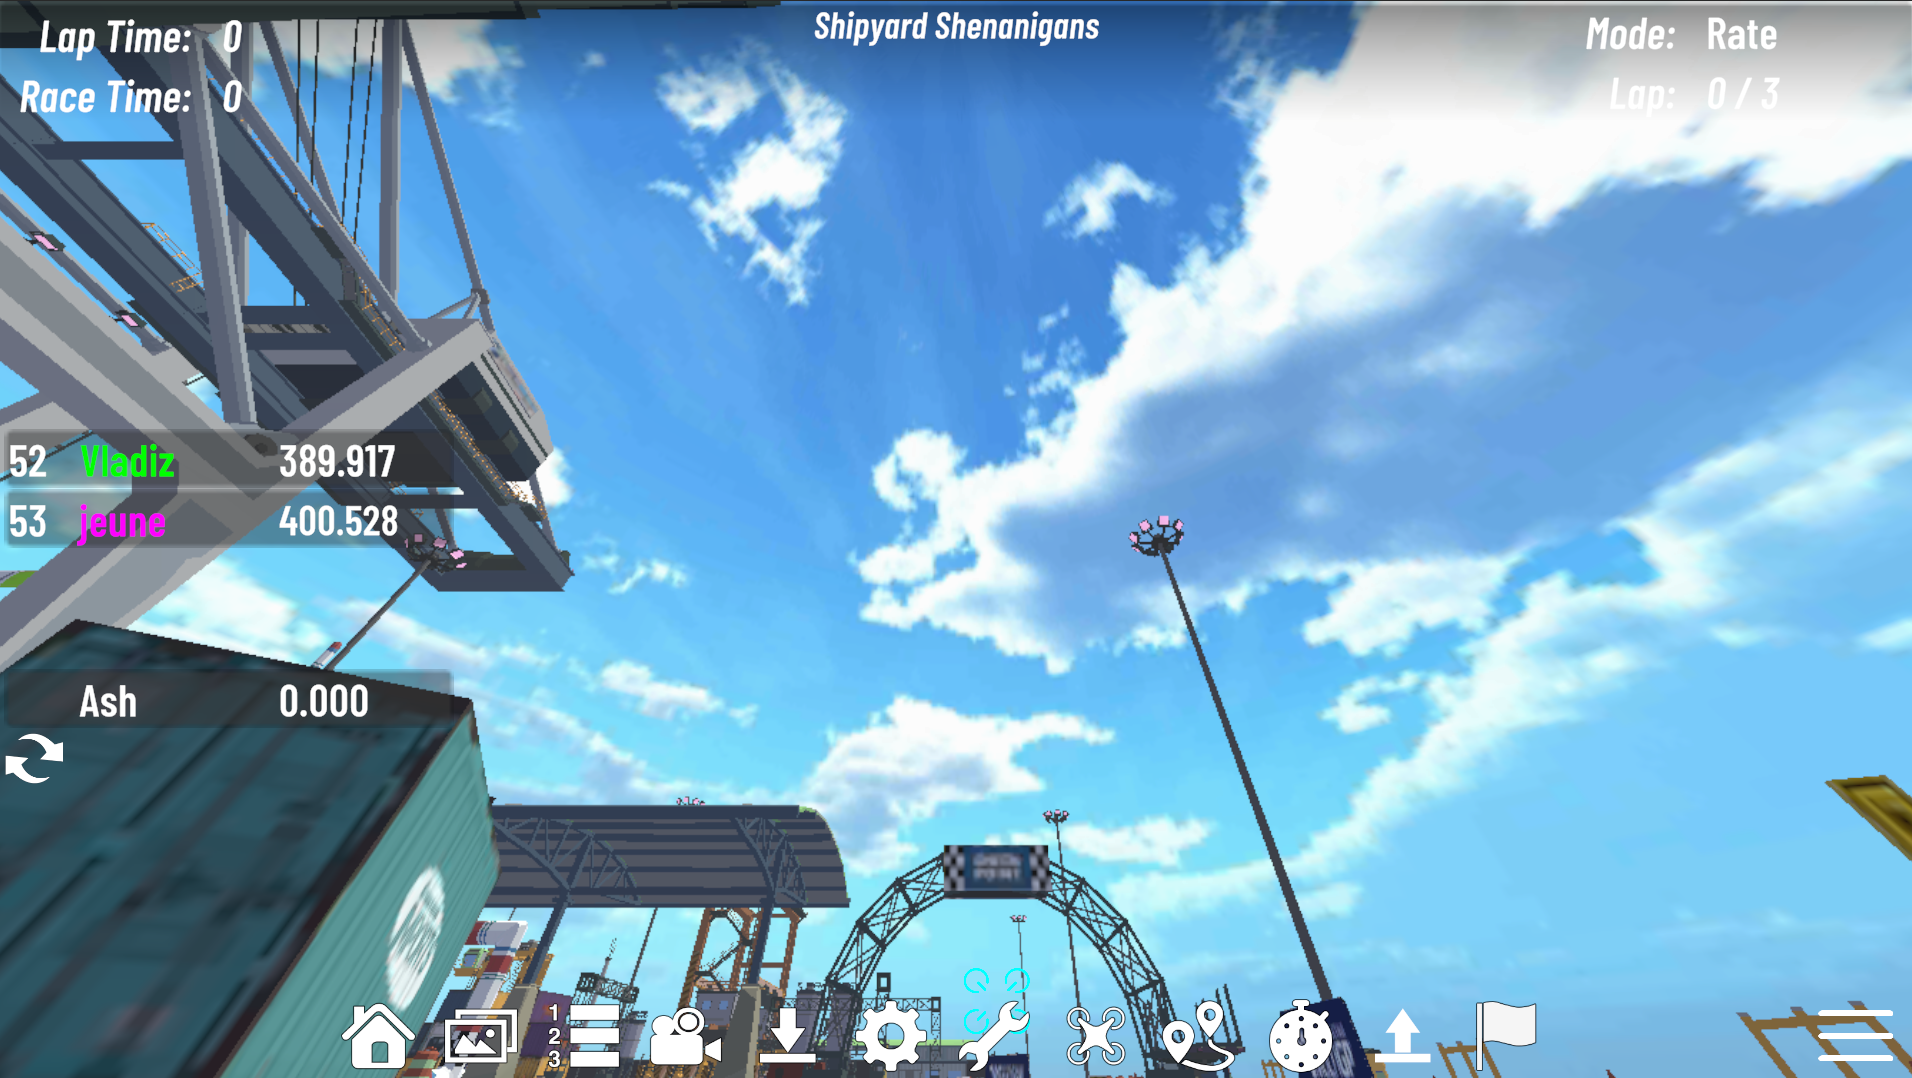
In flight mode there are a number of items displayed in the heads up display:
Top left we have the lap time, which will update for each lap completed and also the race time which is the cumulative total race time so far (or the total race time if the race has completed).
Top middle we have the track name.
Top right we have the mode, which could be Angle, Horizon or Rate - Angle and Horizon being gyro stabilised modes.
We also have the lap counter, showing current laps completed out of the total laps to be completed in this race.
On the left we have the nemesis pilots listed with their respective race times, plus your personal best that has been uploaded to the leaderboard.
Along the bottom we have the various race and game control icons with the system menu on the bottom right.
The race icons along the bottom are as follows:
|
|
This is the return to main menu icon |
|
|
This is to open the scenery selection menu where you can select a new scene or track to fly. |
|
|
This opens the leaderboard for the track for selecting nemesis players to view or race or just to see where your time is on the current leaderboard. |
|
|
This toggles the camera between line of sight mode and first person view (FPV). |
|
|
This is the reset button which will reset your quad to the start grid or the last gate you passed. |
|
|
This opens the settings panel for PID control or accessing your rates. |
|
|
This accesses quad settings - for example drag, prop selection, prop profile and battery settings. |
|
|
This will toggle gate indicators on or off, gate indicators show you which gate is the current active gate to be flown in a race. |
|
|
This will toggle on the racing line if one is available for the current track. |
|
|
This toggles the panel to show your last race and lap times as well as total race time.. |
|
|
This sets your FPV reset position outside of a race. You can hit this key after flying to any location on the map and as long as you are not in an active race this will become the reset position when you crash and reset or hit the reset button. |
|
|
This is the race start button. Hitting this will either start a race if none is active or abort a race if one is active. |
|
|
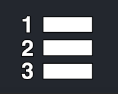
This is the system menu - clicking this gives you access to change your quad as well as other system functions. |
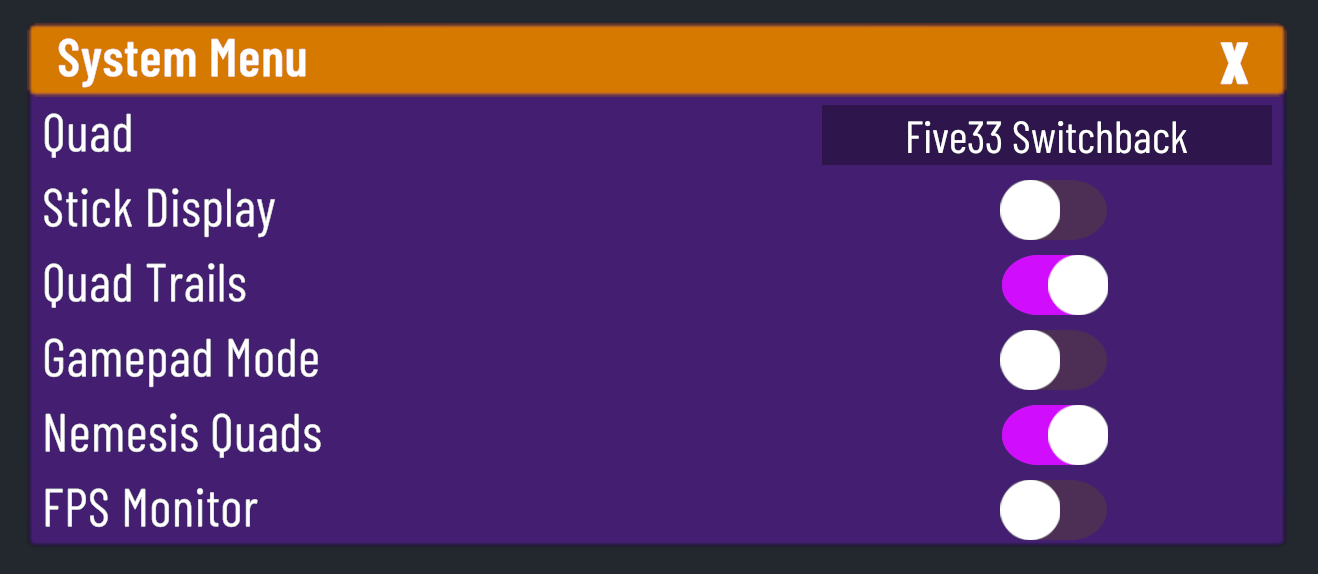
This menu appears from pressing the three bars button at the bottom right when in flight mode.
It allows you to change the quad you are flying in game.
You can also turn on stick display which will display your stick movements on the screen.
Quad trails will toggle quad trails on or off.
Gamepad mode will make the throttle only work from mid stick upwards (to help with the fact that gamepads have a throttle control that returns to center.
Nemesis quads will toggle on/off the loading of nemesis quads when racing, if you have a low specification phone/tablet this may help with FPS.
FPS monitor toggles the frame rate monitor so you can see what frame rates you are achieving.
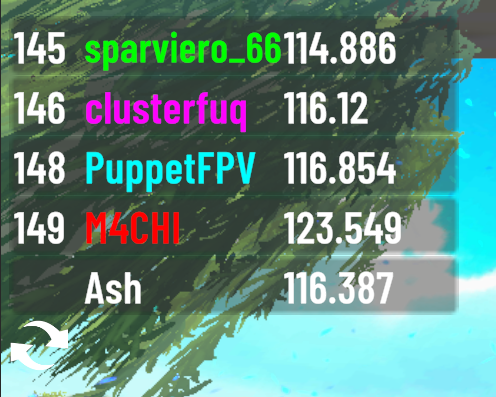
This dialog shows you the racers you are racing against in nemesis mode for the current track.
Pilots are selected based on your position on the current track leaderboard. Nemesis will attempt to get four pilots - two that are faster than you and two that are slower from directly above and below your current time on the leaderboard.
In the list the green and magenta pilot are faster than your current leaderboard time, the cyan and red pilot are slower than your current leaderboard time.
At the bottom is your own leaderboard time as well as the refresh button (the two circular arrows).
Pressing the refresh button will cause velocidrone to try to refresh the pilots you are flying against - usually it does this automatically when you beat the fastest two pilots but you can trigger this refresh manually. An example of when you might do this is if you have selected to race a single pilot on the leaderboard and now wish to return to using nemesis to automatically select your competitors.
If the pilots beat you in the race then you will see a chequered flag appear next to their name …
If you beat the pilot then you will see a red skull appear next to the pilot instead of a chequered flag. The ideal situation you are aiming for is to see four red skulls (one against each pilot) and when you start the next race nemesis will go and select new (faster) pilots for you to race.
Bear in mind that whether you get new pilots to race or not is reliant on you uploading your time to the leaderboard, if you do not do this then nemesis will not select new (faster) pilots for you.
We recommend turning on auto time upload in the main options so that you do not need to submit your times after completing a race.
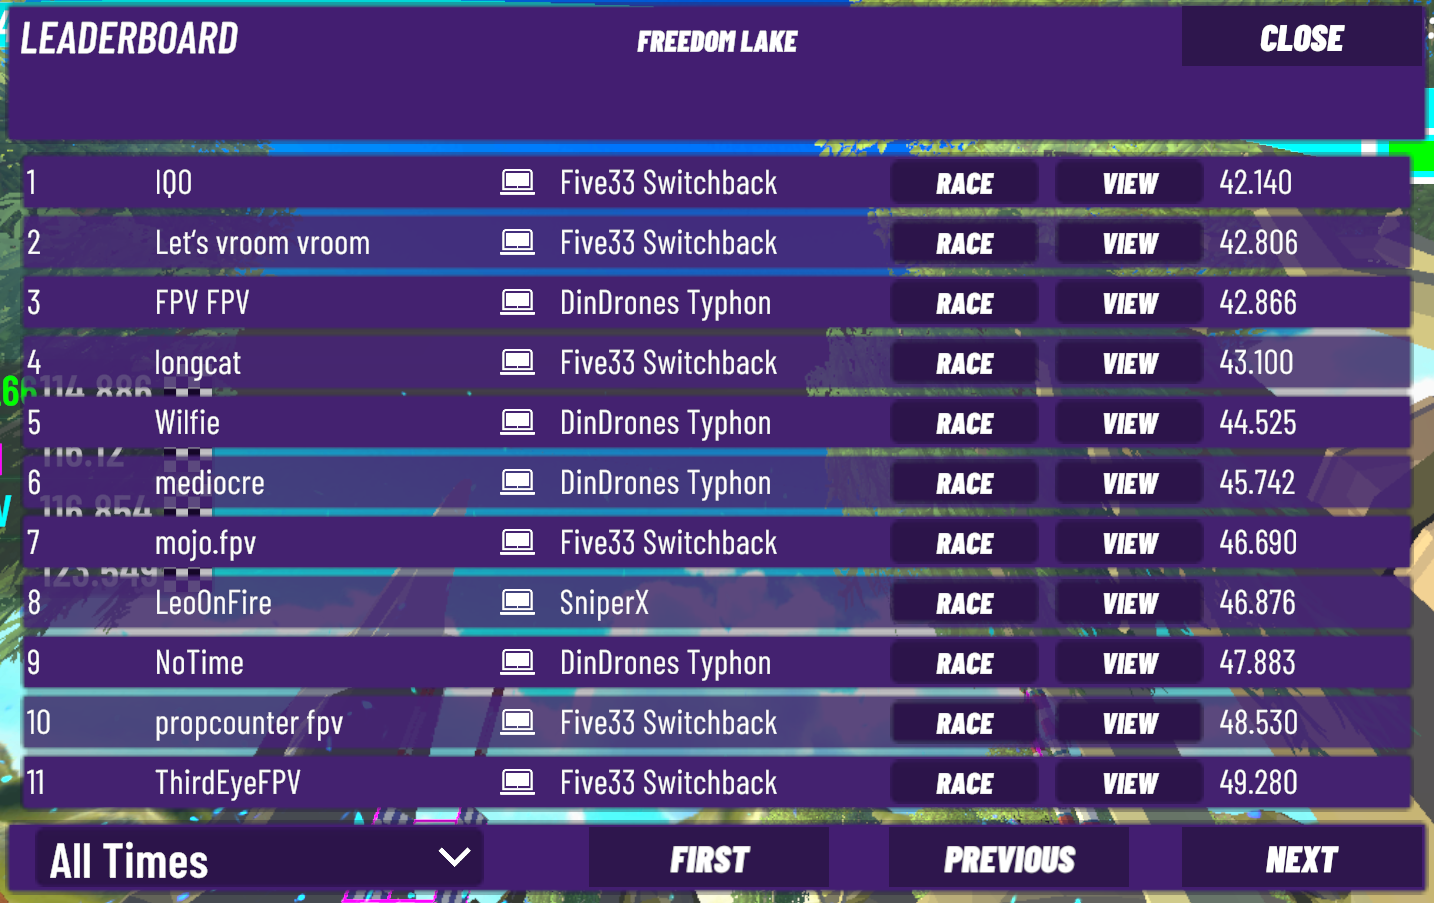
This dialog shows you the leaderboard for the current track and all the pilots and their times on that leaderboard (including your own time).
You can page up and down through the times using the provided buttons.
Each time on the track has an icon showing what velocidrone client was used to create that time, desktop times have a desktop computer icon and mobile times have a mobile phone icon.
You have two buttons against each pilot, the view button will let you view that pilots race from an FPV perspective. The race button will load that pilot as your nemesis and let you race them on the track.
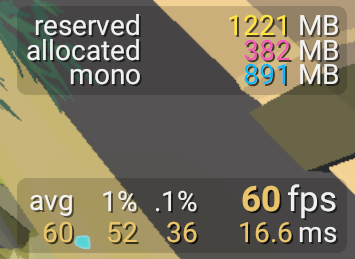
The FPS monitor can be accessed from the system menu - it shows the memory used as well as to frame rate statistics for your current loaded map / track.
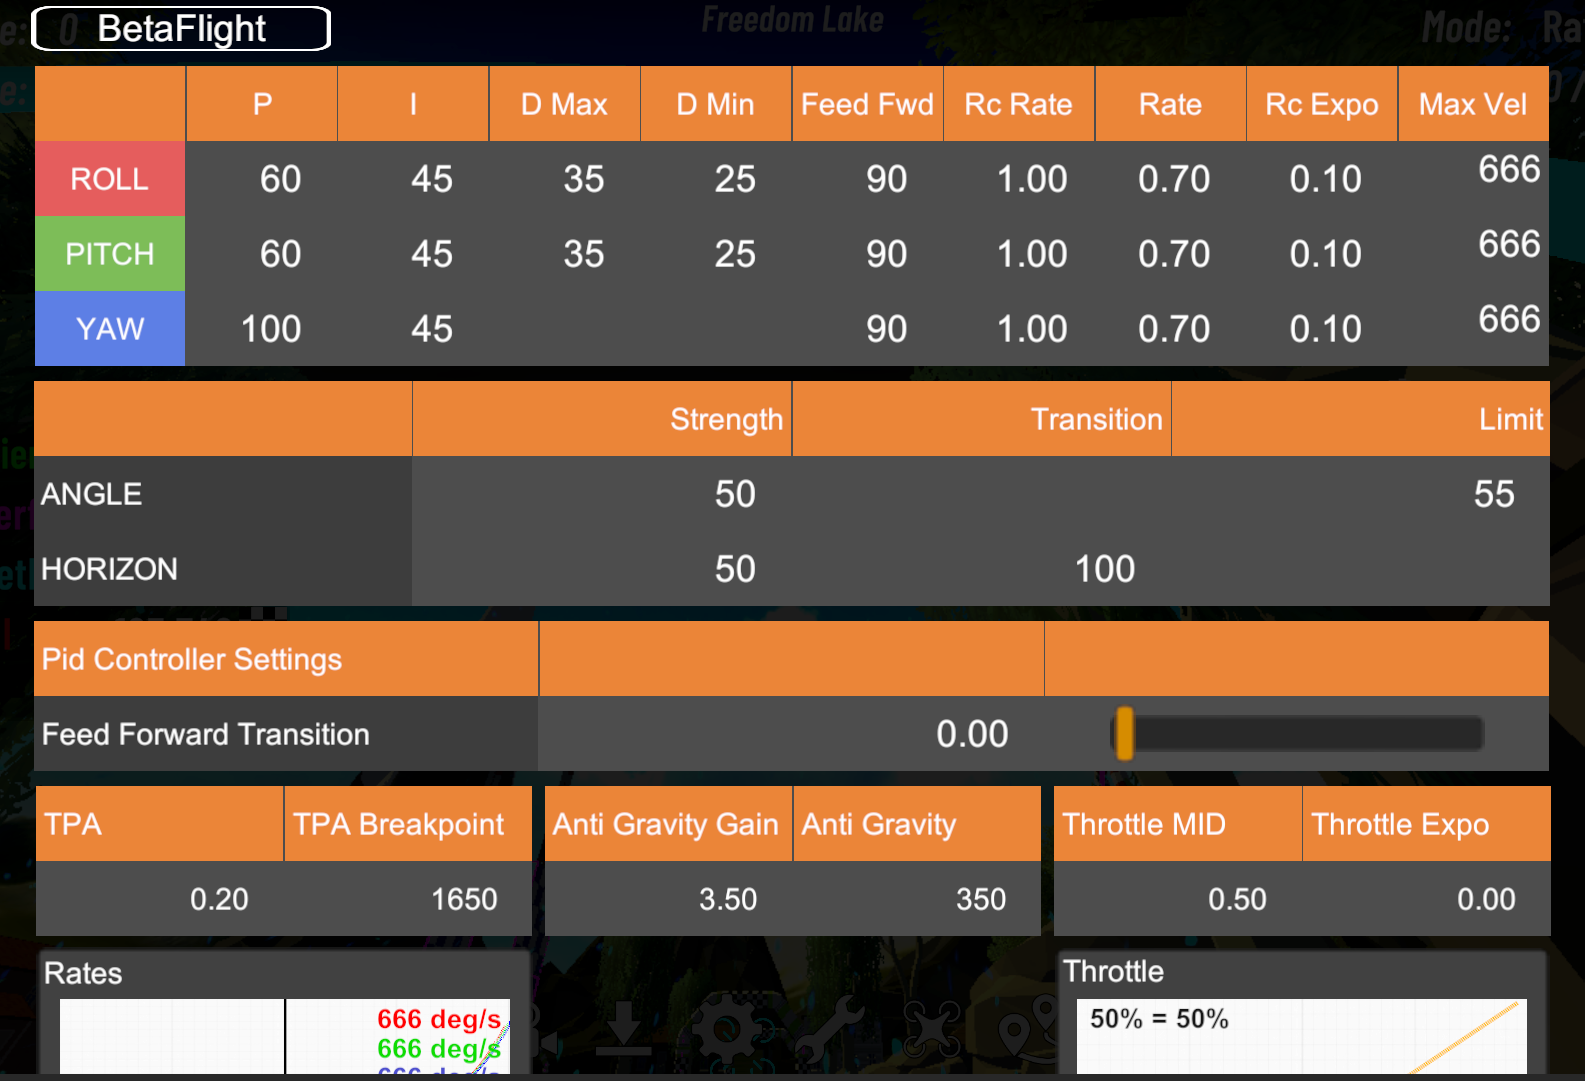
When you hit the rate button you will be shown the rates dialog, we recommend running betaflight rates in the main menu settings. This manual is not the place to fully describe how betaflight PIDs and rates work and we would recommend looking at the betaflight documentation for details on how to PIDs and rates.
In general all the quads in velocidrone already have a good set of PIDs but pilots should look to set rates that suit their flying style.
The button at the top of the screen does allow changing between different rate types - like actual rates or betaflight rates or kiss rates etc.
Remember to save when leaving this dialog as otherwise whatever you set will only be active until you leave the current selected map.
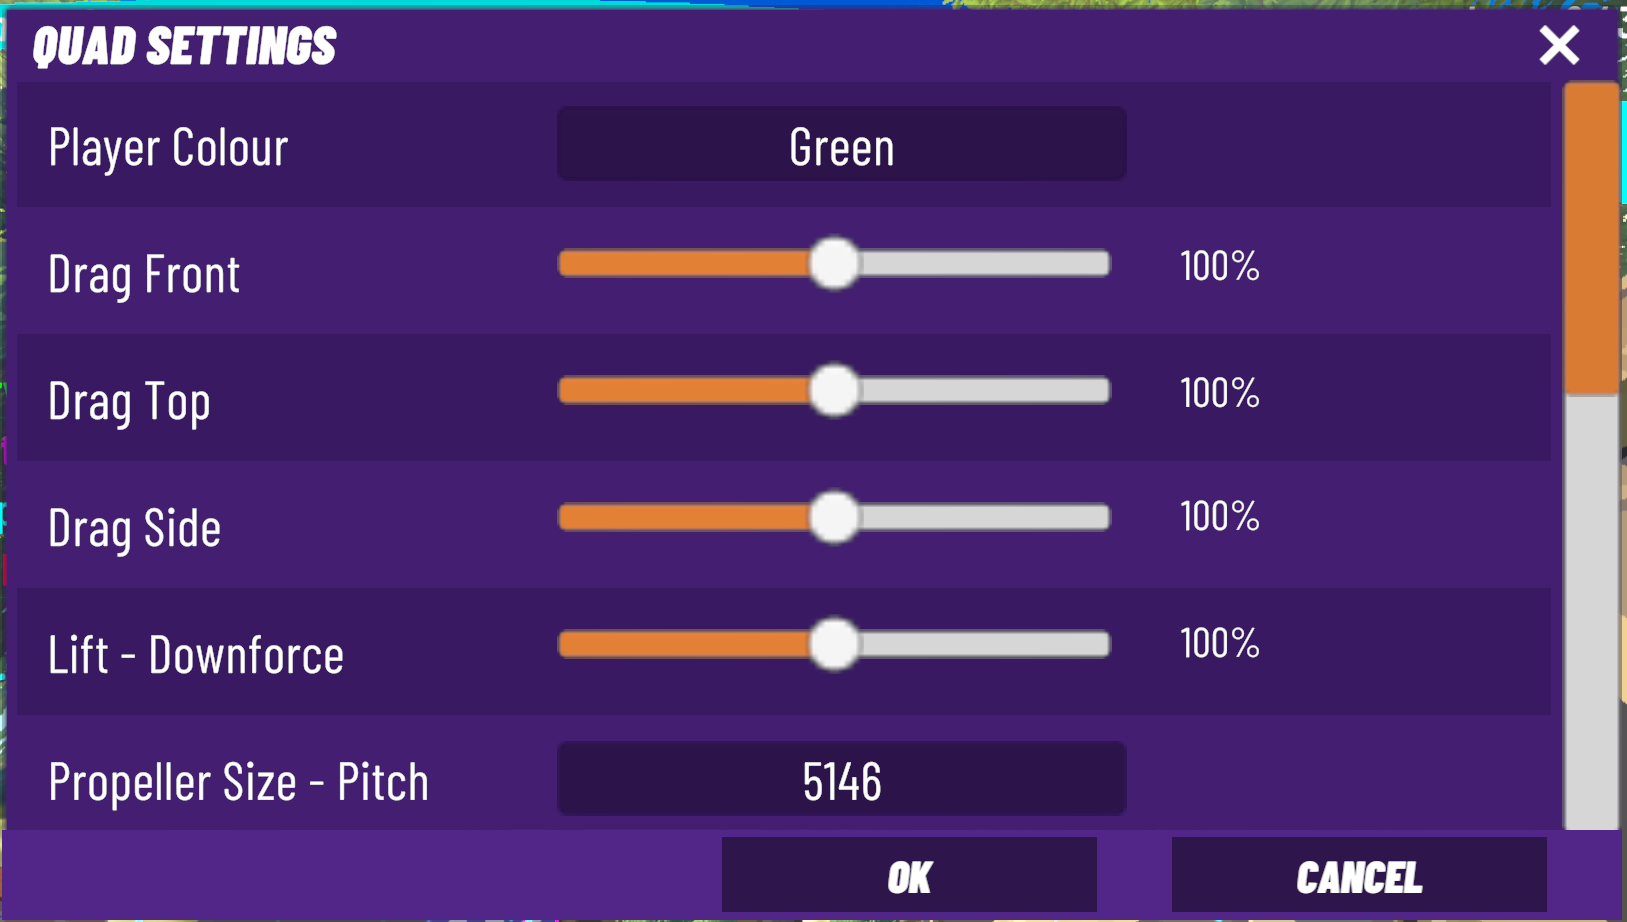
This is the in game dialog that allows you to modify your currently selected quad. The options presented are as follows:
|
Player colour |
Change your quad’s prop colours and also its light trail. |
|
Drag front |
Increase or decrease the aerodynamic drag of the quad from the front - this change will not apply when racing in nemesis. |
|
Drag top |
Increase or decrease the aerodynamic drag of the quad from the top - this change will not apply when racing in nemesis. |
|
Drag side |
Increase or decrease the aerodynamic drag of the quad from the side - this change will not apply when racing in nemesis. |
|
Lift - Downforce |
How much lift or downforce the quad will generate in fast forward flight - this change will apply when racing in nemesis. |
|
Propeller size |
For example 5146 = 5.1 inch prop with a pitch of 46 degrees |
|
Propeller power |
Allows reduction of prop power by a percentage, applied linearly. |
|
Propeller profile |
Profile 1 = fastest speed, profile 2 = most realistic, profile 3 = softer prop profile for beginners |
|
Prop wash |
How aggressively prop power will be reduced when you fly through your own prop wash |
|
Quad weight |
Applied as a percentage of the quads default weight. We do not provide weight in grams as this value should be adjusted by feel not by just setting it to an explicit value. |
|
Camera angle |
The angle of the camera tilt on the quad. This setting is individual to each quad you are using. |
|
Camera FOV |
Adjusts the field of view of the camera - this setting is global and affects all quads. |
|
Camera mix angle |
This mixes the quads control inputs with camera angle. For example if your camera angle is 45 degrees and your camera mix angle is 45 degrees then when you roll the quad it will roll around the cameras roll axis not the quads roll axis. Most pilots will want to turn this to zero - be aware this is automatically set on micro quads, so you may need to remove it if you do not usually fly micros with camera mix angle. |
|
Air mode |
Toggles air mode - this should be on except for some micro pilots who may prefer it off. Without air mode your control authority at low throttle will be poor. |
|
Battery emulation |
Turn this on for battery simulation and a battery that runs down as you fly. This is toggled on automatically in nemesis races.. |